
Are you looking to build a Gatsby website with markdown? This post will take you through the Gatsby development process, from creating the project to deploying it in production on AWS. We will talk about the benefits of using Gatsby and show how to set up markdown, configure Gatsby, and build an article for your demo website.
Understanding Gatsby
Gatsby is a React-based framework that is used to build websites and applications. You can use it for blogs, documentation, portfolios, business, media, and e-commerce websites.
What are Gatsby's benefits?
- Markdown is a text-to-html conversion tool that allows you to write in an easy-to-read and easy-to-write plain text format. With the usage of markdown within Gatsby, you’ll be able to develop web page content.
- Gatsby’s performance is significantly better than many standard web application frameworks. Gatsby decouples the back end from the front end and allows new and improved front-end technologies to load extremely fast. This is optimal for both usability and SEO.
- Improved performance, scalability, and security are pre-built within the framework.
- Gatsby uses React, which is a great choice for most front-end developers.
- Gatsby is widely supported. It has plugins through which you are able to connect to external systems such as HubSpot, WordPress, and many others, which are being updated constantly.
Are there any drawbacks?
- Even the simplest Gatsby site requires some development to set up, as opposed to some website builders that are entirely plug and play.
- If you want to add a feature from another site, you'll need to custom code it.
However, the many advantages overshadow the drawbacks.
Getting Started
Let’s get started with the Gatsby blog development and design process!
Note: You can also visit Gatsby's official documentation for more information.
Gatsby Blog Development
When developing with Gatsby, we need to install Gatsby CLI. Open up your terminal and paste in the following:
To create the project files, use the command below:
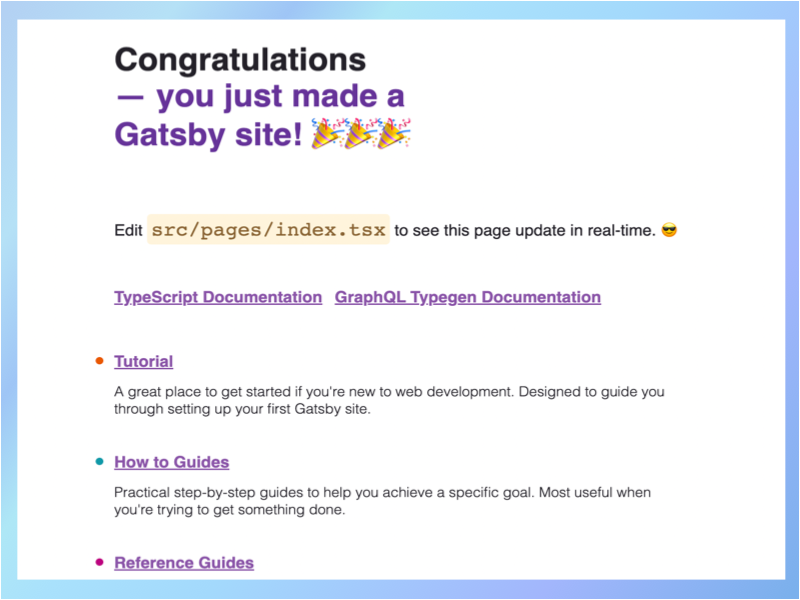
After this command has been entered, you will see instructions on how you can set up the Gatsby website. Follow along with the instructions. After completion, you’ll have your project folder.
Gatsby Project Structure
Let’s see the files that are within the project itself. You can either navigate to your project folder or use your terminal to open the folder location.
These are the files you should have:
We will be focusing on the following: gatsby-config.js and the src directory.
gatsby-config.js is where all the customization, meta data, and tools will be added. src contains the resources which will be used and displayed on your website. These can range from images to videos and many other sources.
To view the blog which has been created, you can do gatsby develop.
If it has been done successfully, you’ll see the following message, which shows you the localhost URL of your development view.
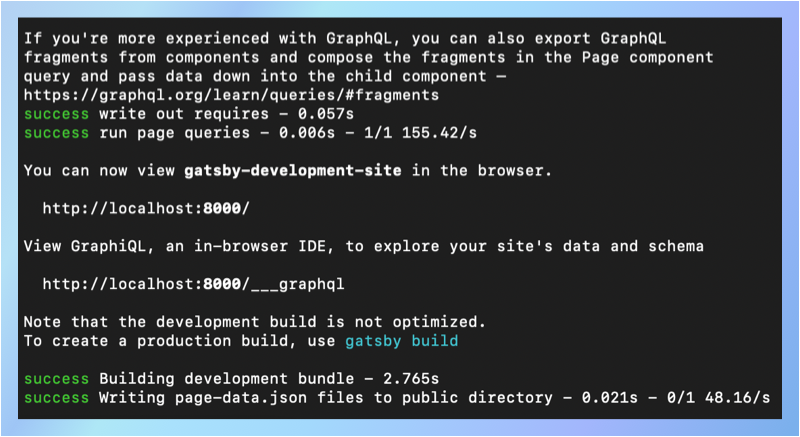
By default, http://localhost:8000/ is the main URL, but this can change depending on whether you have other development views open at the same time.
The development view will auto-update with any changes that have been made, allowing you to see your changes in real-time. You won't need to refresh often to see your update.
Creating Gatsby Markdown
Create a folder within the src folder called pages. This folder will host our markdown article pages. To add your first markdown page, navigate to the pages folder and create a file within the folder called index.md.
The index.md file should have a path, date, and title in the header (or “frontmatter”). These determine how and where articles are loaded on the website. However, depending on the structure of your website, you can develop your own frontmatter. Your frontmatter depends entirely on what you would like to display on the website. You could add a field called "Author", for example.
We will now add two useful React tools remark and helmet to our project. remark will parse the markdown files and helmet will manage our document components such as title, description, path etc.
Once we’ve installed these, we can add both of them to our gatsby-config.js. The reason we are adding both of these is to tell the code the location of the pages.
Creating Separate Article Pages
Now that we have a markdown file, we need to load it on our website. In order to do this, we create a file within the project folder called gatsby-node.js.
This file will contain code that builds links from our blog posts into standalone article pages.
We’re going to use the .createPages function to build each of the blog pages within our Gatsby website. Our markdown file will be parsed and, if there are no errors, a page will be created at the URL specified in our frontmatter.
The function then passes the results to blog.js, which formats the information to display it.
Next we will create blog.js and posts.js in the src/templates directory.
These two files handle the display of the blog posts, and the listing page.
In blog.js, we import graphql, helmet, and react. These tools allow us to parse information, create headings and render our post.
The function below renders the information parsed from the markdown file. The function will be used to post the title and blog content. However, to display the information, we will need to create posts.js.
Design & Display Your Article Page
Within the post.js page, we parse the information as usual, but we have an additional variable id. This variable is used to build up a list of blog posts to display.
We import another tool named Link which converts the blog title to a link. The reason why we would need to have this field is so that when the user clicks on the title, it will direct them to the node-config.js which handles the blog page.
Bridging The Connection Between Files
We now have a complete backend for our Gatsby development blog. We can create posts using markdown, parse the markdown and render it as a page. Next we will list our blog posts on the main blog page.
First we need to import Link into our index.js to convert our titles to links.
Within our index.js, we will create an export function . This function lists our blog posts on the main page. After we have our export function, we will need to query our information again.
After all the information has been added to the main blog page, we will need to add ({data}) within our const design parameters as we need to pass the information to the front end.
After we have added the parameters, we will now add our export function. We will do this by creating a new heading. Once we have a heading, we can add our index function after the heading.
With all the code added and completed it should look like this:
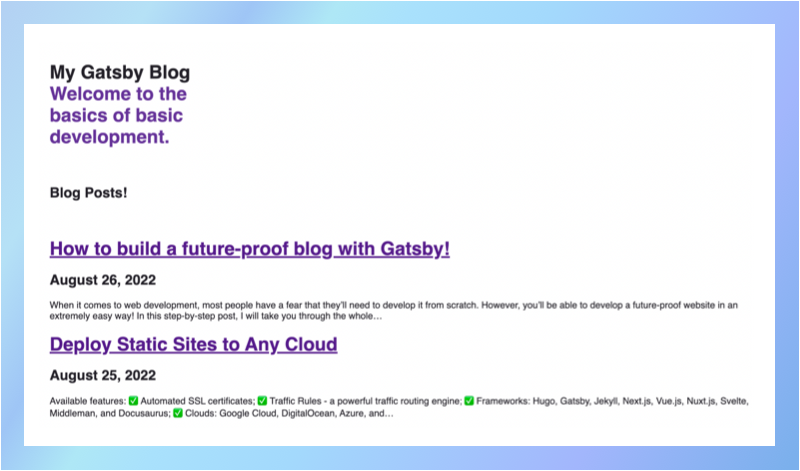
Restart your development server, and your Gatsby blog website should look something like this! With this, your markdown blog is completed.
Design, Deploy and Maintain Your Blog
UI with TailwindCSS
Design might be the hardest part of the process, as there are an infinite number of options for how your website can look and feel. To keep things simple I would recommend using TailwindCSS - it allows you to build nicely styled pages without messing with CSS directly. You’ll be able to find all the UI elements that you could include within your website.
Tailwind has a huge library of resources to help get you started. You’ll be able to find resources such as blogs, videos, documentation, and much more.
Note: Check out the official documentation on Tailwind. It contains everything you need to get going.
Deploy your Gatsby Blog with Cloud 66
Gatsby pairs extremely well with Cloud 66 as you will be able to configure and deploy your website every time a change has been applied to it without needing to manually copy the files or configure the environment.
Sign up for a Cloud 66 account
Navigate to the Cloud66 sign up page here: https://app.cloud66.com/users/sign_up
There are three options for creating a Cloud 66 account. You can use your GitHub, Google account, or sign up with your email and password.
Once you've entered your details, click on "Sign Up."
Connect Cloud 66 to your Git Repo
Next, if you created your account with email or Google, get started by connecting your git repository with your Cloud 66 account. You can skip this step if you've already connected with Github.
Next, choose a Gatsby repository from the drop-down and click the "Analyze" button. Cloud 66 has "read-only" access to your application, and it will return to you what we found about your application.
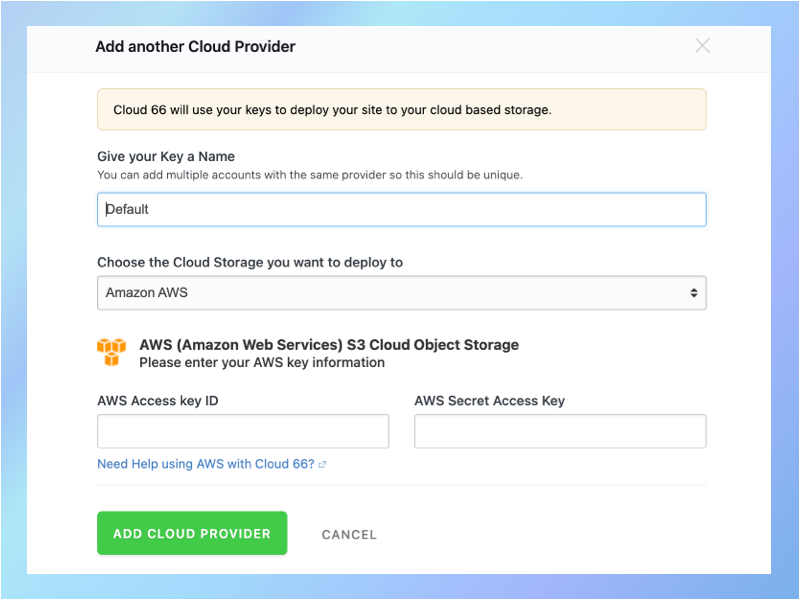
Connect your cloud provider with Cloud 66
Cloud 66 will ask you to enter your cloud provider API Key to give us the required access to deploy your blog for you.
Note: To host a static website, like Gatsby blog, you will need a cloud object storage service such as DigitalOcean Spaces, AWS S3, Google Cloud Storage, Linode Object Storage, or Azure Blob Storage.
Deploy!
Now hit the Deploy button and sit back and relax.
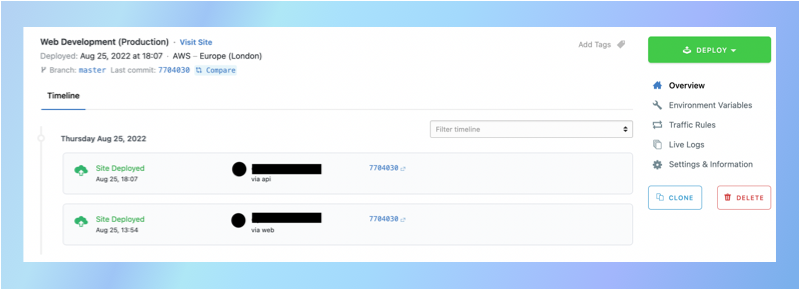
Congratulations, You’ve successfully deployed your Gatsby website!
Maintenance
Cloud 66 has a range of features to help you enhance and maintain your new Gatsby blog. For example:
- preview deployments
- traffic rules to control the traffic visiting your blog
- failover groups
- Team access control
- LiveLogs and audit logs
- Automated SSL certificates
- Toolbelt (command-line interface).
All features are included and accessible to all members of your team at no extra cost.
Cloud 66 Toolbelt Deployment
The Cloud 66 Toolbelt is a command-line tool that uses an open-source API library. It allows users to manage and control their Cloud 66 applications. While it does allow users to access the open API, it expands the configuration options significantly. It’s available for MacOS, Windows, and Linux.