
Cloud 66 supports all kinds of languages and frameworks.
This blog post will explore the world of Vert.X and how you can use this awesome framework to design, build and deploy your microservices with Cloud 66.
Let get our hands dirty!
▶ Example code used in this blog post can be found on Github.
What is Vert.x
Eclipse Vert.x is event-driven and non-blocking. This means your app can handle a lot of concurrencies using a small number of kernel threads. Vert.x lets your app scale with minimal hardware.
Vert.x isn't opinionated and got a big list of components you can use in your Verticle , your service. All those cool components will speed up your development and make new microservices a breeze.
And on top of this, Vert.x support polyglot development. You can use Vert.x with multiple languages including Java , JavaScript , Groovy , Ruby , Ceylon , Scala and Kotlin.
Create your first microservice
A simple service called a Verticle in the Vert.x world, written in Java looks like this:
hello-verticle.java
The same service using Ruby :
hello-verticle.rb
Time to run this guy.
Run it with Docker
Because we are going to focus on container-based Vert.x development using Docker, this is a Dockerfile to run the Ruby example. You can use the same Dockerfile for all the supporting programming languages. Easy.
Build the verticle:
▶ docker build -t sample/vertx-ruby .
Run it:
▶ docker run -t -i -p 8080:8080 sample/vertx-ruby
The port is mapped to port 8080, point your browser to http://localhost:8080 and you run your first Verticle.
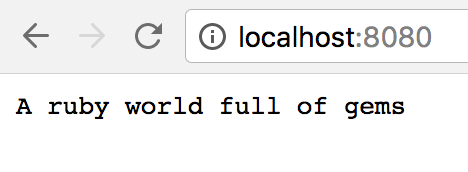
Like magic!
Use the following for quick testing, no need for building a custom Docker image:
▶ docker run -i -t -p 8080:8080 -v $PWD:/usr/verticles vertx/vertx3 vertx run main-verticle.rb -cp /usr/verticles/
If you don't want to use Docker at this stage and installed the vertx CLI tool. You also can run:
▶ vertx run hello-verticle.rb
We are using the vertx/vertx3-exec base image ( 332MB ), but you can also use the vertx/vertx3-alpine base image ( 160MB ) for the same results:
▶ docker run -i -t -p 8080:8080 -v $PWD:/usr/verticles vertx/vertx3-alpine vertx run main-verticle.rb -cp /usr/verticles/
The differences are alpine linux is using musl libc and you need to check if the packages your are using are compatible with musl libc. Most packages are compatible.
Go small with alpine linux.
Deploy to Production using Cloud 66
With the Vert.X base image it easy to run your Verticle in production using Cloud 66.
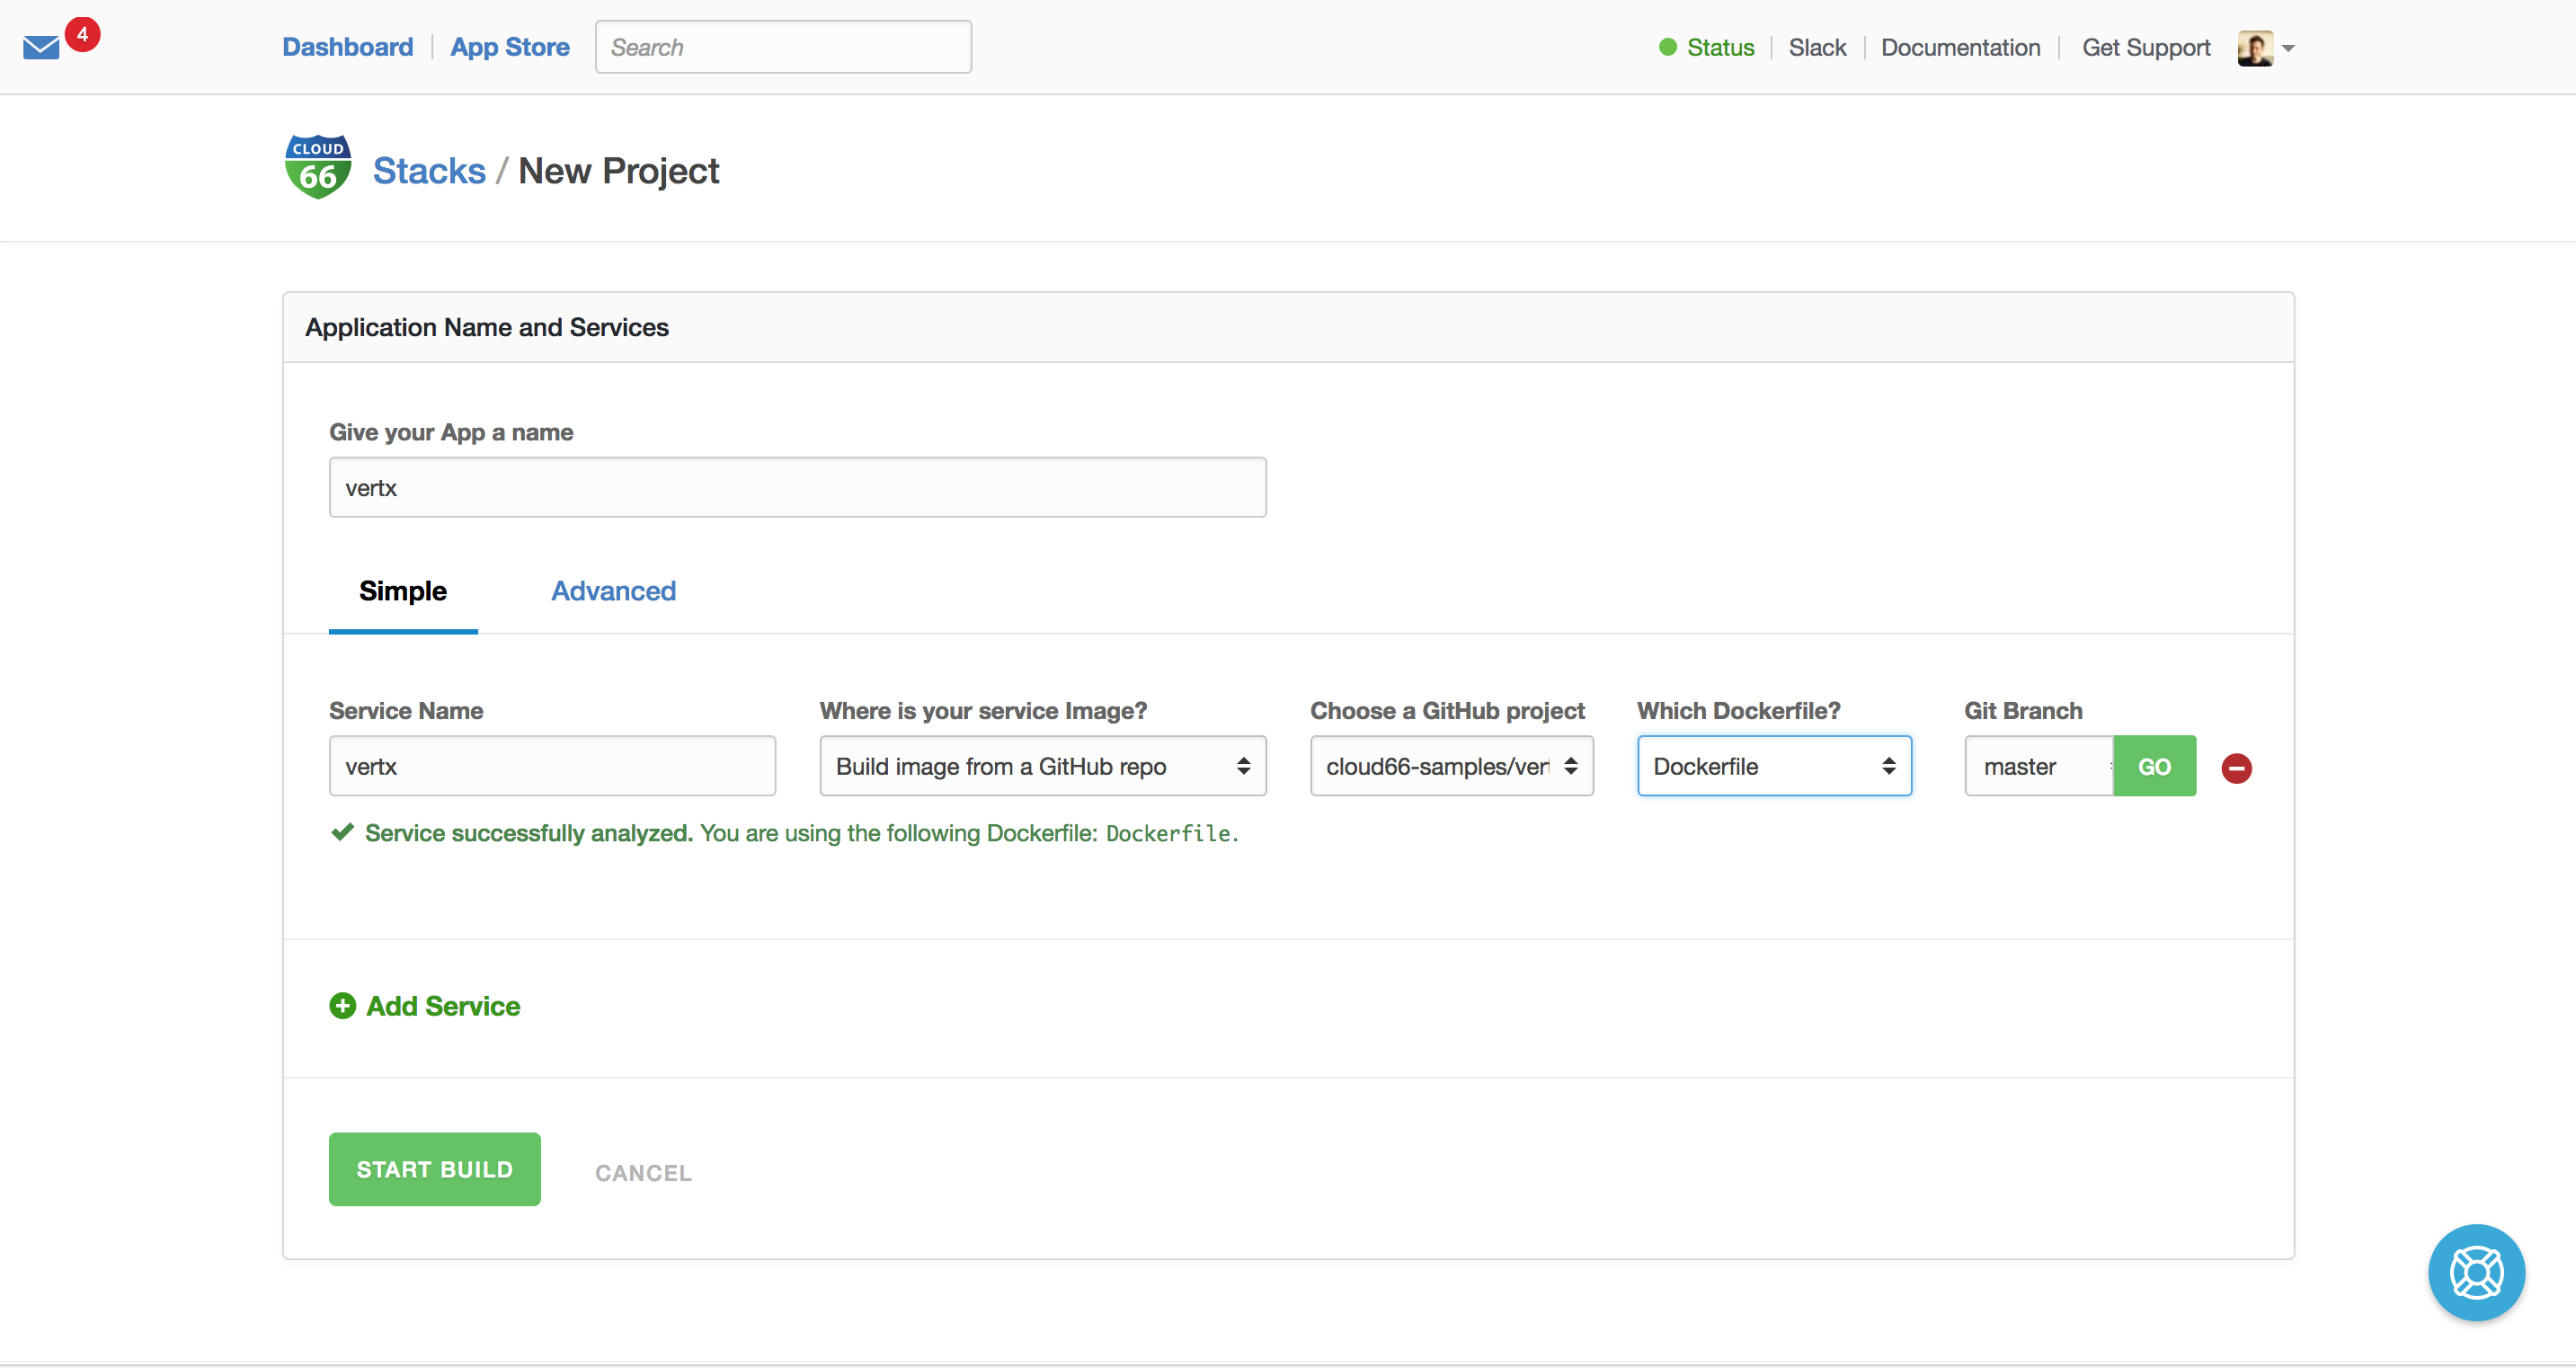
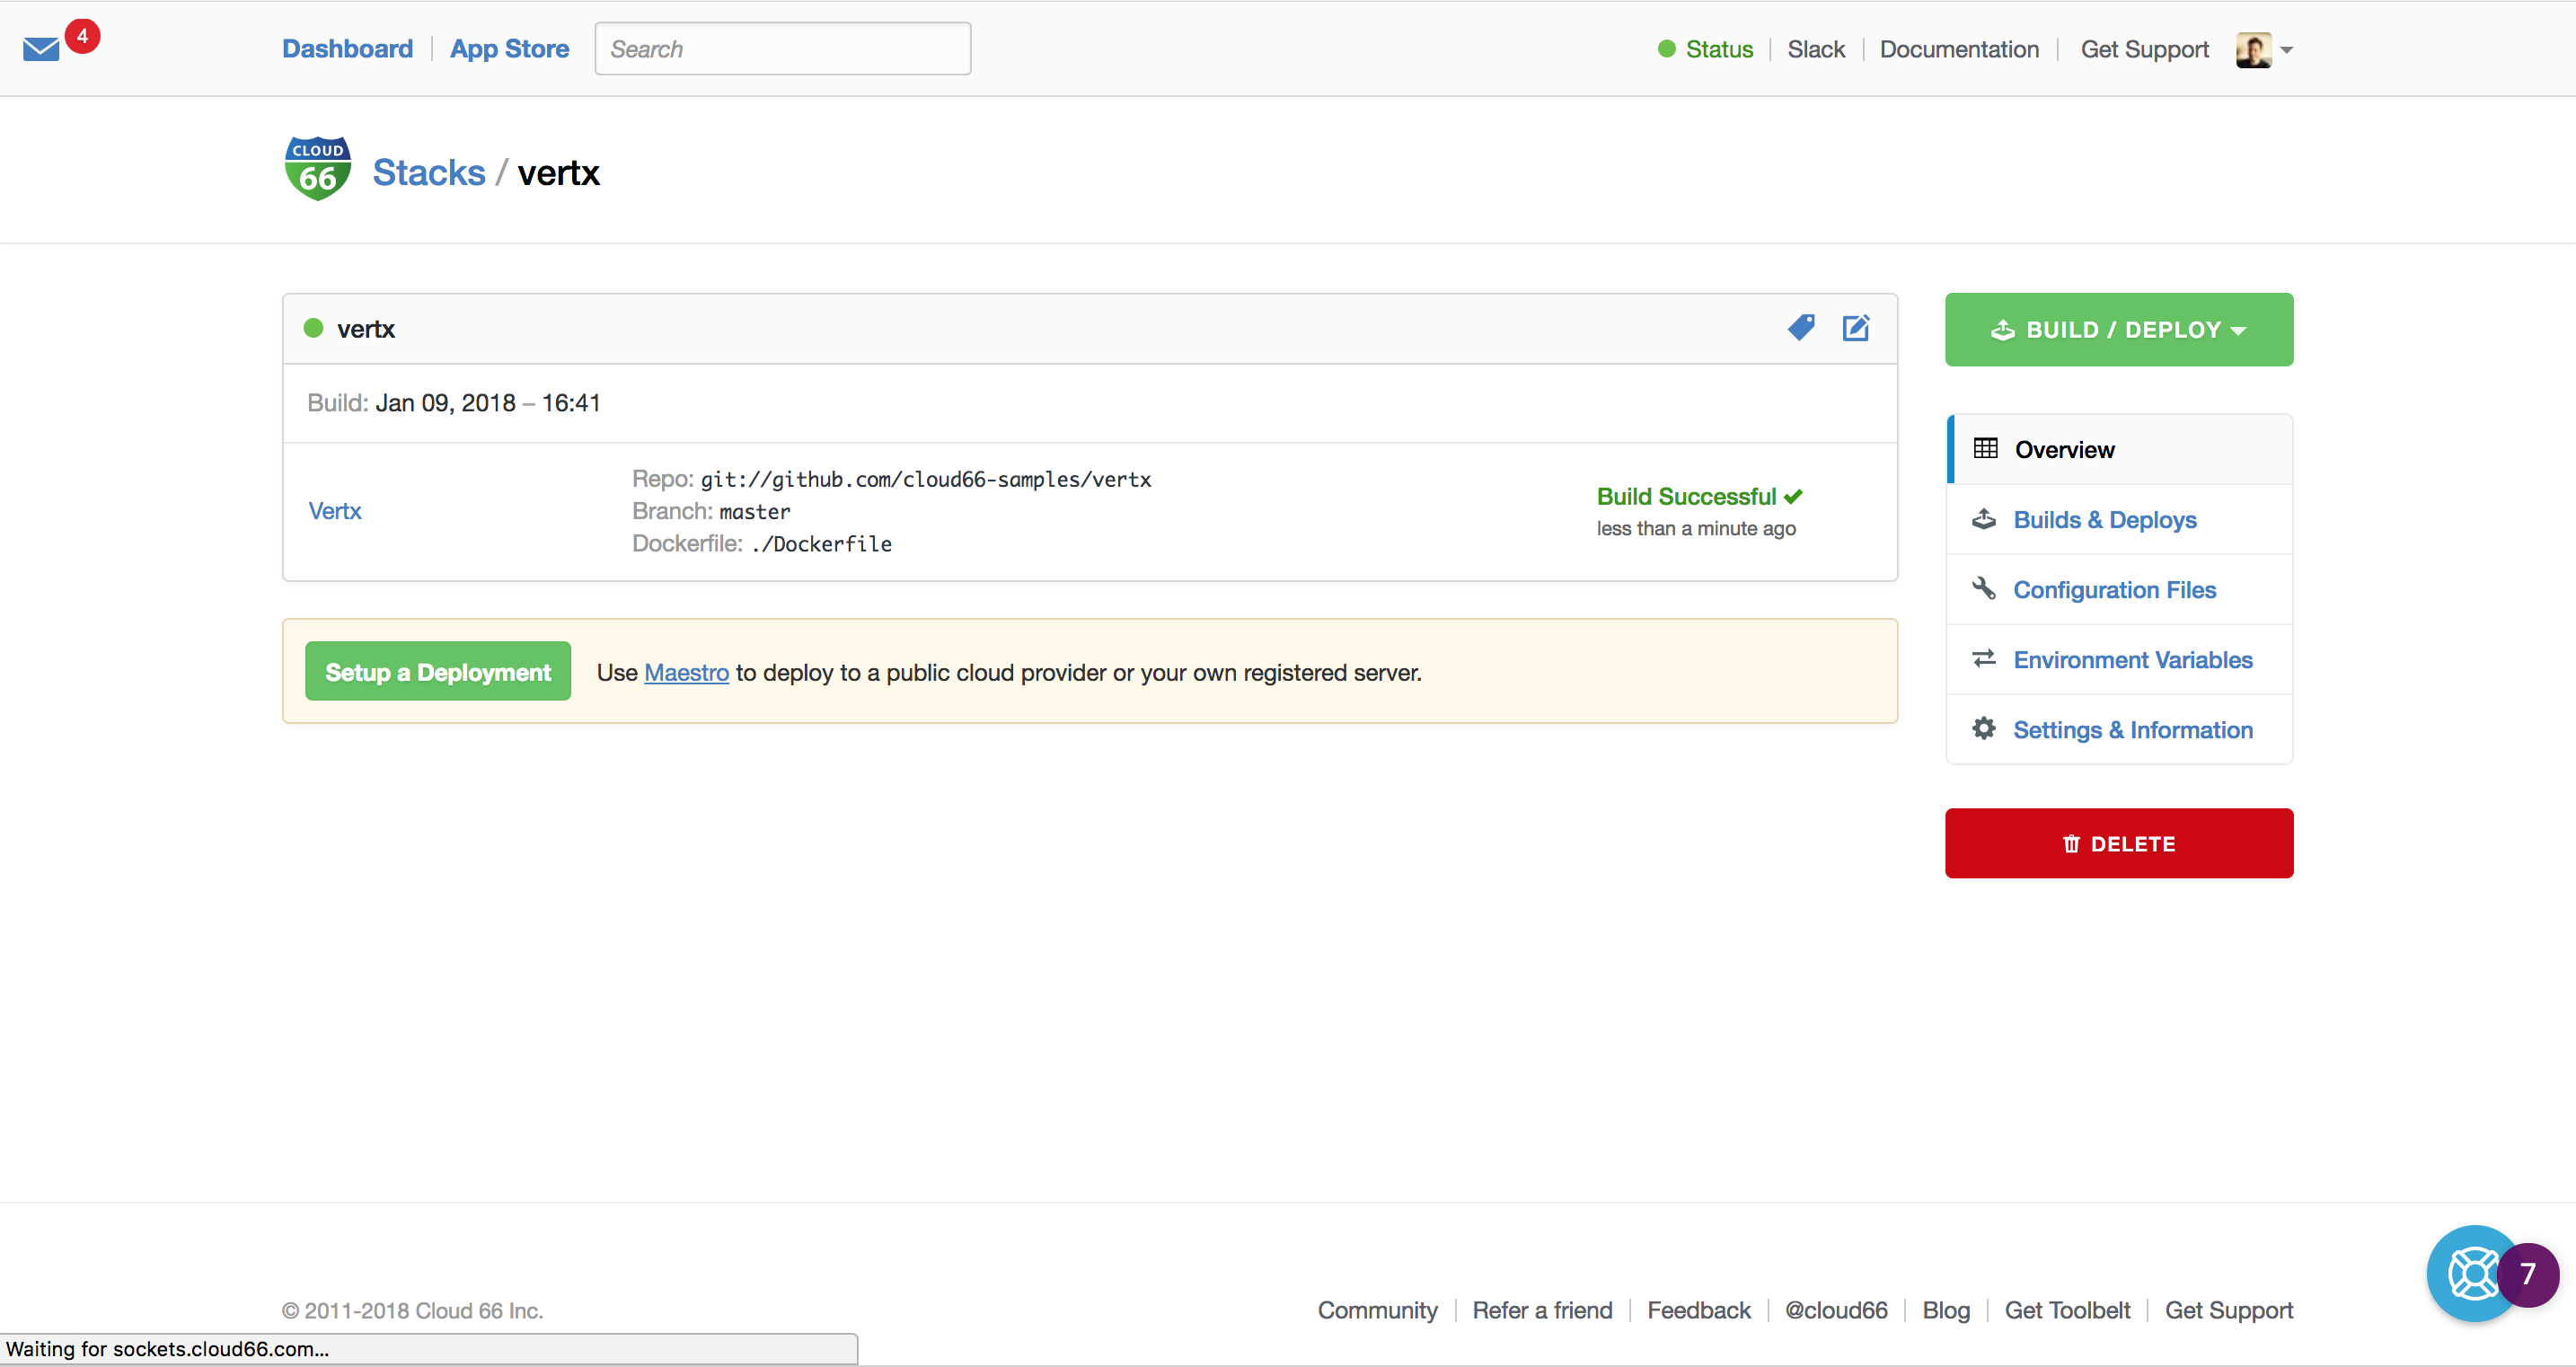
The only thing you need is a Dockerfile in your Git repo and Cloud 66 will build your image and deploy it on any public cloud or on your own servers. The first step is to bring in your source-code and let SkyCap build your Verticle images.
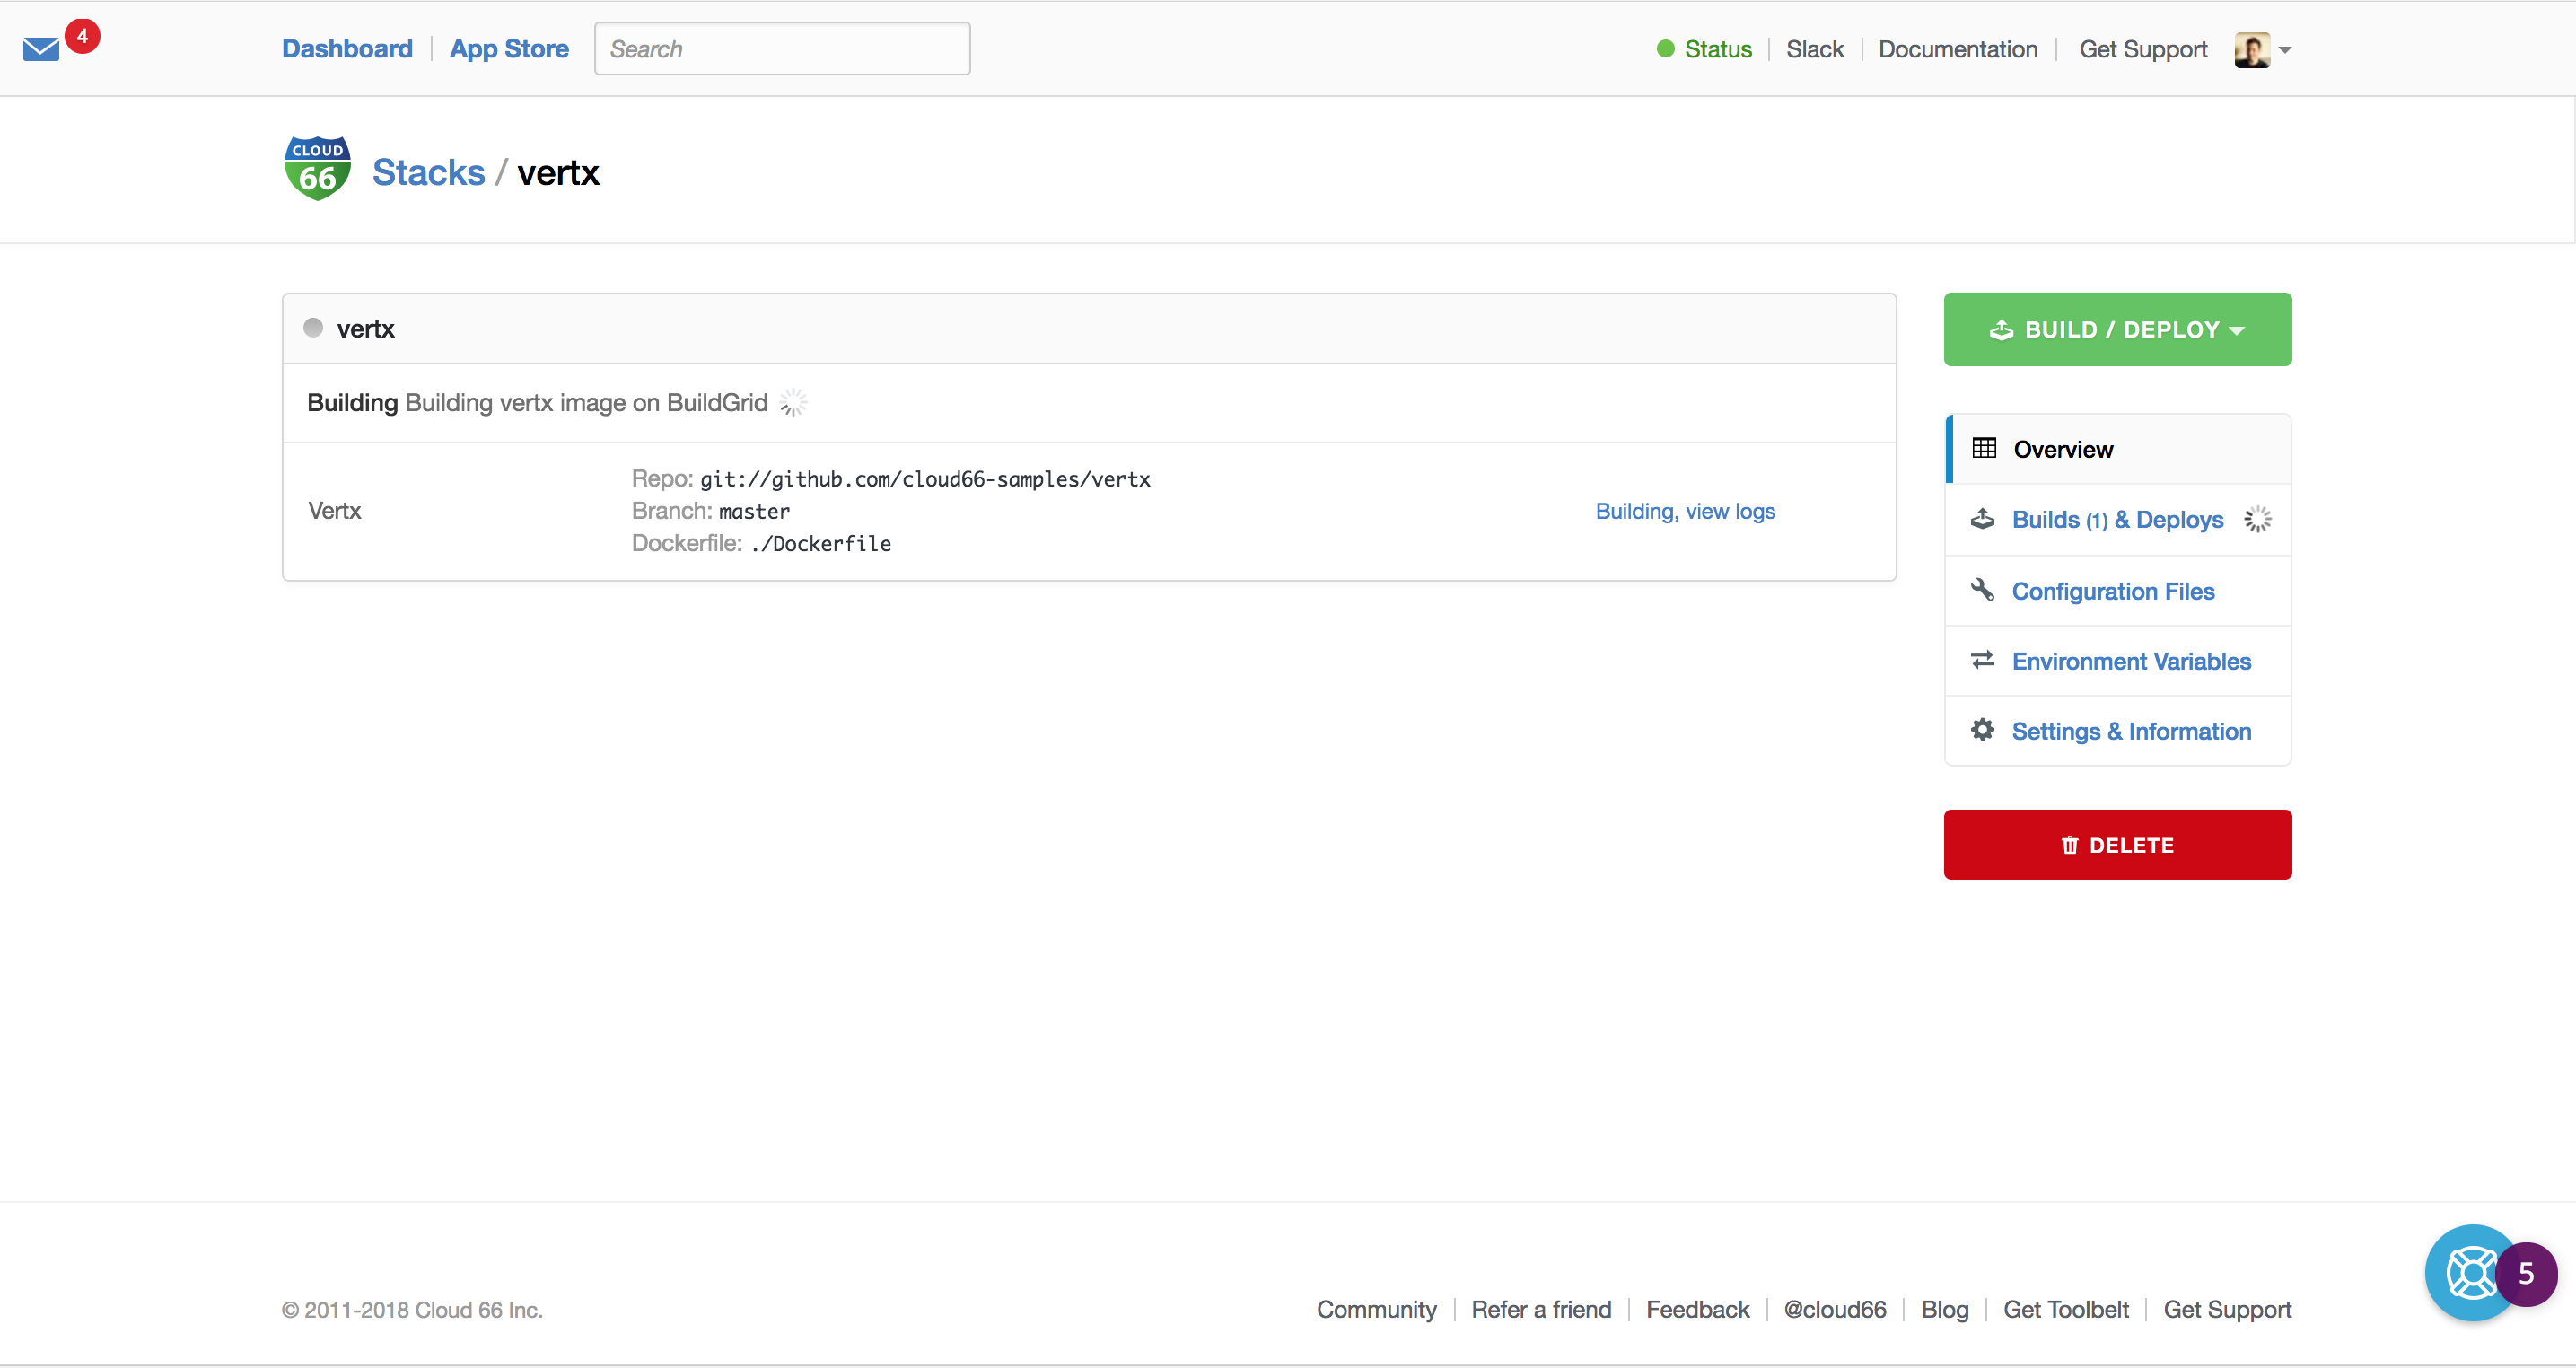
Now the building is done, we can deploy it to production. Of course, we can build as manage microservices as we want and let Cloud 66 handle the builds and the deployments to any cloud (backed by Kubernetes).
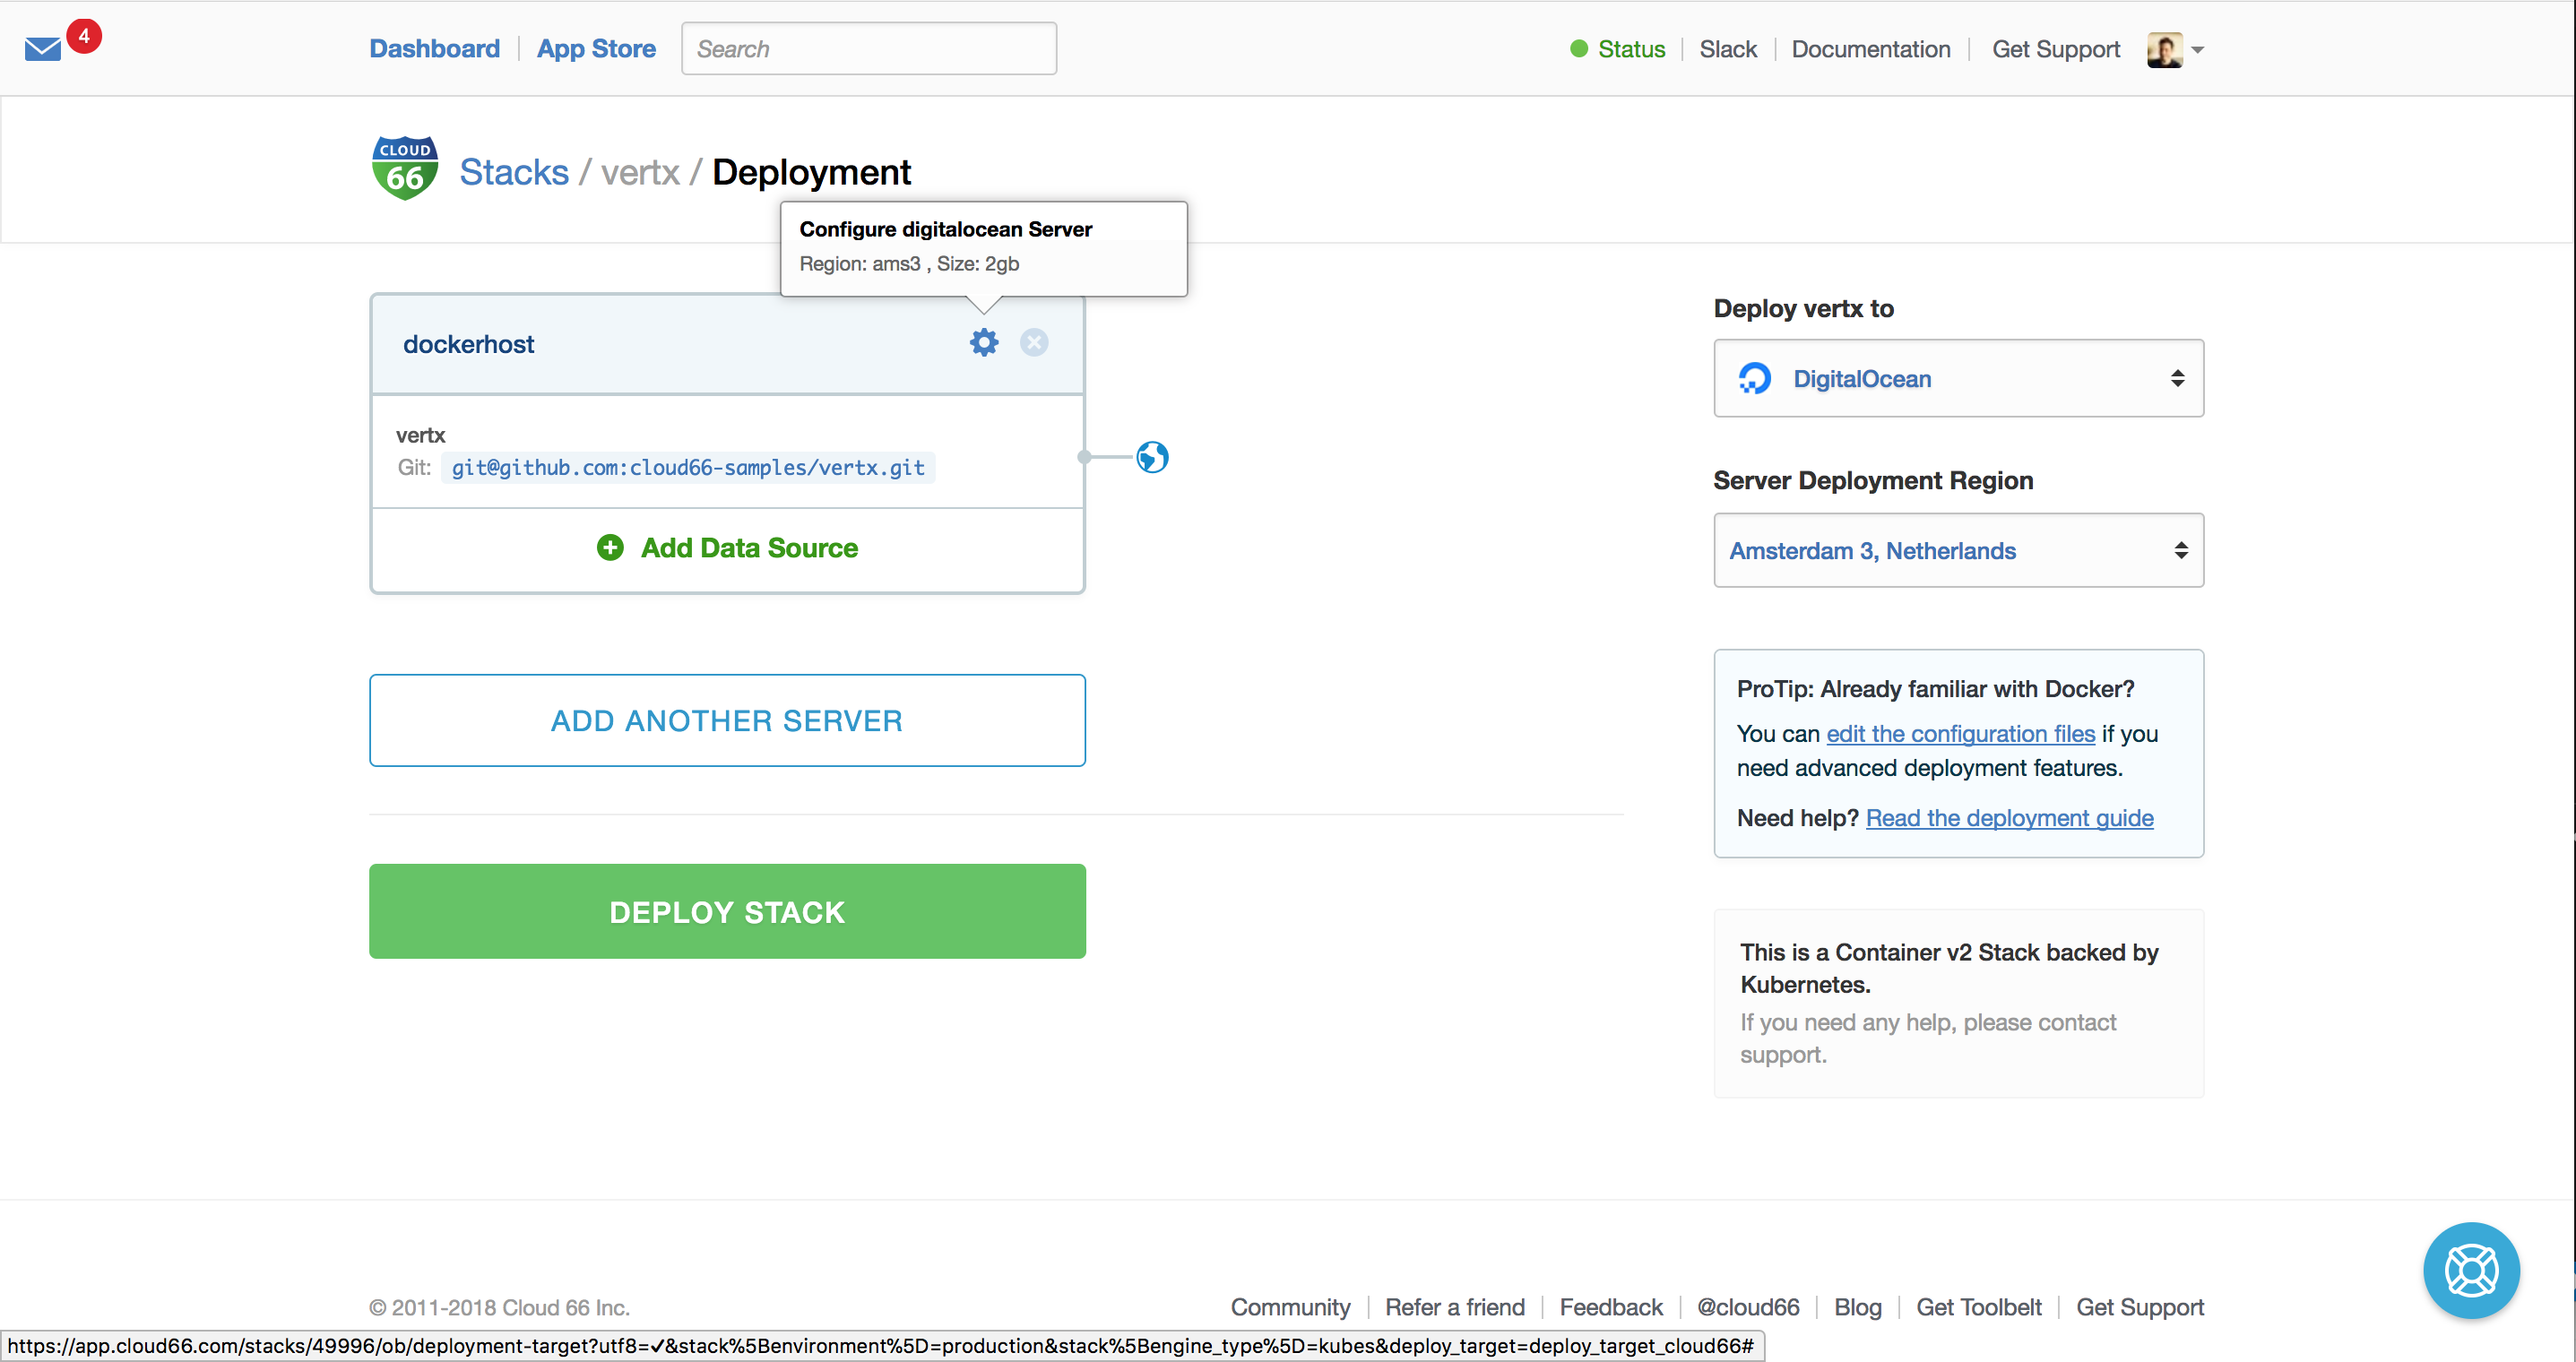
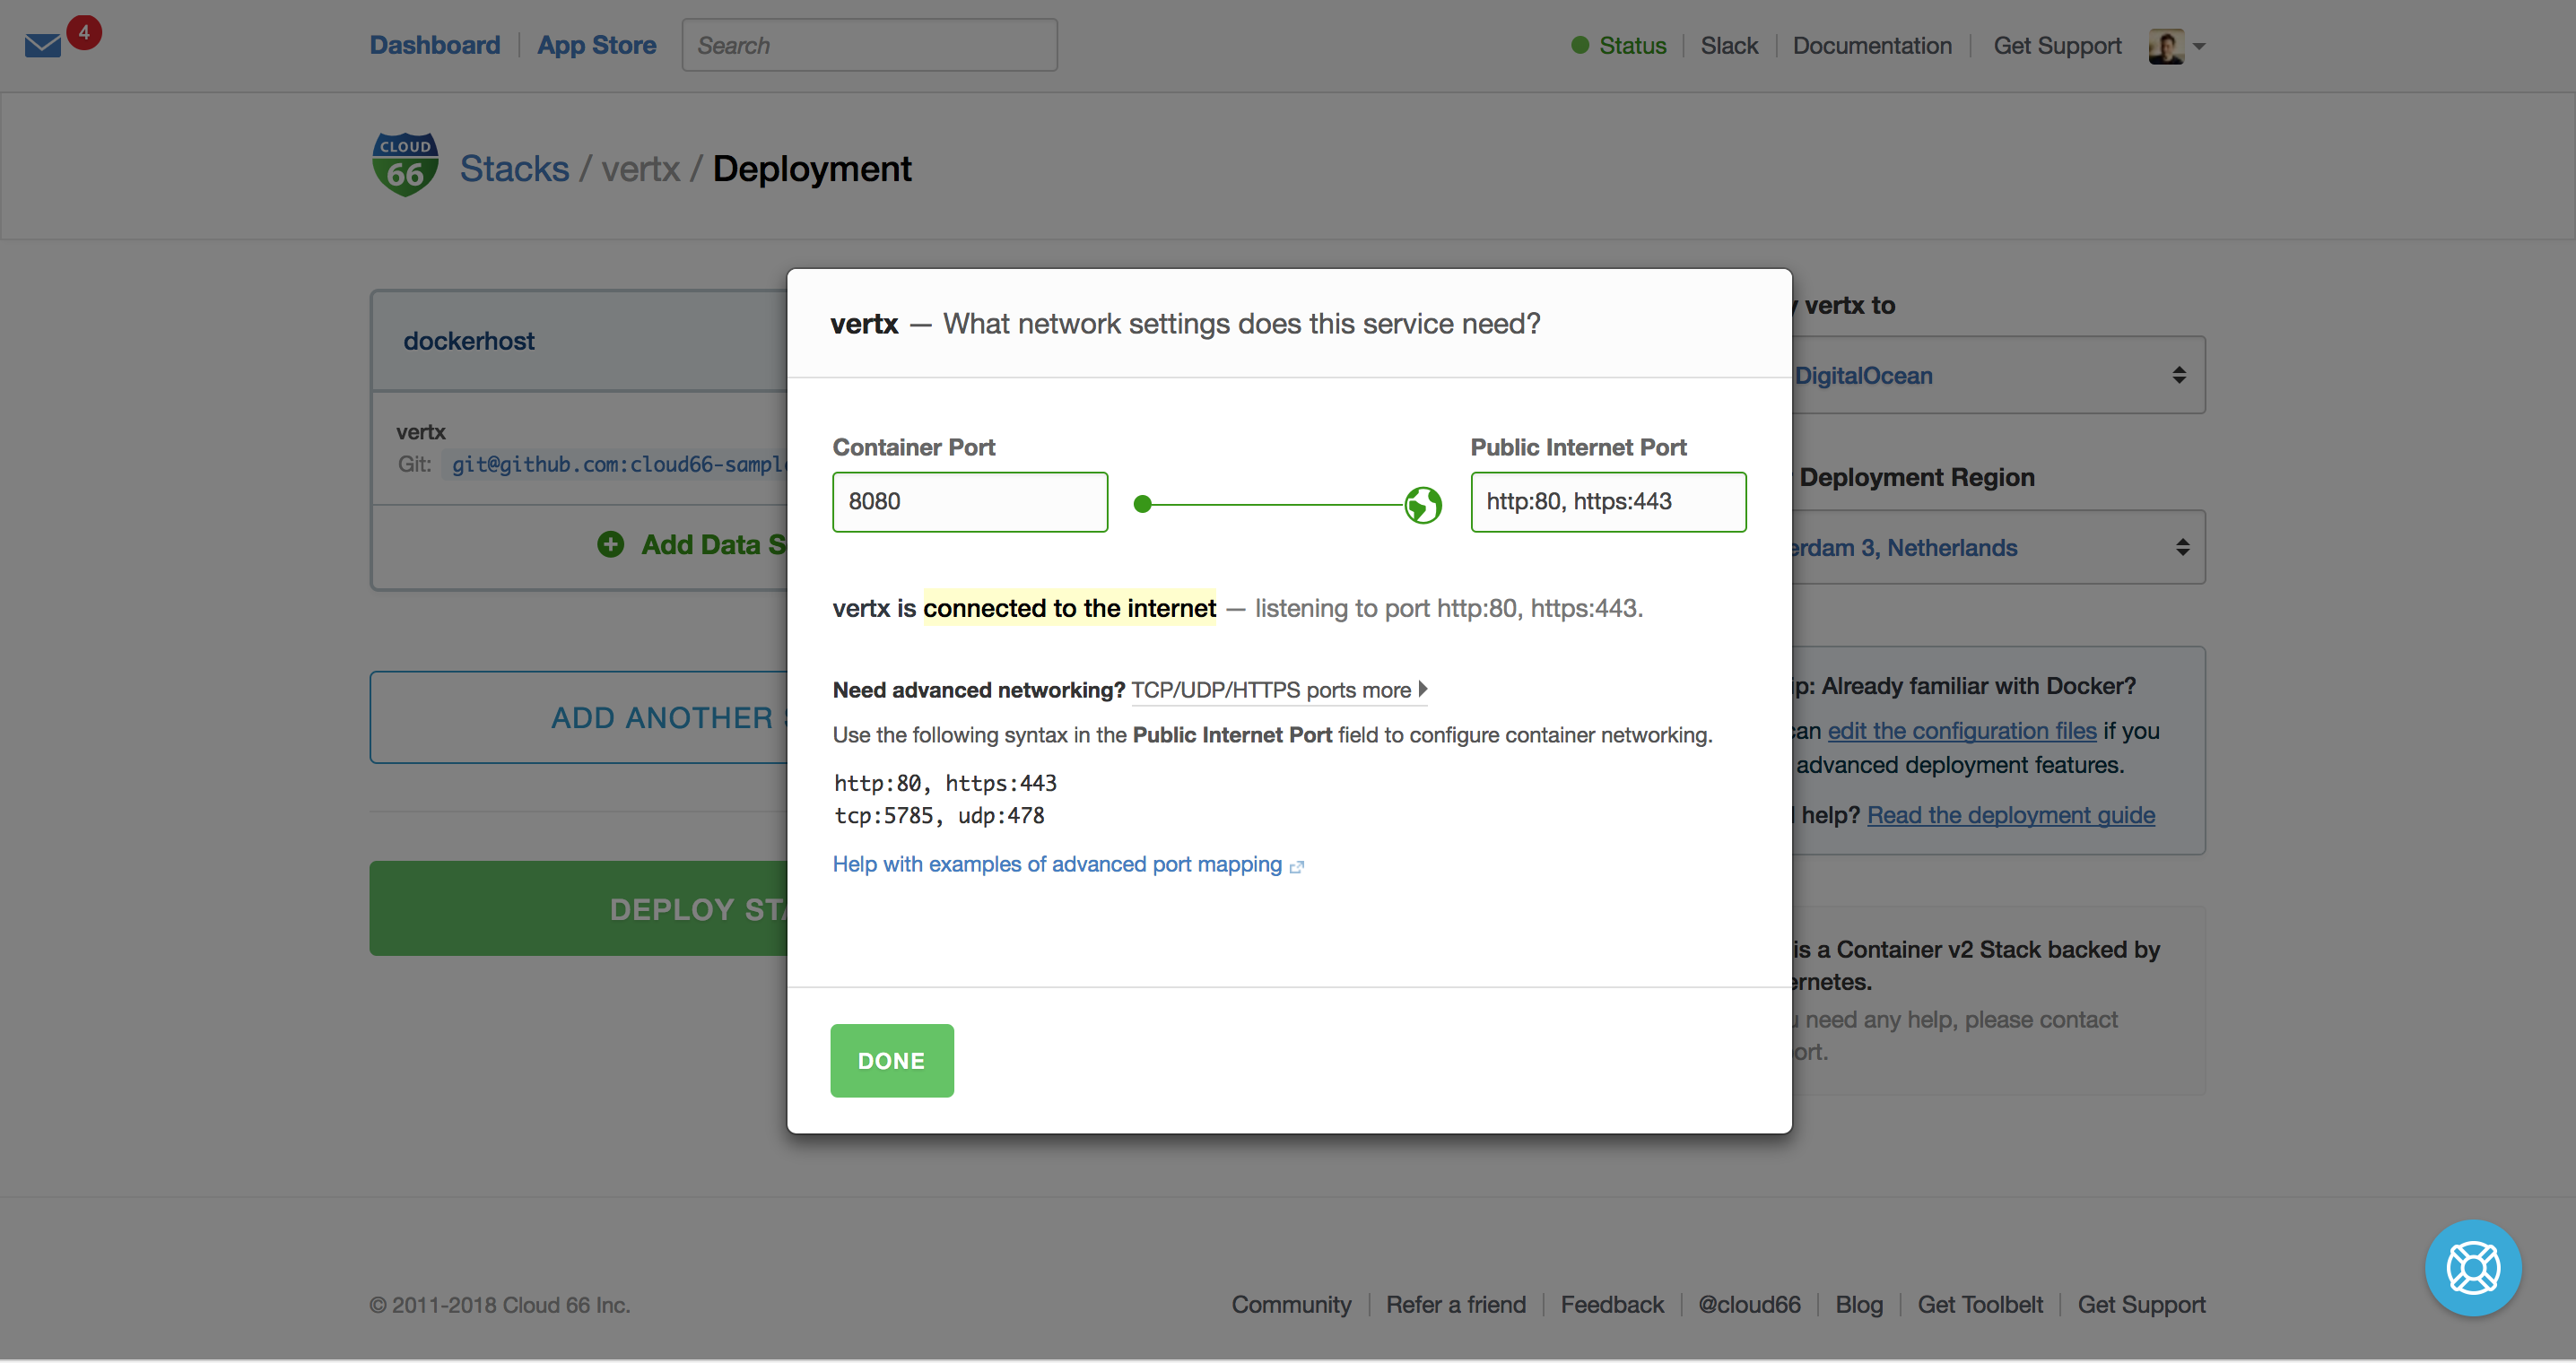
We deploy our Kubernetes cluster to Digital Ocean and map our port (8080) to the outside world on port 80 and 443. Good to know, we support SSL certificates and SSL termination to secure your services.
Nowe we hit deploy and Cloud 66 will do all the heavy lifting and deploy your Verticle in production!
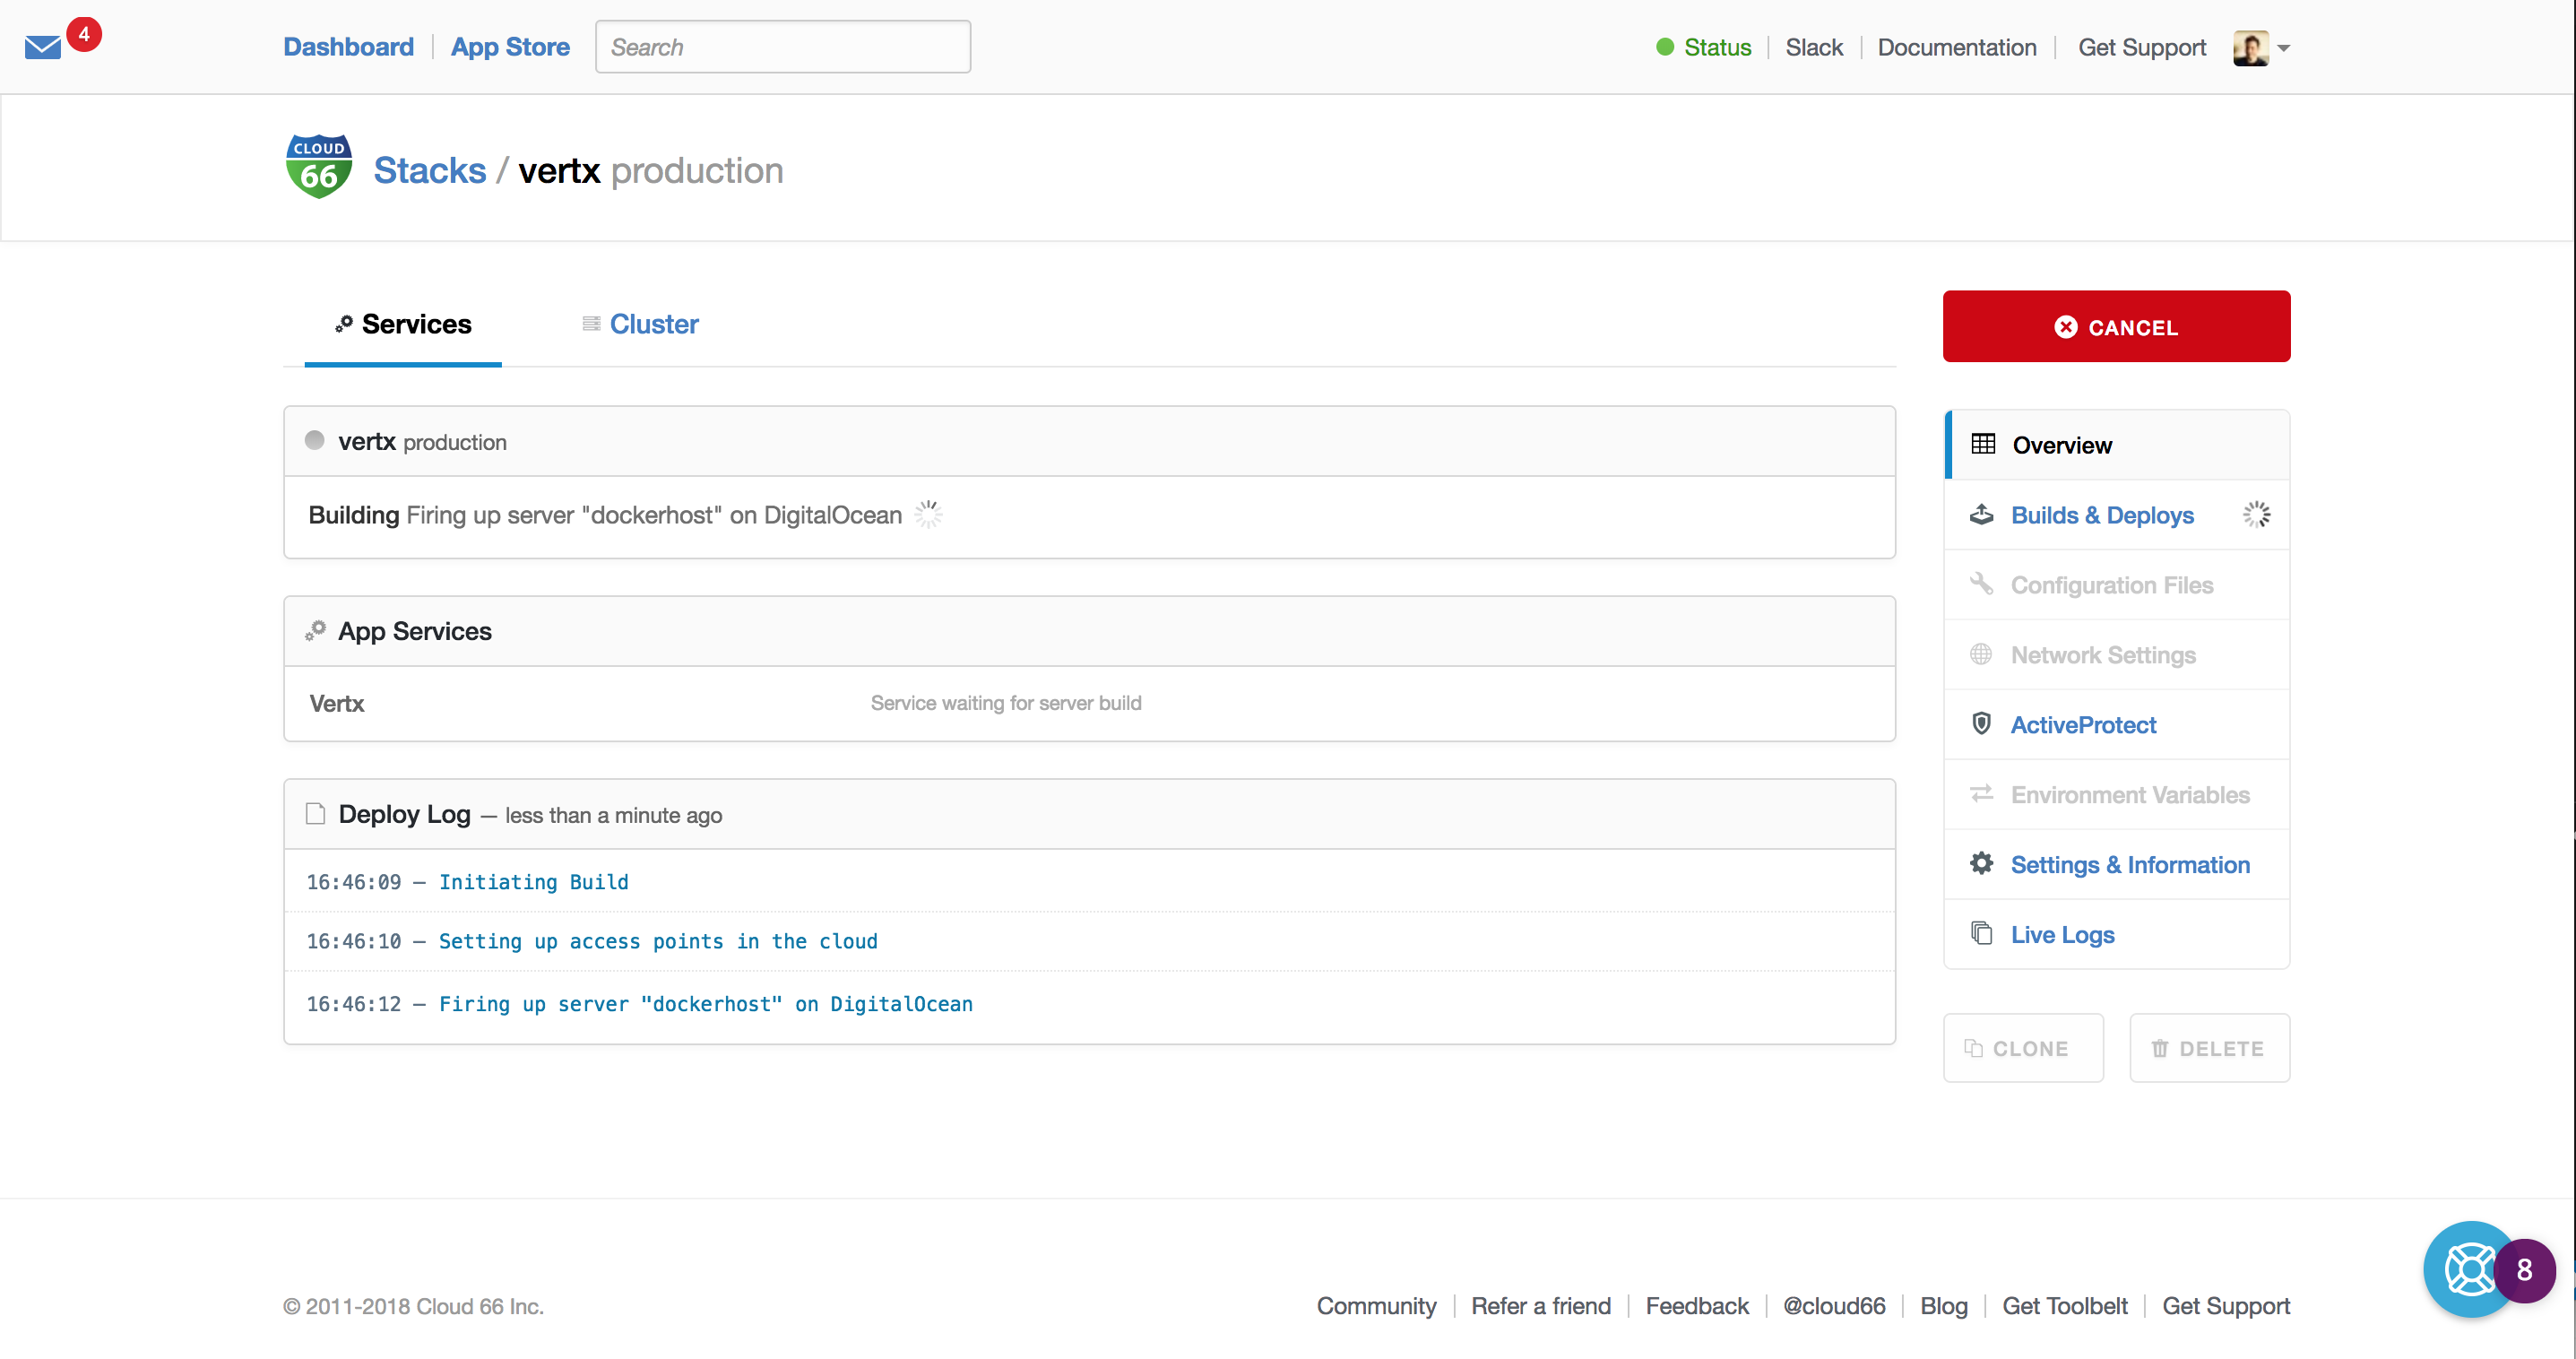
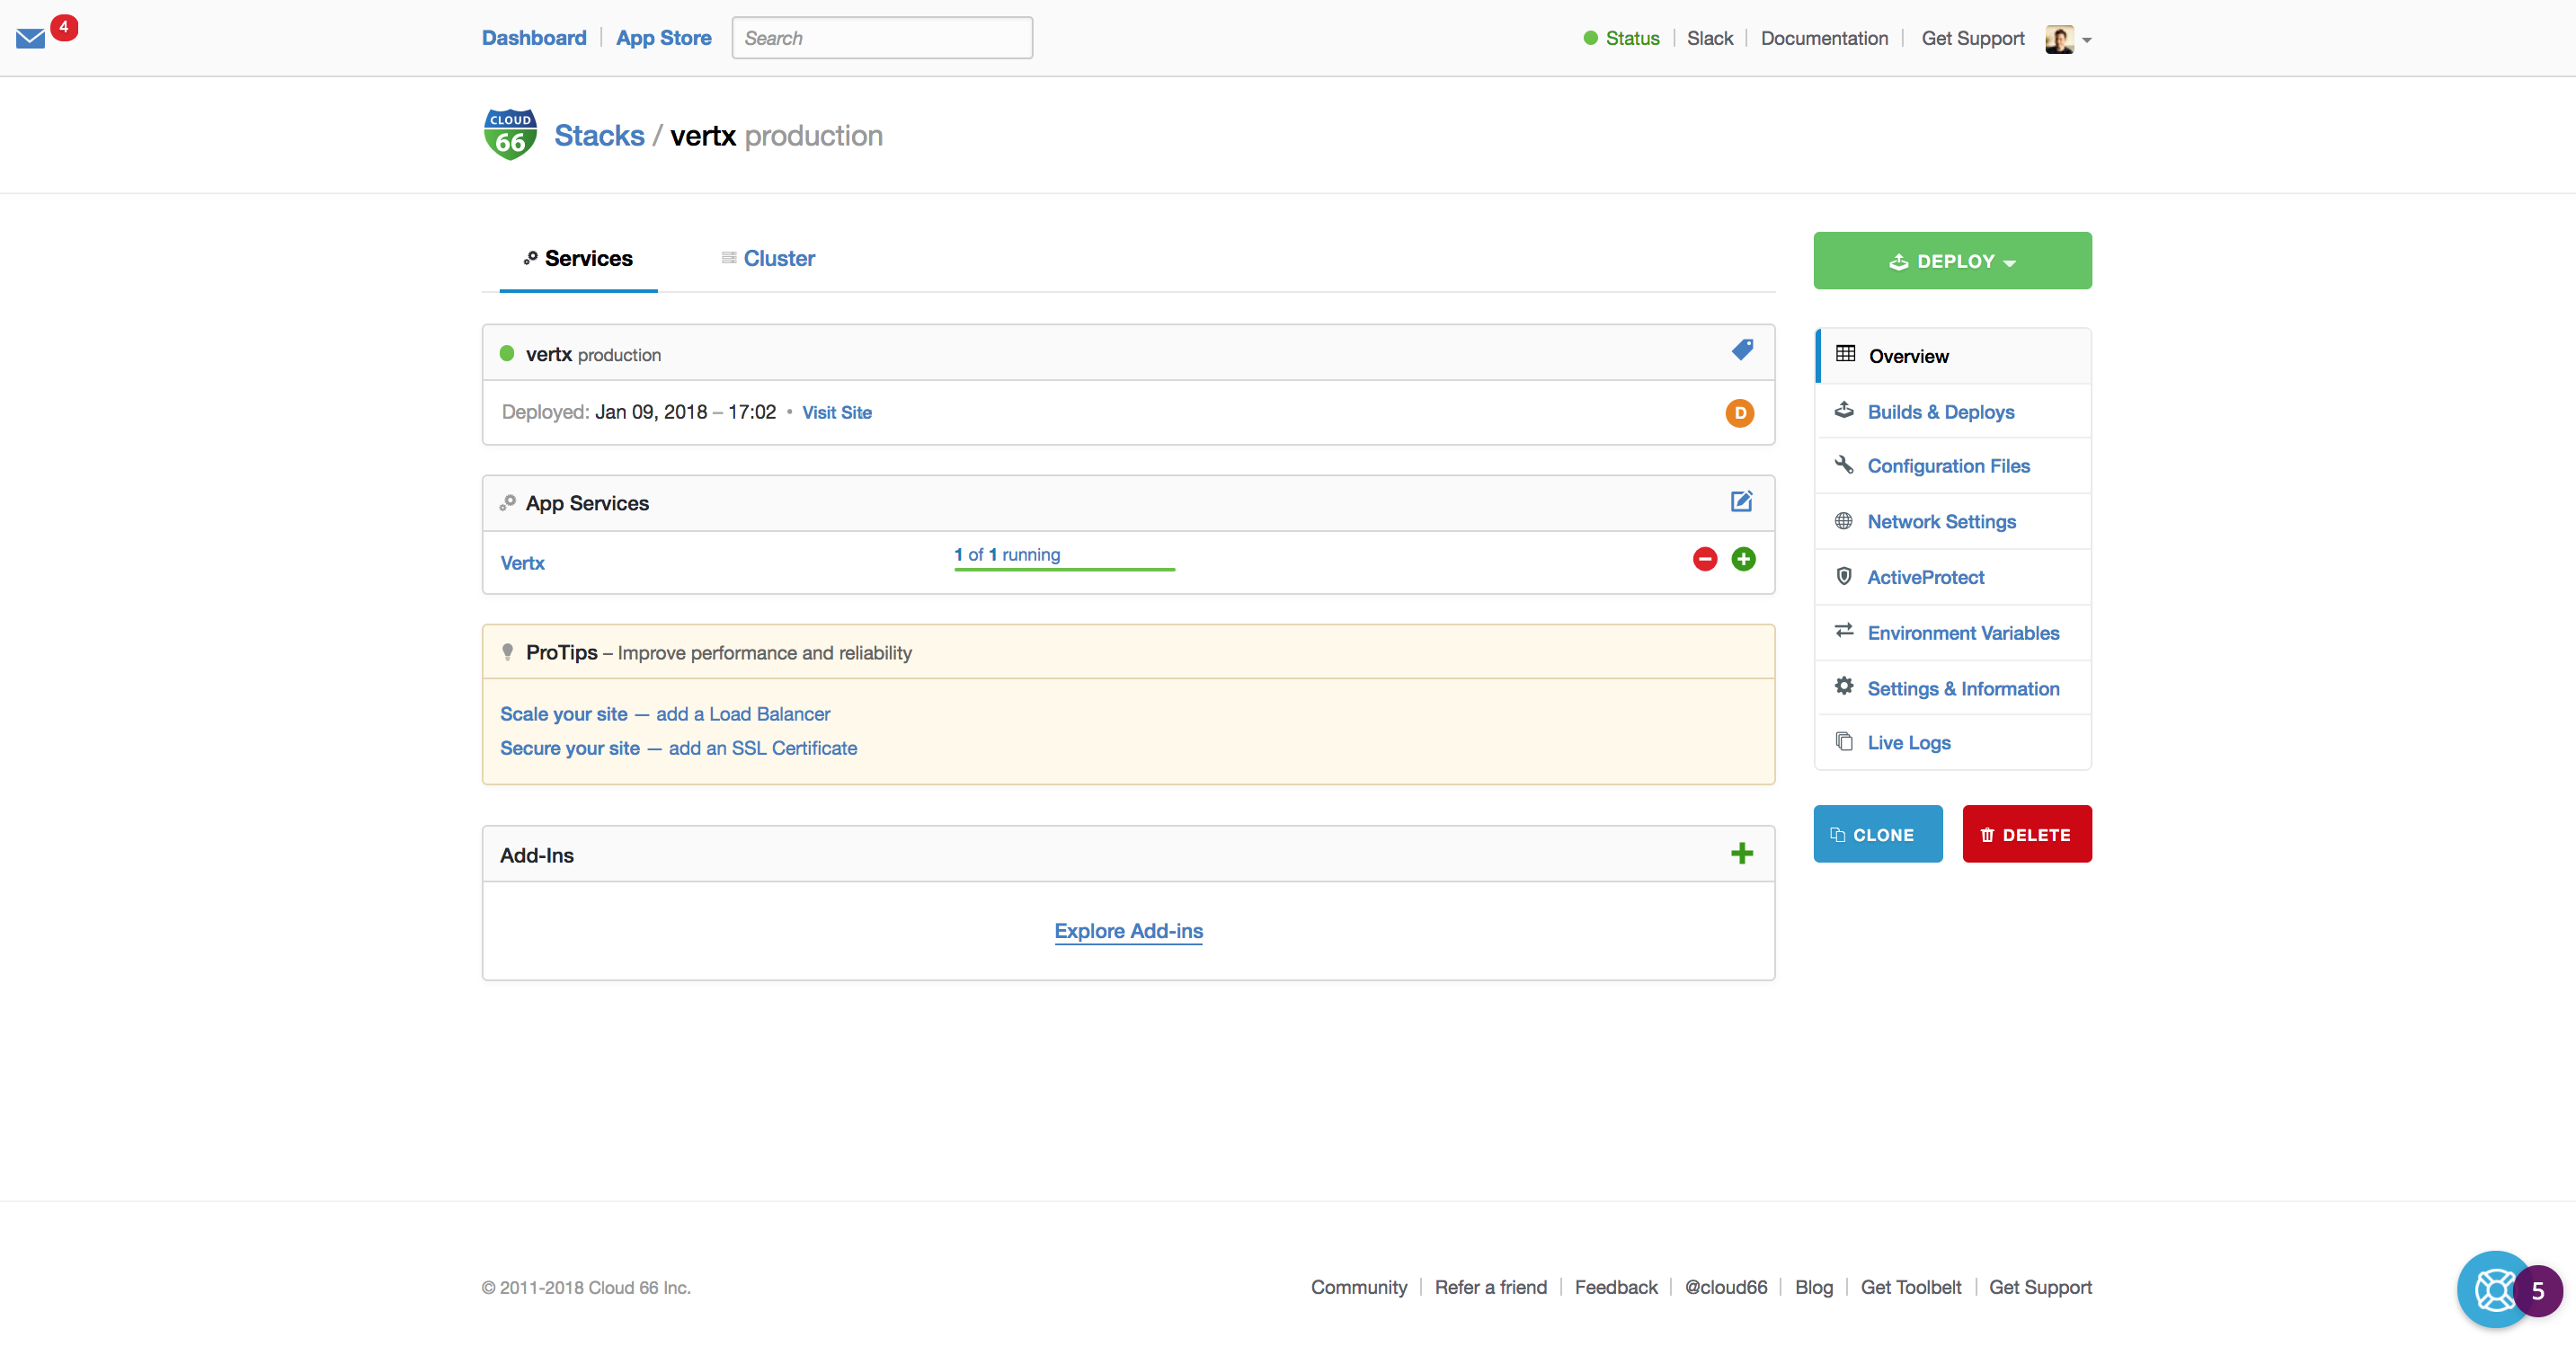
After Cloud 66 setup your infrastructure, your Verticle is running in production!
Now you can explore all the cool features Cloud 66 has to offer! And start scaling your application.
Going as small as possible using Habitus
Of course, you want to reduce image size for security and fast deployment purposes. To achieve this, we need to cut out the middleman (Maven + Vert.x runtime) and go for the fat-jar deployment model.
To achieve this, we need a two-stage build pipeline, you can use Habitus. Habitus is a Build Flow Tool for Docker.
This is how our build.yml looks like:
We have the package stage and the production stage. In the packaging stage, we use Maven to download our dependencies and pack everything in one Fat Jar. The Fat Jar artifact is copied into the smallest possible Java Runtime image to be executed in production.
This is the Dockerfile.package we use for packaging:
This is the Dockerfile.production we use for production:
Now we can run habitus to build our image:
▶ habitus
After the build, you get an image named cloud66-client:latest and is ready to test locally or deploy it to production.
▶ docker run -it cloud66-client:latest
Of course, you can use Habitus with Cloud 66. Just use the following entries in service.yml.

Summary
Vert.X is a great project to build (micro) services fast in the language of choice. Together with Docker and Cloud 66 Skycap and Cloud 66 Maestro you can deploy with speed on any cloud.
Have Fun!
REFERENCE