
Containerization, clusters, micro-services, Kubernetes... modern DevOps can be confusing and exhausting, particularly for small teams. But it doesn't have to be this way! Maestro makes deploying any application to any cloud provider into a simple 5 step process.
Overview
To prove how easy it is, we've put together an example of deploying a Node.js application to a Vultr server using Maestro. The whole process took us less than 20 mins, including the 15 minute wait while the servers were provisioned. You can do this with literally any app that has a Dockerfile and deploy to any of our supported cloud providers.
The only thing you need is a Git repo containing your application code with a valid Dockerfile. This can be a private or public repo.
Don't have a Dockerfile?
Not to worry - we will help you build one. When we analyze your code ( Step 3 below) will detect that your application does not have a file and help you create one.
Node.js sample:
You can always use Cloud 66 Node.js application sample:
Here are the 5 steps we took to get our Node.js app configured, built and deployed using Maestro:
Step 1: Sign up for a Cloud 66 account
Signing up takes seconds and we offer a fully-functional free 4-week trial with no credit card required during the trial period.
Step 2: Sign up for a Vultr account
Cloud 66 doesn't host applications. We natively integrate with major cloud providers to automatically manage servers via your own account. (You can also bring your own servers via our Register Servers feature.)
In this example we're using our newest friend, Vultr, to host our app. Vultr is one of our native cloud partners, so you can deploy directly to Vultr from Cloud 66 without having to leave our interface.
To get you started, Vultr is offering $66 in free credits. To sign up simply visit https://www.vultr.com/register/ and fill in your email and a password, enter the coupon code: CLOUD66. This promo is valid for 66 days after Vultr account activation, and applies to brand new accounts only.
Finally, you'll need an API key to connect Cloud 66 to your new Vultr account. Click on your account dropdown (top right) and then "API". Next click "Enable API" and then "Allow All IPv4". Now copy the API key and keep it to hand. We'll need it in Step 5. (We also have an in-depth guide to integrating Cloud 66 with Vultr if you need one.
Step 3: Automatically configure your application
One of the benefits of using Maestro is that it automatically analyses your application code and figures out the required configurations.
To get started, log into Cloud 66 and choose “I have a containerized application” and then “I need to build a Kubernetes cluster” (Try Maestro). If you’re already using Cloud 66 just click New Application → Maestro (Build a new cluster) button on the dashboard.
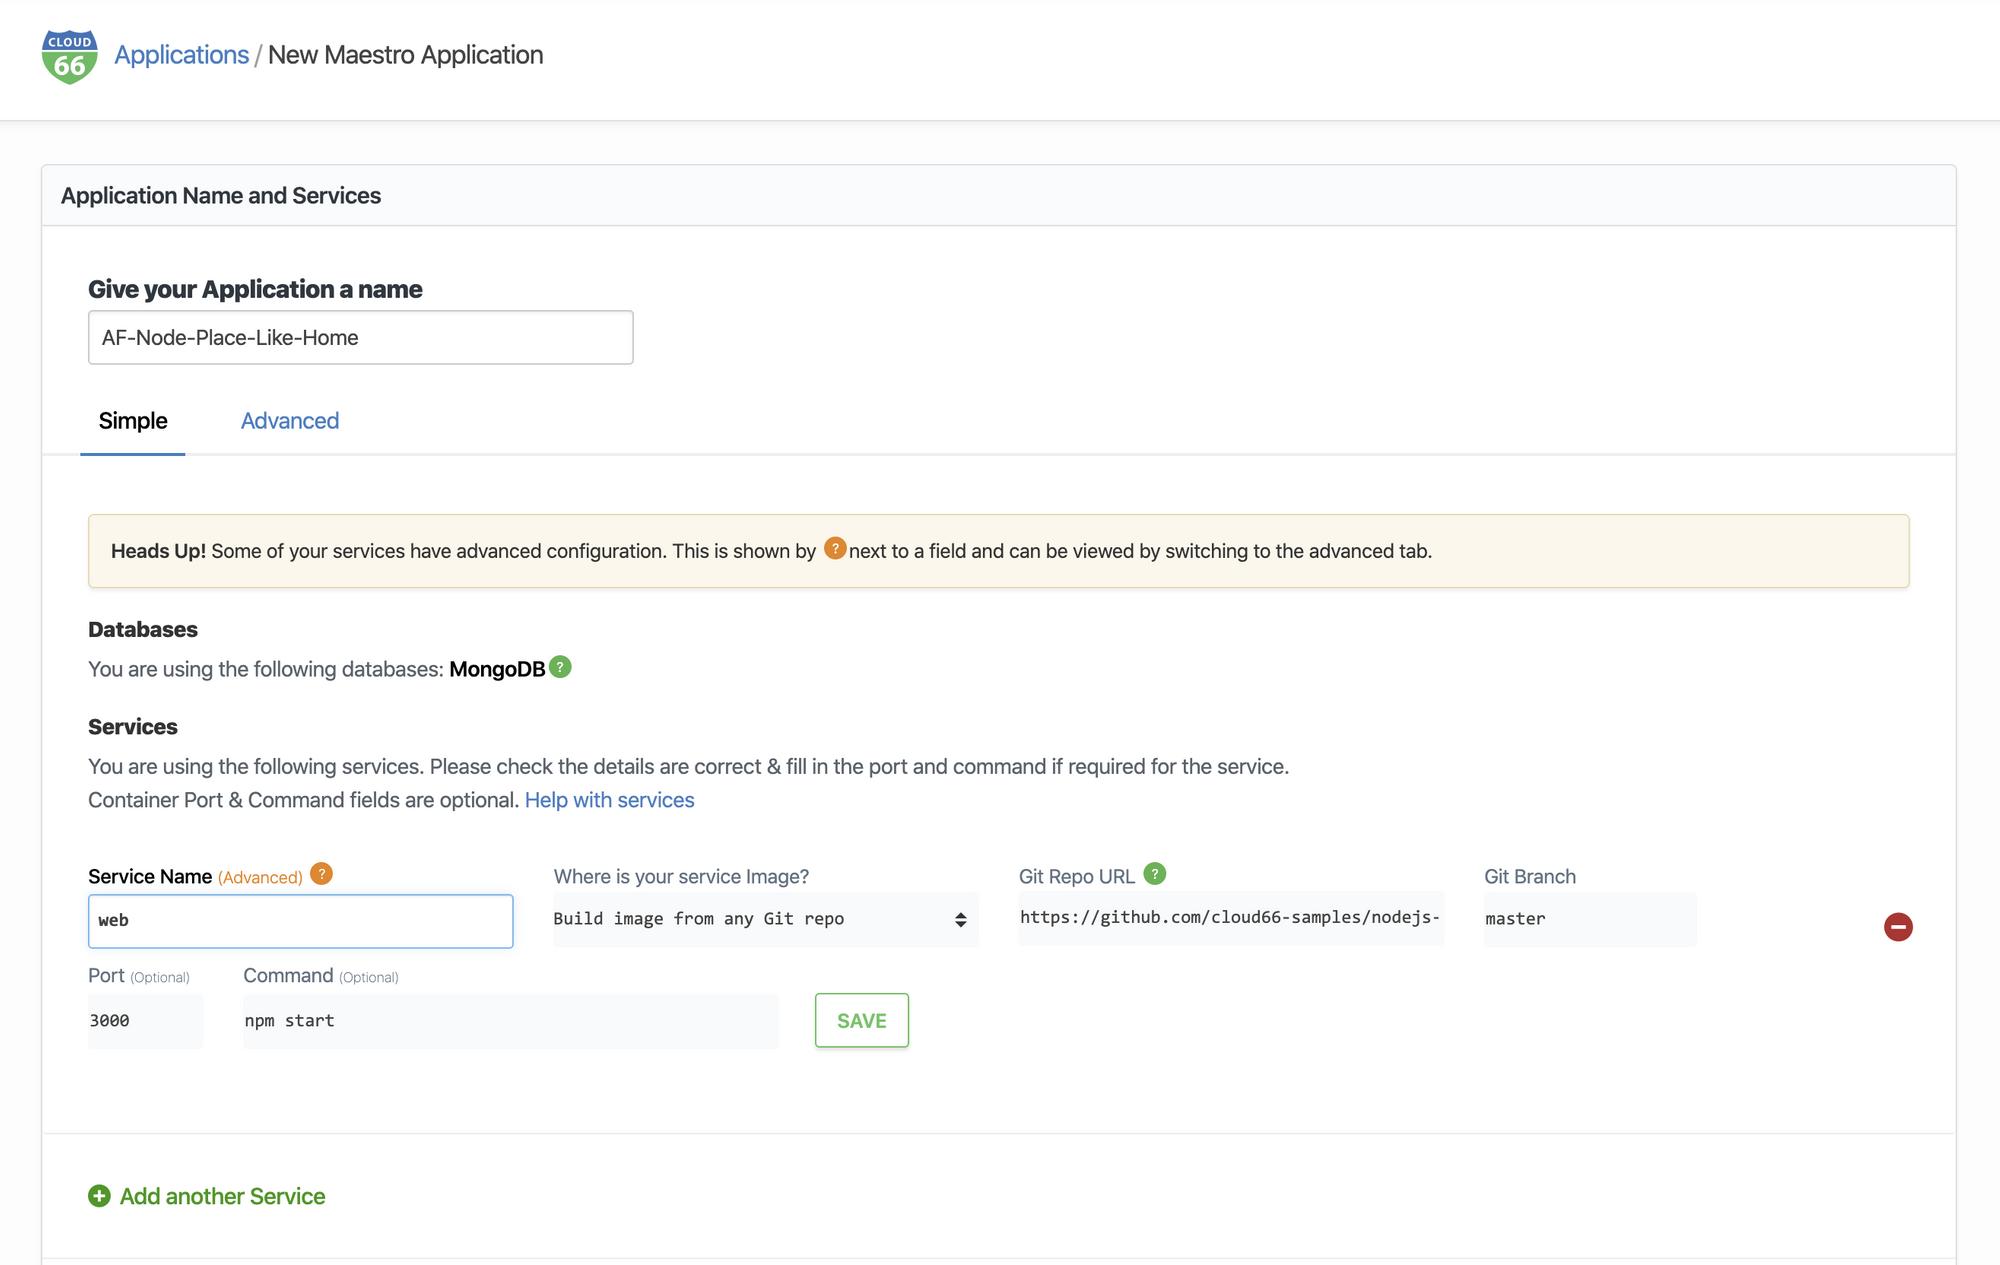
Give your app a name and click "Analyze my code". Now paste the URL for your Git repo and hit the green button. The next page displays the results of our analysis:
If you don't have a Dockerfile, we will suggest one for you based on your code. Click on Get help adding a Dockerfile. A window with instructions will pop up:
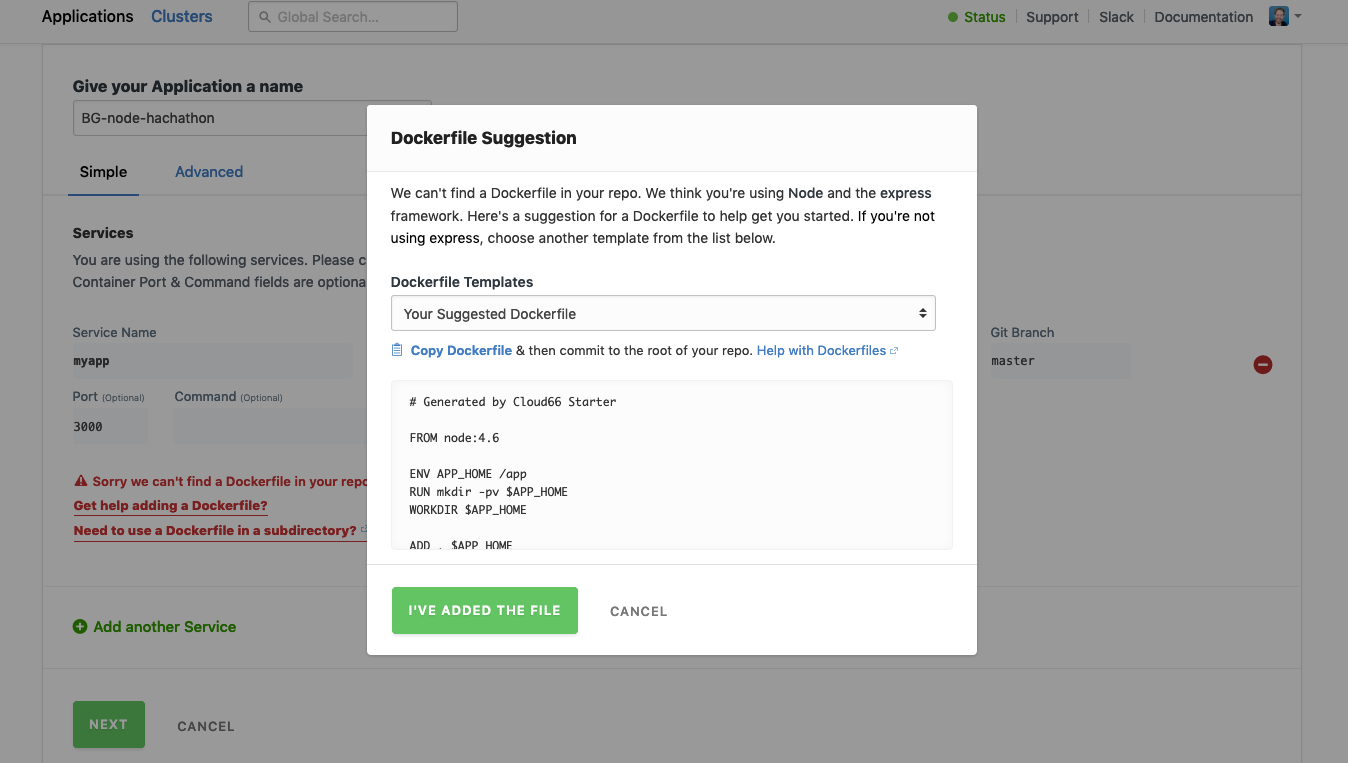
We suggest the content for a Dockerfile based on your code, but you can also change it where needed. Once you are happy with your configuration click Copy Dockerfile and paste it into plaintext file named Dockerfile in the root of your repo (don't forget to commit the change). Once you've added the file, come back to the Cloud 66 dashboard and click I've added the file.
You can now tweak the configuration of any of your services, if you need to. Once you're happy, click "Next".
Step 4: Build application images
Maestro handles the building of container images that can then be deployed. Just click the green "Build Application Images" button and let Maestro do all the work for you.
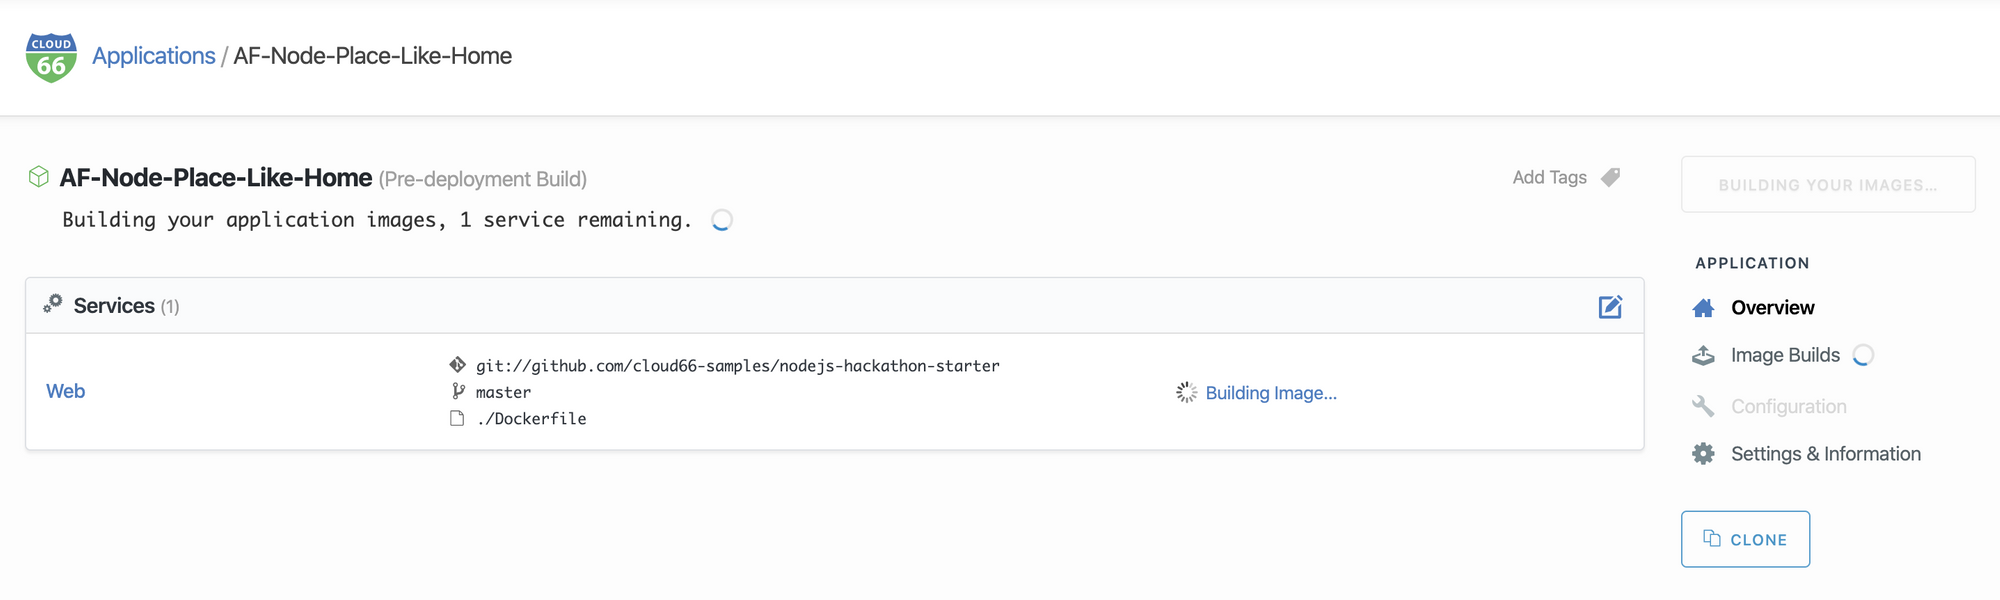
Maestro shows you a live log of the build, so you can watch the progress. Or you can close the tab and come back later once a build is ready (we will email you when it's complete).
Step 5: Deploy your application to the cloud
The final step is getting your newly built app into the cloud. Click the green "Setup Deployment" button to start the process.
Maestro will suggest servers based on your configuration, but you can add additional servers as you need by clicking the "Add Another Server" button. You can also add data sources, either alongside your application (sharing servers) or as standalone servers.
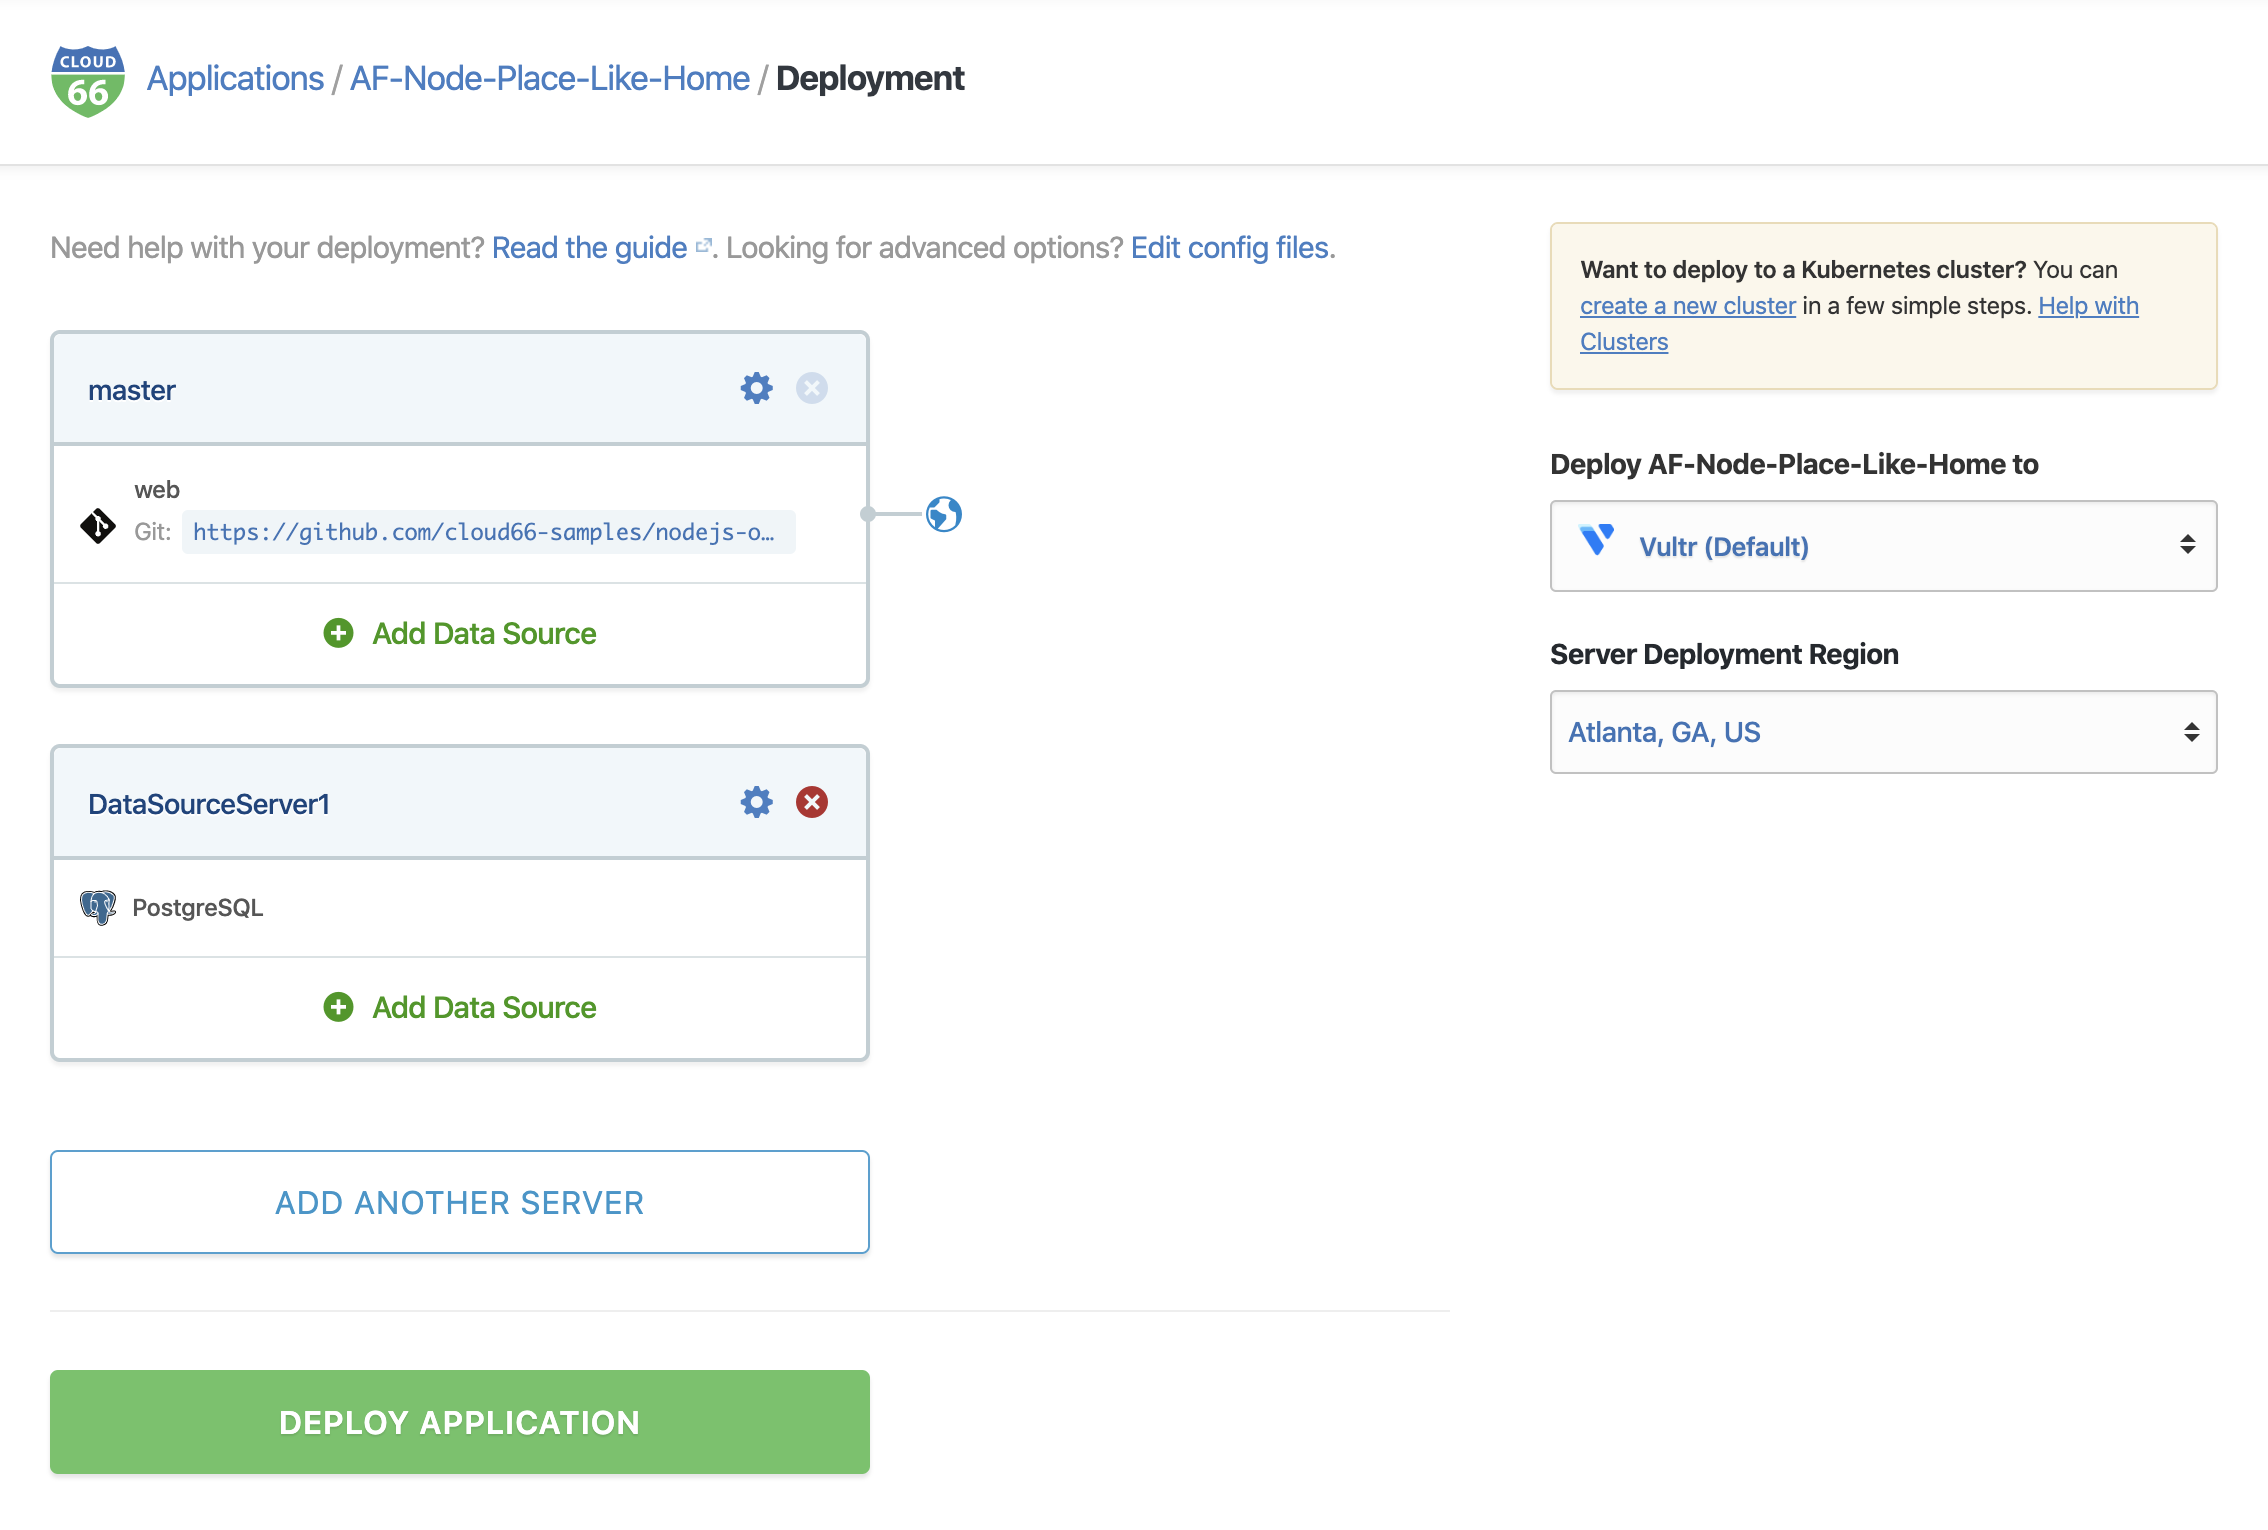
Finally you need to choose a target for your deployments. This is where our Vultr API key will come in handy. Select Vultr from the cloud providers dropdown (on the right) and choose a region.
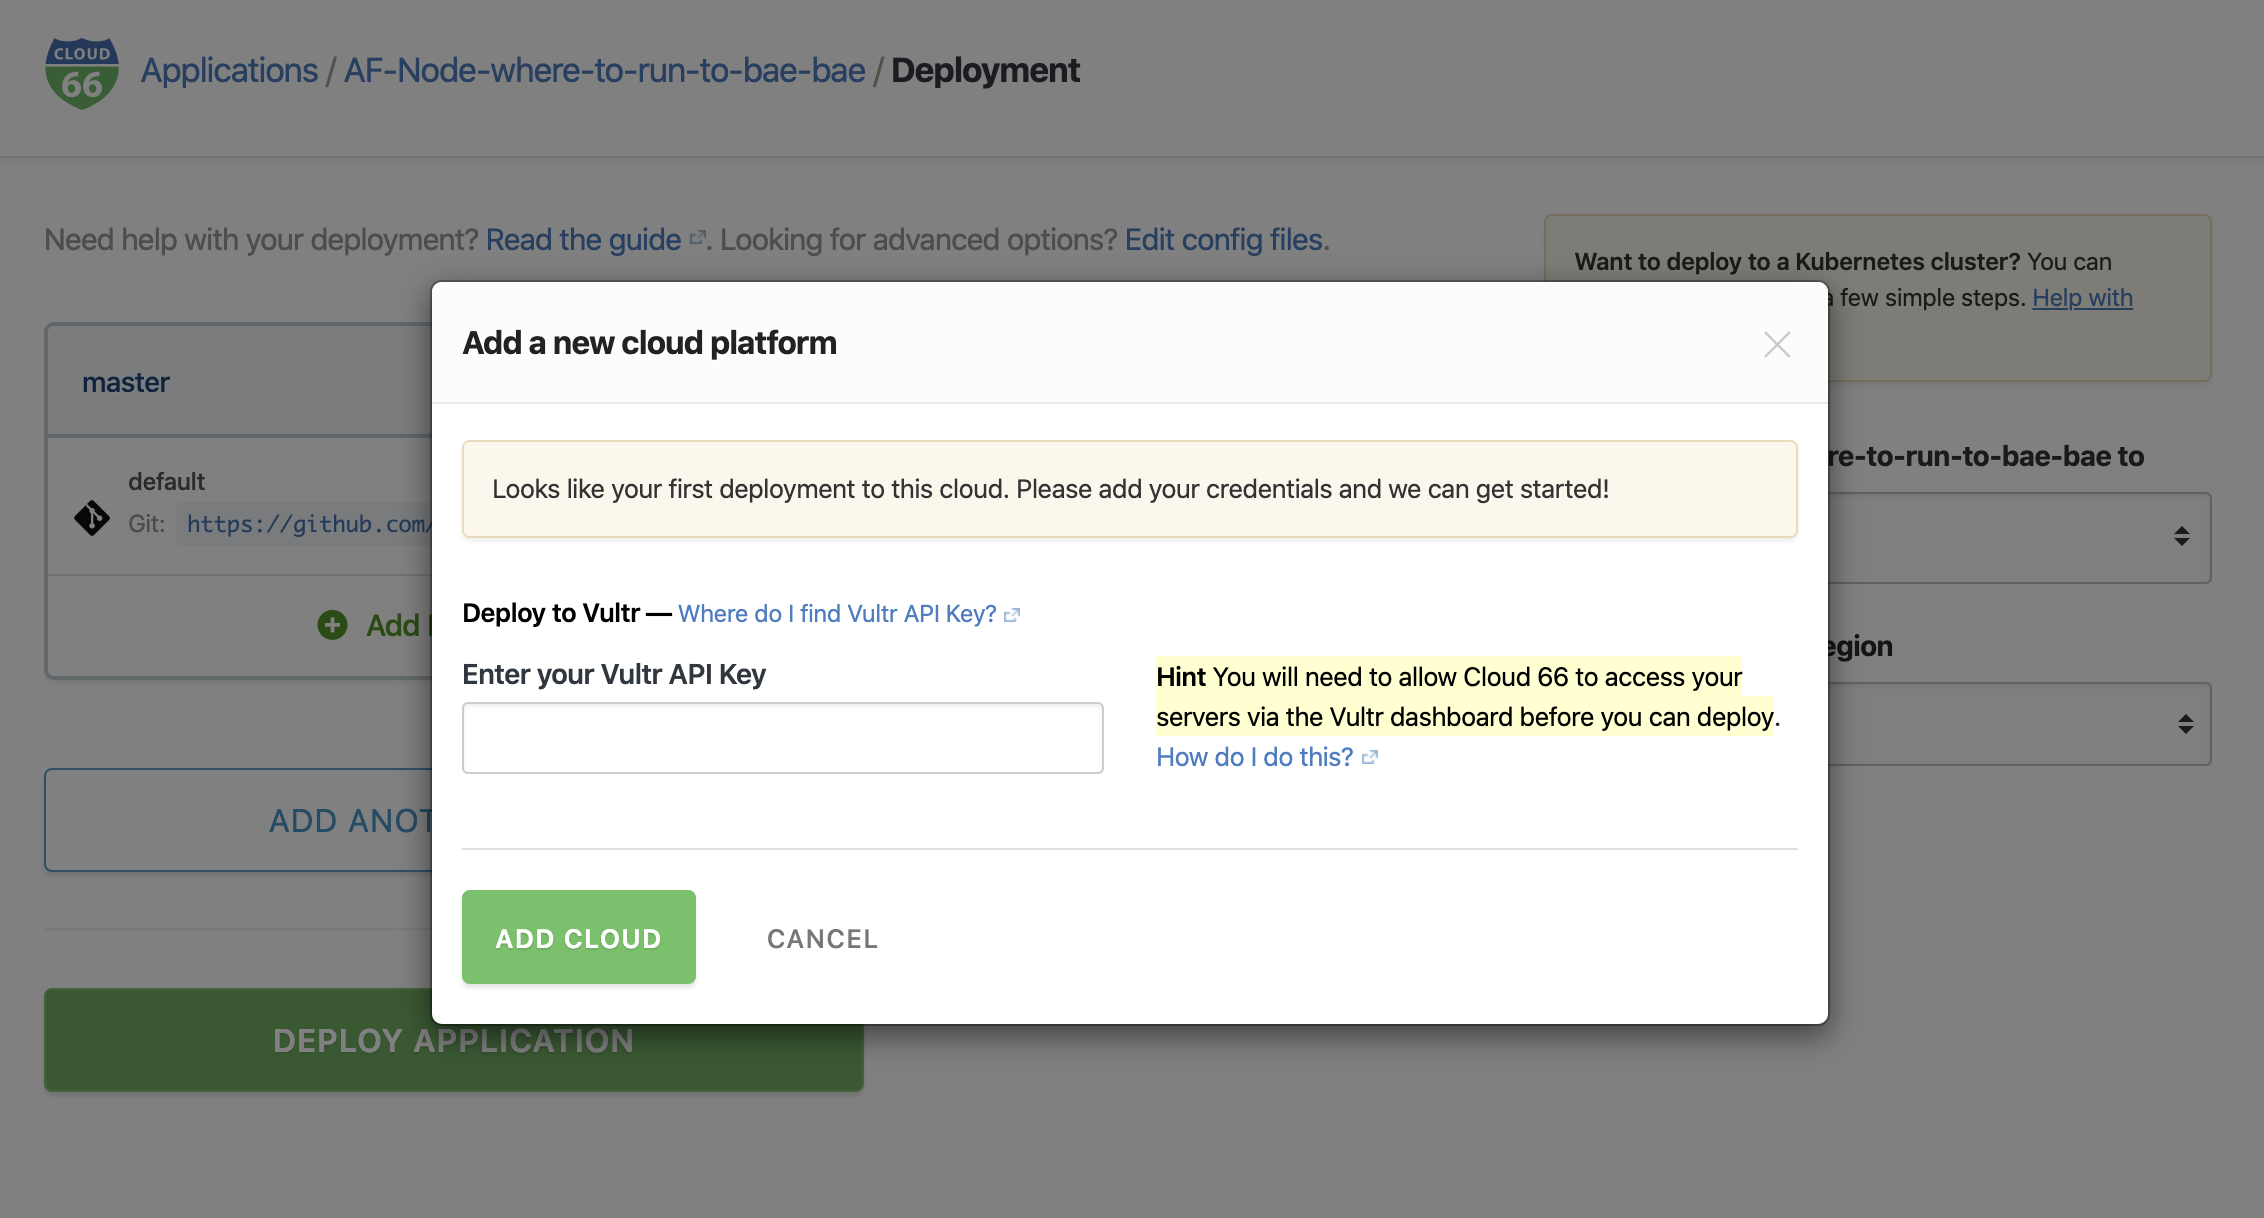
Now click "Deploy Application". This will open a popup in which we paste our Vultr API key and click "Add Cloud" and then click "Deploy Application" again.
Now you can just sit back and watch Maestro do all the deployment work for you. Or you can close the tab and get on with other work, and we'll email you when everything is deployed.
That's it, you're done!
You can see your new application running on your new servers by clicking the "Visit" site from your application's dashboard on Cloud 66.
If you have any questions please join Cloud 66 Slack Community, where you can solve problems or learn from other awesome developers who are using Cloud 66 to manage their awesome applications.
Getting started with Cloud 66 Maestro. Step by step guide.