
Google Identity-Aware Proxy (IAP) is a Google Cloud service that provides authentication for web applications.
This service simplifies the process of building web applications authenticated with Google, eliminating the need to handle user-related concerns within your application code. This is especially valuable for internal applications within organizations that already utilize GSuite. It is straightforward to use, particularly when operating on Google Cloud. However, it is worth noting that IAP can also function with other cloud providers and non-cloud hosted applications.
In this post, you will see how you can implement IAP with a Rails application for authentication. This example focuses on the authentication aspect of IAP, rather than authorization (access rights, etc., which can be achieved using IAP in conjunction with IAM). Furthermore, this article concentrates on applications hosted on Google Cloud Platform (GCP), specifically Google Compute or Google Kubernetes Engine (GKE). While it is possible to adapt IAP to apps hosted on alternative clouds via IAP Connector and authenticate non-GSuite users, those topics are beyond the scope of this post.
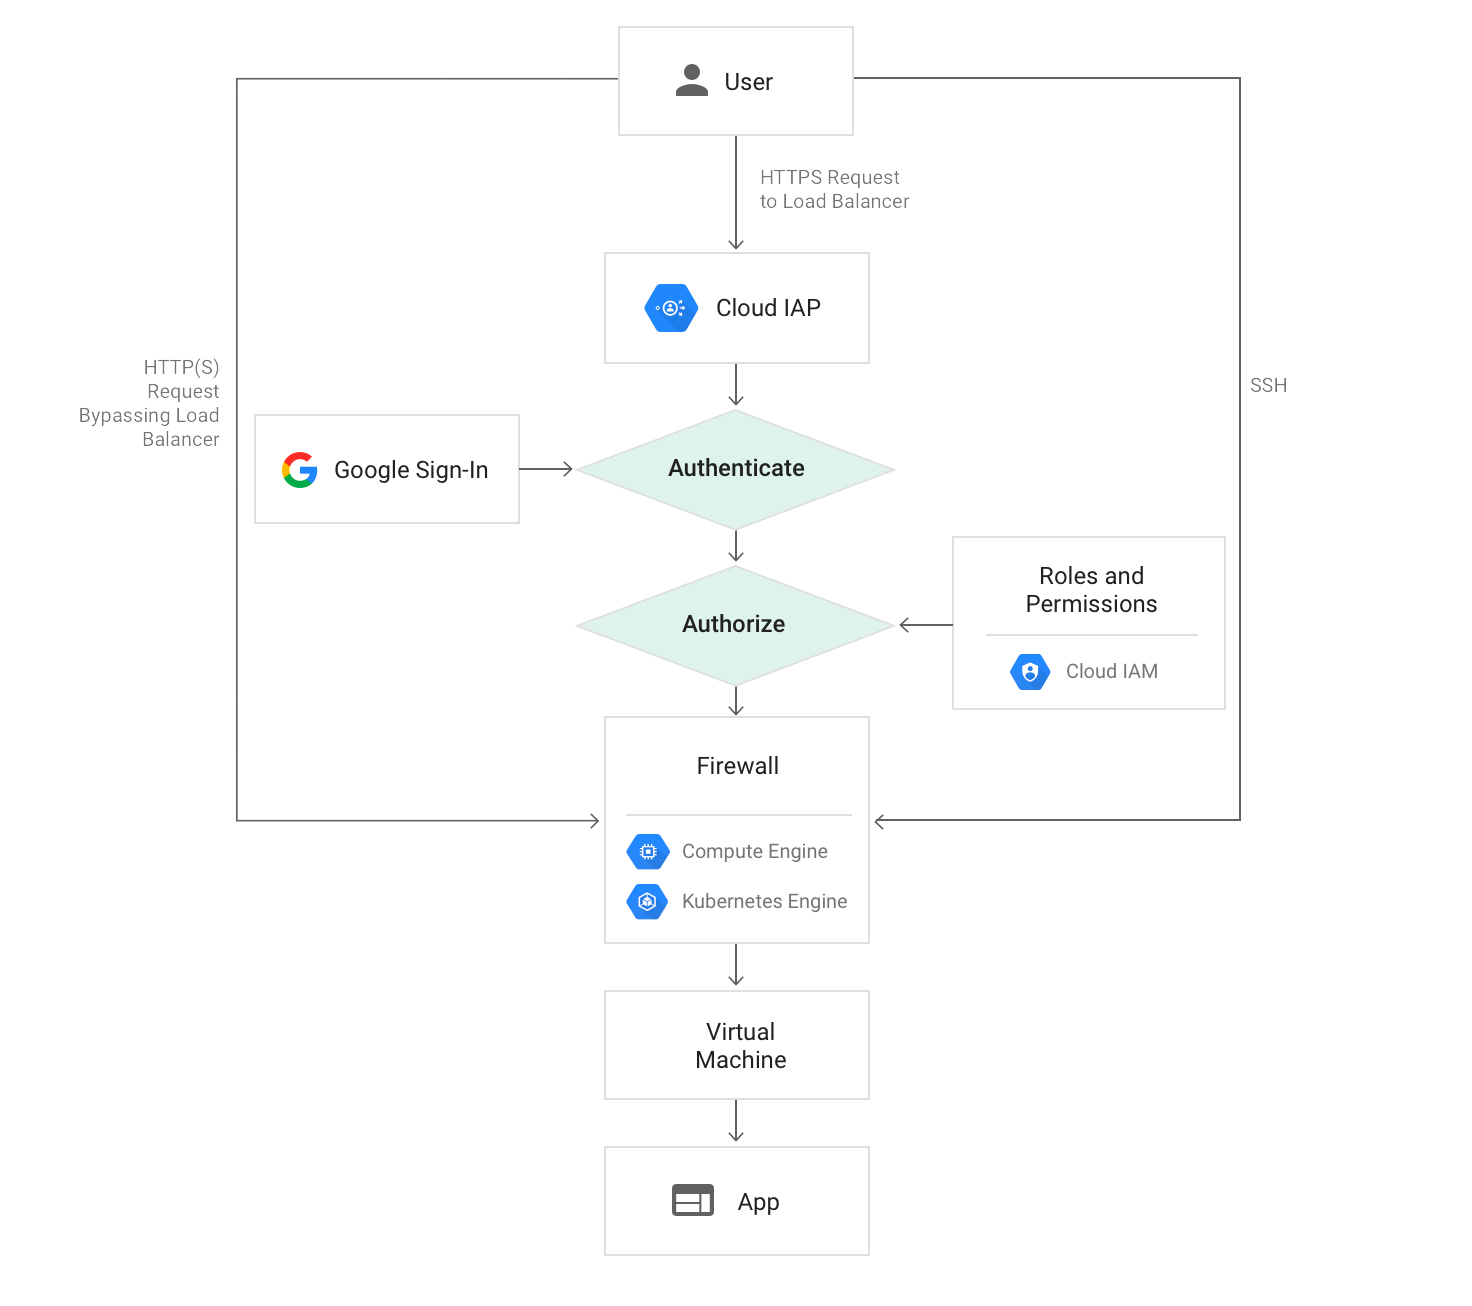
Before we proceed, let's briefly examine how IAP operates:
So, how do we go about using IAP in Rails? The concept is quite straightforward.
- Deploy your Rails app to Google Cloud (VMs or GKE). Note: Cloud 66 can facilitate this process, making it exceptionally user-friendly.
- Activate IAP within Google Cloud and restrict access to your app exclusively through IAP.
- Authorize access to your application.
- In your Rails application, read the IAP HTTP headers and validate them to extract user information.
Now, let's dive in.
Step 1: Deploy Your Rails App to Google Cloud
Numerous guides outline the deployment process of a Rails application to a cloud provider. Alternatively, you can use Cloud 66 to deploy your Rails application to Google Cloud. The crucial point is that an HTTPS Load Balancer from Google is necessary for IAP functionality. Cloud 66 supports native Google HTTPS load balancers.
Assuming your Rails app is now hosted on Google Cloud with an HTTPS Load Balancer in place, we can proceed to Step 2.
Step 2: Enable IAP in GCP
Navigate to the GCP dashboard and locate IAP. Within this section, you'll find an "Applications" tab.
Under this tab, a list of applications hosted on Google AppEngine, VMs, and GKE will be displayed, provided they have an HTTPS load balancer:
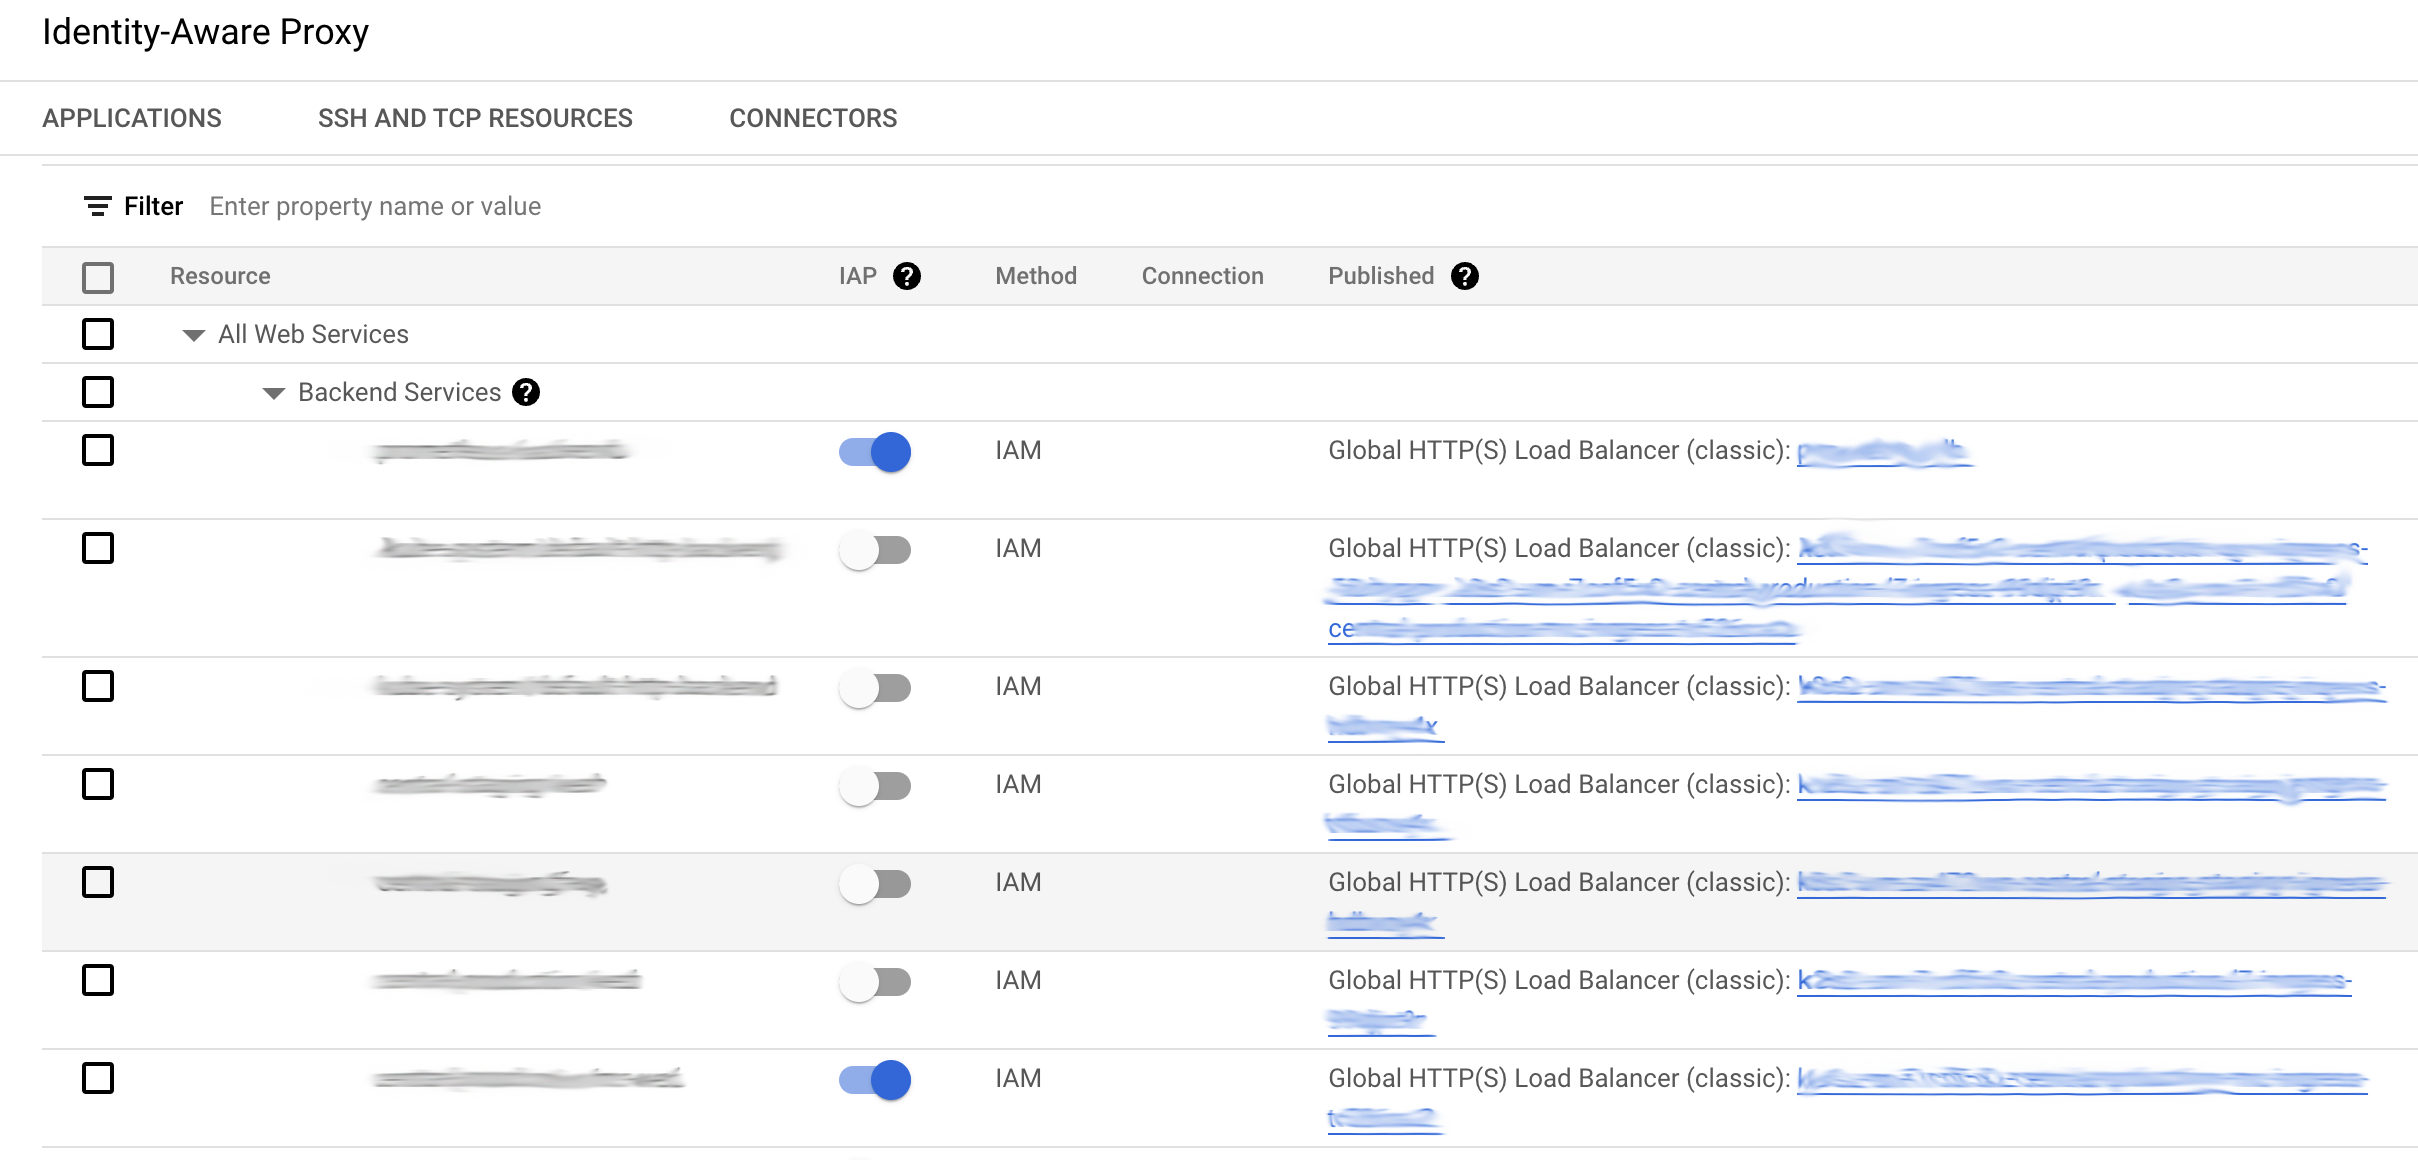
Enable IAP for any of your hosted apps by toggling the switch in the dashboard. During the confirmation step, specific configuration requirements will be outlined. For web applications, the primary requirement is to ensure that no traffic directly reaches your load balancers, except through IAP. This setup is relatively straightforward: configure your Google Firewall to allow traffic only from 35.235.240.0/20, which constitutes IAP's IP range. You can also enable internal traffic if you've established Google VPC/VPNs that bypass authentication. These internal IPs generally fall within the 10.x.x.x range. If your application should solely accept authenticated traffic, limit incoming connections to 35.235.240.0/20.
You can find more information about IAP here and details about configuring your firewall for IAP here
Step 3: Grant Access to the App
If the setup is correct, you can access the load balancer's endpoint (usually an IP address visible on Google). You can set up an A record to map to this IP address later. At this stage, upon accessing the endpoint, you'll be redirected to Google's login page. After successful authentication, access will be denied. This is because we haven't yet granted access to our application.
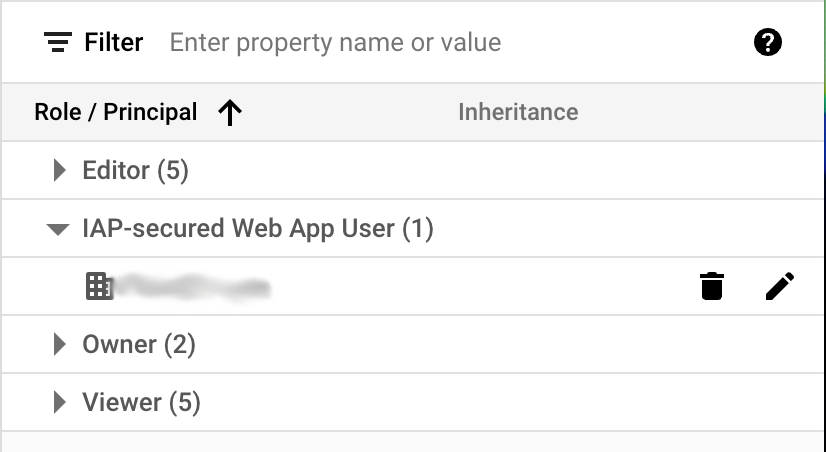
On the IAP page, click on the application and open the panel on the right-hand side. In this panel, you can provide access to your GSuite users or groups that should have access to the app. You must also grant access to the "IAP-Secured Web App User." This user is responsible for accessing your application through the load balancer. Without this user's access, the load balancer won't be able to reach the app. (For more on granting access to your IAP secured app, refer to: https://cloud.google.com/iap/docs/managing-access)
With correct access permissions in place, you should be able to access your application after logging into your Google account.
Step 4: Adding IAP Support to Your Rails App
Now that your app is protected by IAP and exclusively receives authenticated and authorized traffic, it's necessary to validate this traffic (ensuring it originates from IAP) and extract the authenticated user's information (such as their GSuite email address).
This process involves reading the HTTP_X_GOOG_IAP_JWT_ASSERTION HTTP header, which IAP adds to all incoming traffic. The header should be verified against Google's public key, and user information can be extracted from it. There are various ways to implement this in Rails, but in this case, we're utilizing an ActiveSupport::Concern.
This code is meant to be saved as app/controllers/concerns/set_current_request_details.rb. In this example, I am retrieving the user's email address and use it to find the ::User record form database. You can skip this step if only having the email address is sufficient for your needs.
After saving it, include the SetCurrentRequestDetails module in your ApplicationController.
Almost there! With this setup, you can utilize Current.user throughout your application's controllers and views.
Before you proceed with this implementation, you need to add one configuration setting to your app: the valid JWT audience.
As demonstrated in the example, I'm retrieving this value from Rails encrypted settings. However, you can securely deliver this information to your app using any preferred method. If you are using Cloud 66 for deployment, you can leverage account secrets, secure environment variables, Rails encrypted secrets, or integrate with secret providers like Doppler or Infisical.
To add this value to your Rails encrypted secrets, open the credentials file:
Within the file, create a new key named iap_aud. To obtain the IAP JWT audience for your app, click on the ellipsis icon next to the app and select the "Get JWT audience code" option:

Copy the audience value and assign it to the iap_aud key in the credentials file. Save and close the file.
And that's it!
In my example, I've implemented a fixed user based on the
USERenvironment variable when the app runs in non-production environments. This approach ensures compatibility since the header is absent when the app is not behind IAP. You can use whatever approach that suits your needs. Additionally, note that I've included an exception for thehealth_checkaction to facilitate load balancer health checks. As this exception is part of the Concern, you can include thehealth_checkmethod in any controller inheriting from yourApplicationController.