

In this post, I'll be walking you through the steps needed to install NewRelic on your docker stack using deploy hooks.
For any of you unfamiliar with NewRelic, they're a San Francisco based analytics software company, which helps you monitor your web server or mobile app's performance. They've got some pretty cool kit that does everything from monitoring critical transactions, to identifying performance bottlenecks across your microservices.
This guide will help you install the tools for monitoring your server. It's worth mentioning that to add monitoring to your application, you will need to apply some additional configuration, which is not covered in the scope of this post.
So to get started, first you'll need to create a new docker stack, provide the relevant git information or the docker image, and any databases your application might need. Once you go to the next step, your custom git repository will be created and on the side bar on the right you should see:
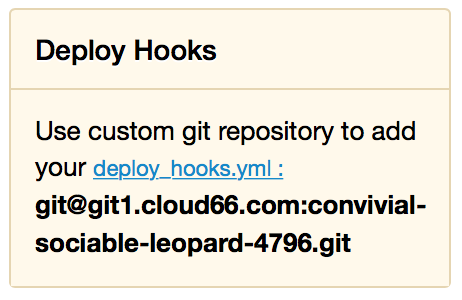
Since Docker stacks don't have a git repository by default, we create one for you to use for your deploy hooks amongst another things.
This of course apples to existing stacks as well. You can find your repository in Settings & Information > Information > CustomConfig git.
The first thing to do is to clone this repository on your machine:
Then create a new file in that folder called
deploy_hooks.ymland add the following:Then add this file to the git repository with:
Check that is has been added:
And then commit to the repository and push:
Back on the Cloud 66 stack creation page, click on the: Add environment variables button on the right, to add a new one called
NEWRELIC_KEYwith your key from NewRelic.