
This article will step you through the process of creating a web application using Phoenix, developing it locally using Docker & Docker Compose , and deploying your Phoenix application to your choice of cloud vendor using Cloud 66.
Along the way, we'll touch on a few helpful tips. You can find the example code on Github.
What is Phoenix?
Phoenix is a productive web framework that does not compromise speed and maintainability. It brings back the simplicity and joy in writing modern web applications by mixing tried and true technologies with a fresh breeze of functional ideas.
Phoenix leverages the Erlang VM ability to handle millions of connections alongside Elixir's beautiful syntax and productive tooling for building fault-tolerant systems.
Dive into Containers!
Before we can write our first Phoenix app, we need a development environment.
With Docker and Docker Compose you can setup a dev environment in minutes. Take a quick look at the Dockerfile.development file and the docker-compose.yml to bring up a dev environment.
Dockerfile.development
# base image elixer to start with
FROM elixir:1.4.4

# install hex package manager
RUN mix local.hex --force

# install the latest phoenix
RUN mix archive.install https://github.com/phoenixframework/archives/raw/master/phoenix_new.ez --force

# install node
RUN curl -sL https://deb.nodesource.com/setup_6.x -o nodesource_setup.sh
RUN bash nodesource_setup.sh
RUN apt-get install nodejs

# create app folder
RUN mkdir /app
COPY . /app
WORKDIR /app

# install dependencies
RUN mix deps.get

# install node dependencies
RUN npm install
RUN node node_modules/brunch/bin/brunch build

# run phoenix in *dev* mode on port 4000
CMD mix phoenix.server
Docker Compose gives you the flexibility to spin-up the Phoenix service and the supporting backend.
version: '2'
services:
  phoenix:
    # tell docker-compose which Dockerfile it needs to build
    context:
      build: .
      dockerfile: Dockerfile.development
    # map the port of phoenix to the local dev port
    ports:
      - "4000:4000"
    # mount the code folder inside the running container for easy development
    volumes:
      - .:/app
    # make sure we start postgres when we start this service
    depends_on:
      - postgres
  postgres:
    # use postgres 9.3.17
    image: postgres:9.3.17-alpine
    # map the data volume, this is the way to keep our data persisitent
    volumes:
       - db_data:/var/lib/postgresql/data
    # set the user and password for postgres
    environment:
      - POSTGRES_PASSWORD=secret
      - POSTGRES_USER=phoenix
# create a named datavolume
volumes:
    db_data:
Developing your Phoenix app with Container
Before we can start coding, we need to build our image. You need to run $ docker-compose build. After the build we need to create the database as defined in dev.exs. You can see in the dev.exs it's matching the credentials which are defined in the docker-compose.yml
First, we need to start PostgreSQL database and let it running in the background.
$ docker-compose up -d postgres
You can check the logs if PostgreSQL is up and running:
$ docker-compose logs postgres
After the database is up and running we can run mix commands using our build image in a running container. First we create the database:
$ docker-compose run phoenix mix ecto.create
And run the migrations.
$ docker-compose run phoenix mix ecto.migrate
Let start our development enviroment and run it on port 4000.
$ docker-compose up phoenix
This command will run the Phoenix service and make it easy to stop it. Just press Ctrl-C and you're existing the running Phoenix process.

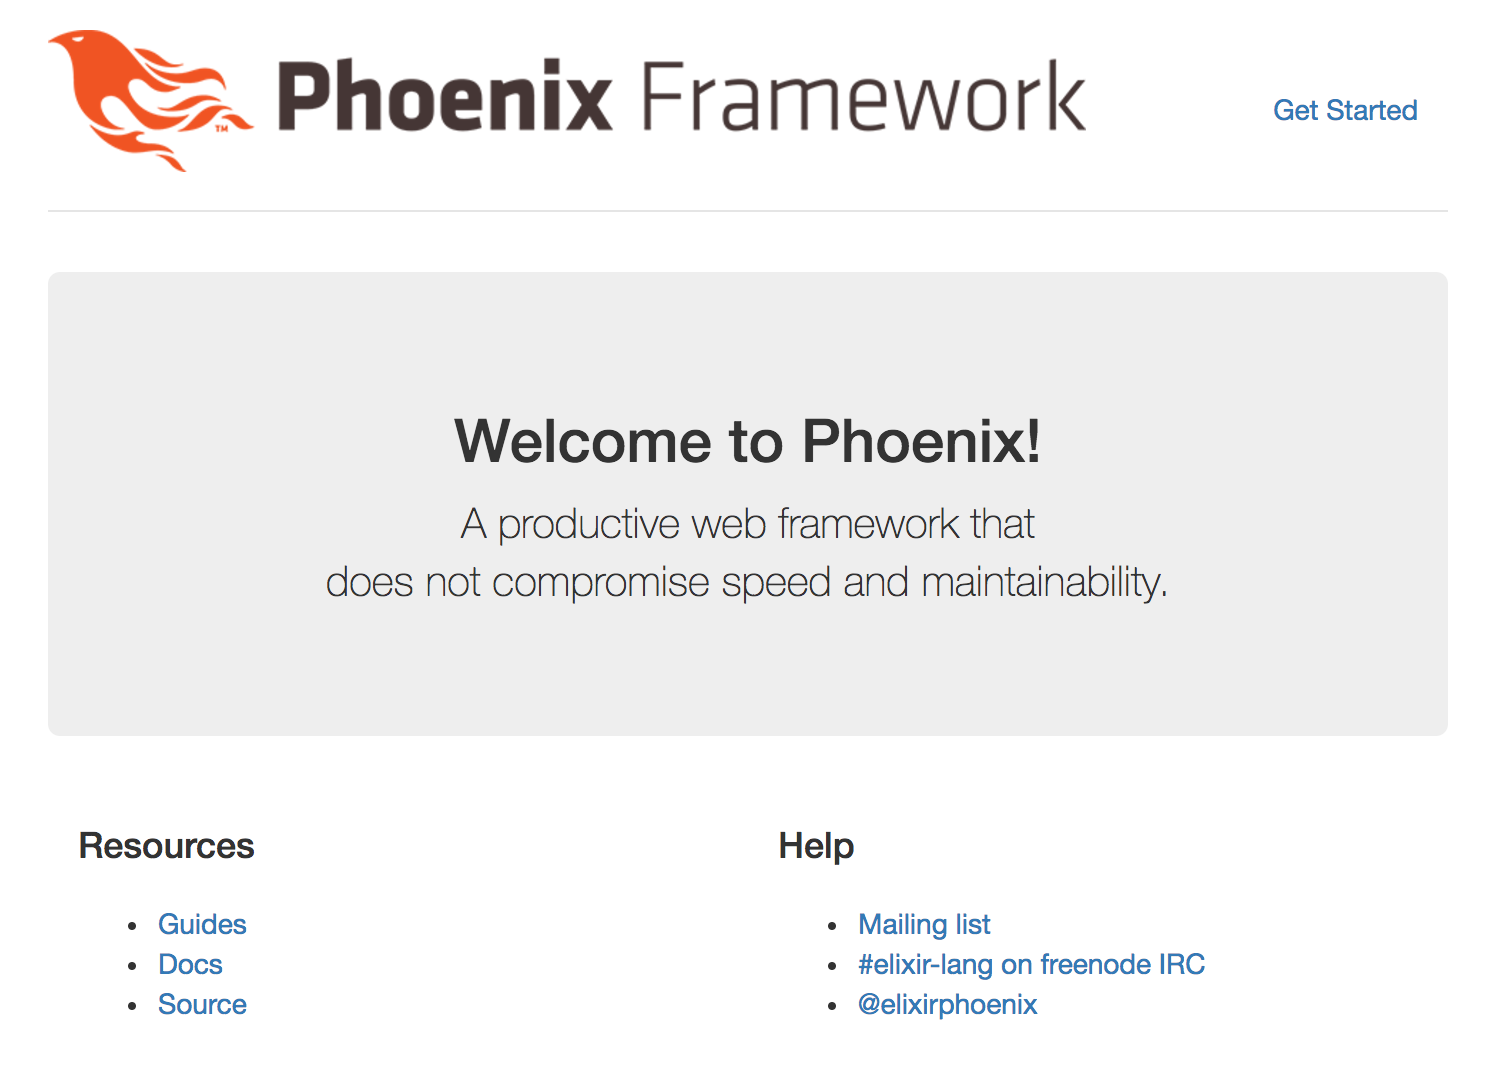
Hit http://localhost:4000/ to see a nice Phoenix welcome screen!
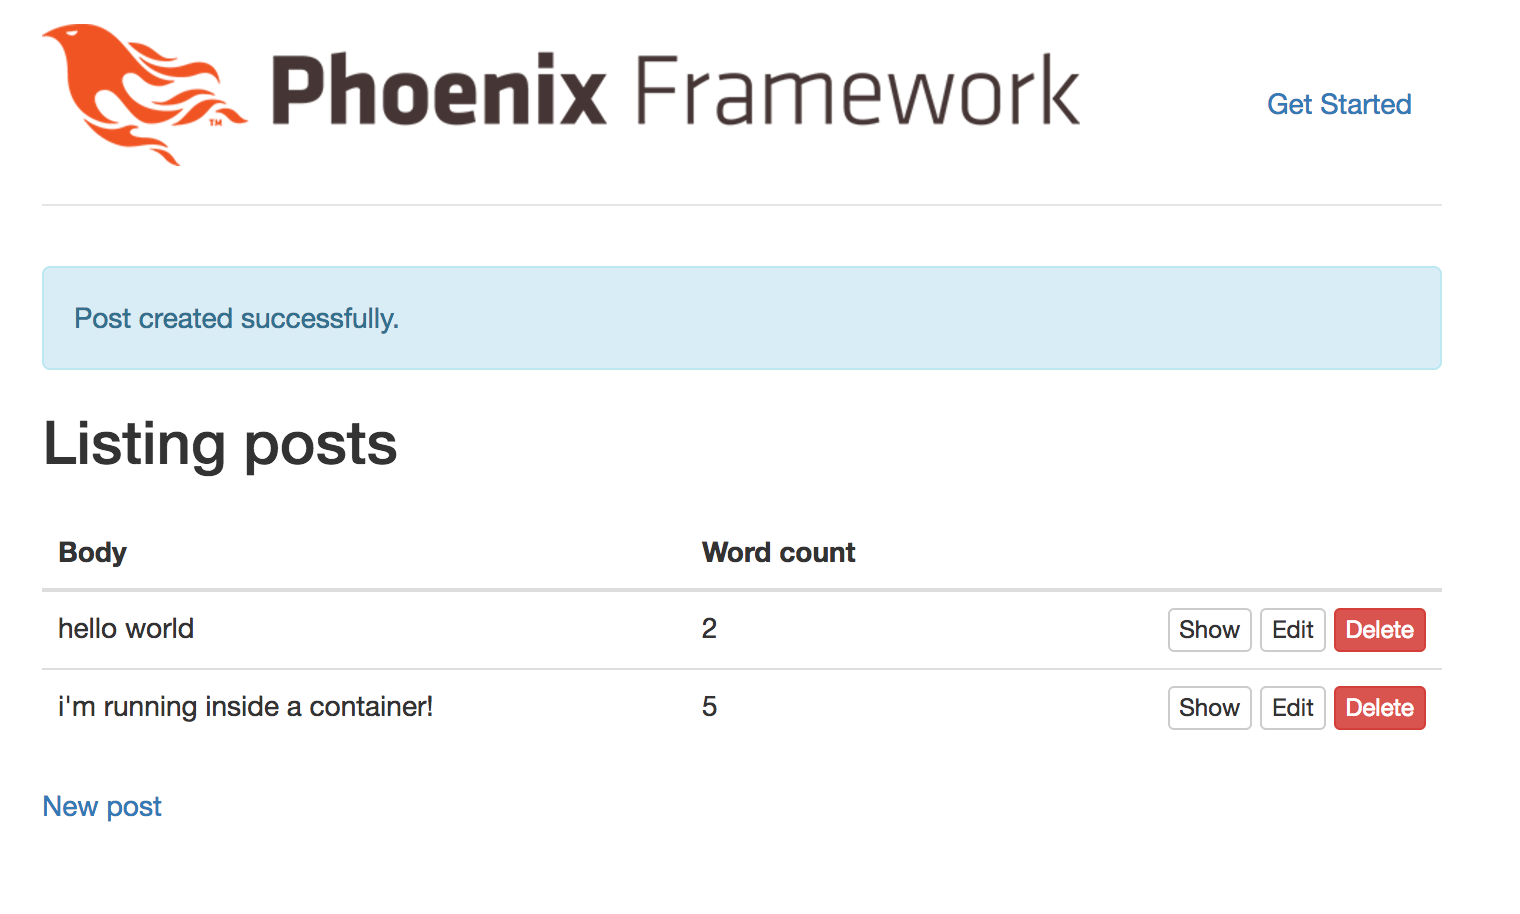
The provided example already has a Post model with all the CRUD actions. Hit http://localhost:4000/posts.
You can start coding right away! If you want to run a scaffolding action, you just run it against a new running Phoenix container. Just run our Phoenix service, in a separated terminal:
$ docker-compose run phoenix bash
And 'inside' the running container you can run your mix commands:
Create a new scaffold!
mix phoenix.gen.html Post posts body:string word_count:integer
Run the migrations
mix ecto.migrate
Happy coding!
Deploying your containerized Phoenix application in production
When you done developing your probably want to deploy your Phoenix application in the cloud or on your own bare metal server. Cloud 66 will provide you will at the tools to make this really easy.
The only thing we need is a Dockerfile for production-ready Phoenix.
# base image elixer to start with
FROM elixir:1.4.4

# install hex package manager
RUN mix local.hex --force

# install phoenix
RUN mix archive.install https://github.com/phoenixframework/archives/raw/master/phoenix_new.ez --force

# install node
RUN curl -sL https://deb.nodesource.com/setup_6.x -o nodesource_setup.sh
RUN bash nodesource_setup.sh
RUN apt-get install nodejs

# create app folder
RUN mkdir /app
COPY . /app
WORKDIR /app

# setting the port and the environment (prod = PRODUCTION!)
ENV MIX_ENV=prod
ENV PORT=4000

# install dependencies (production only)
RUN mix local.rebar --force
RUN mix deps.get --only prod
RUN mix compile

# install node dependencies
RUN npm install
# build only the things for production
RUN node node_modules/brunch/bin/brunch build --production

# create the digests
RUN mix phoenix.digest

# run phoenix in production on PORT 4000
CMD mix phoenix.server
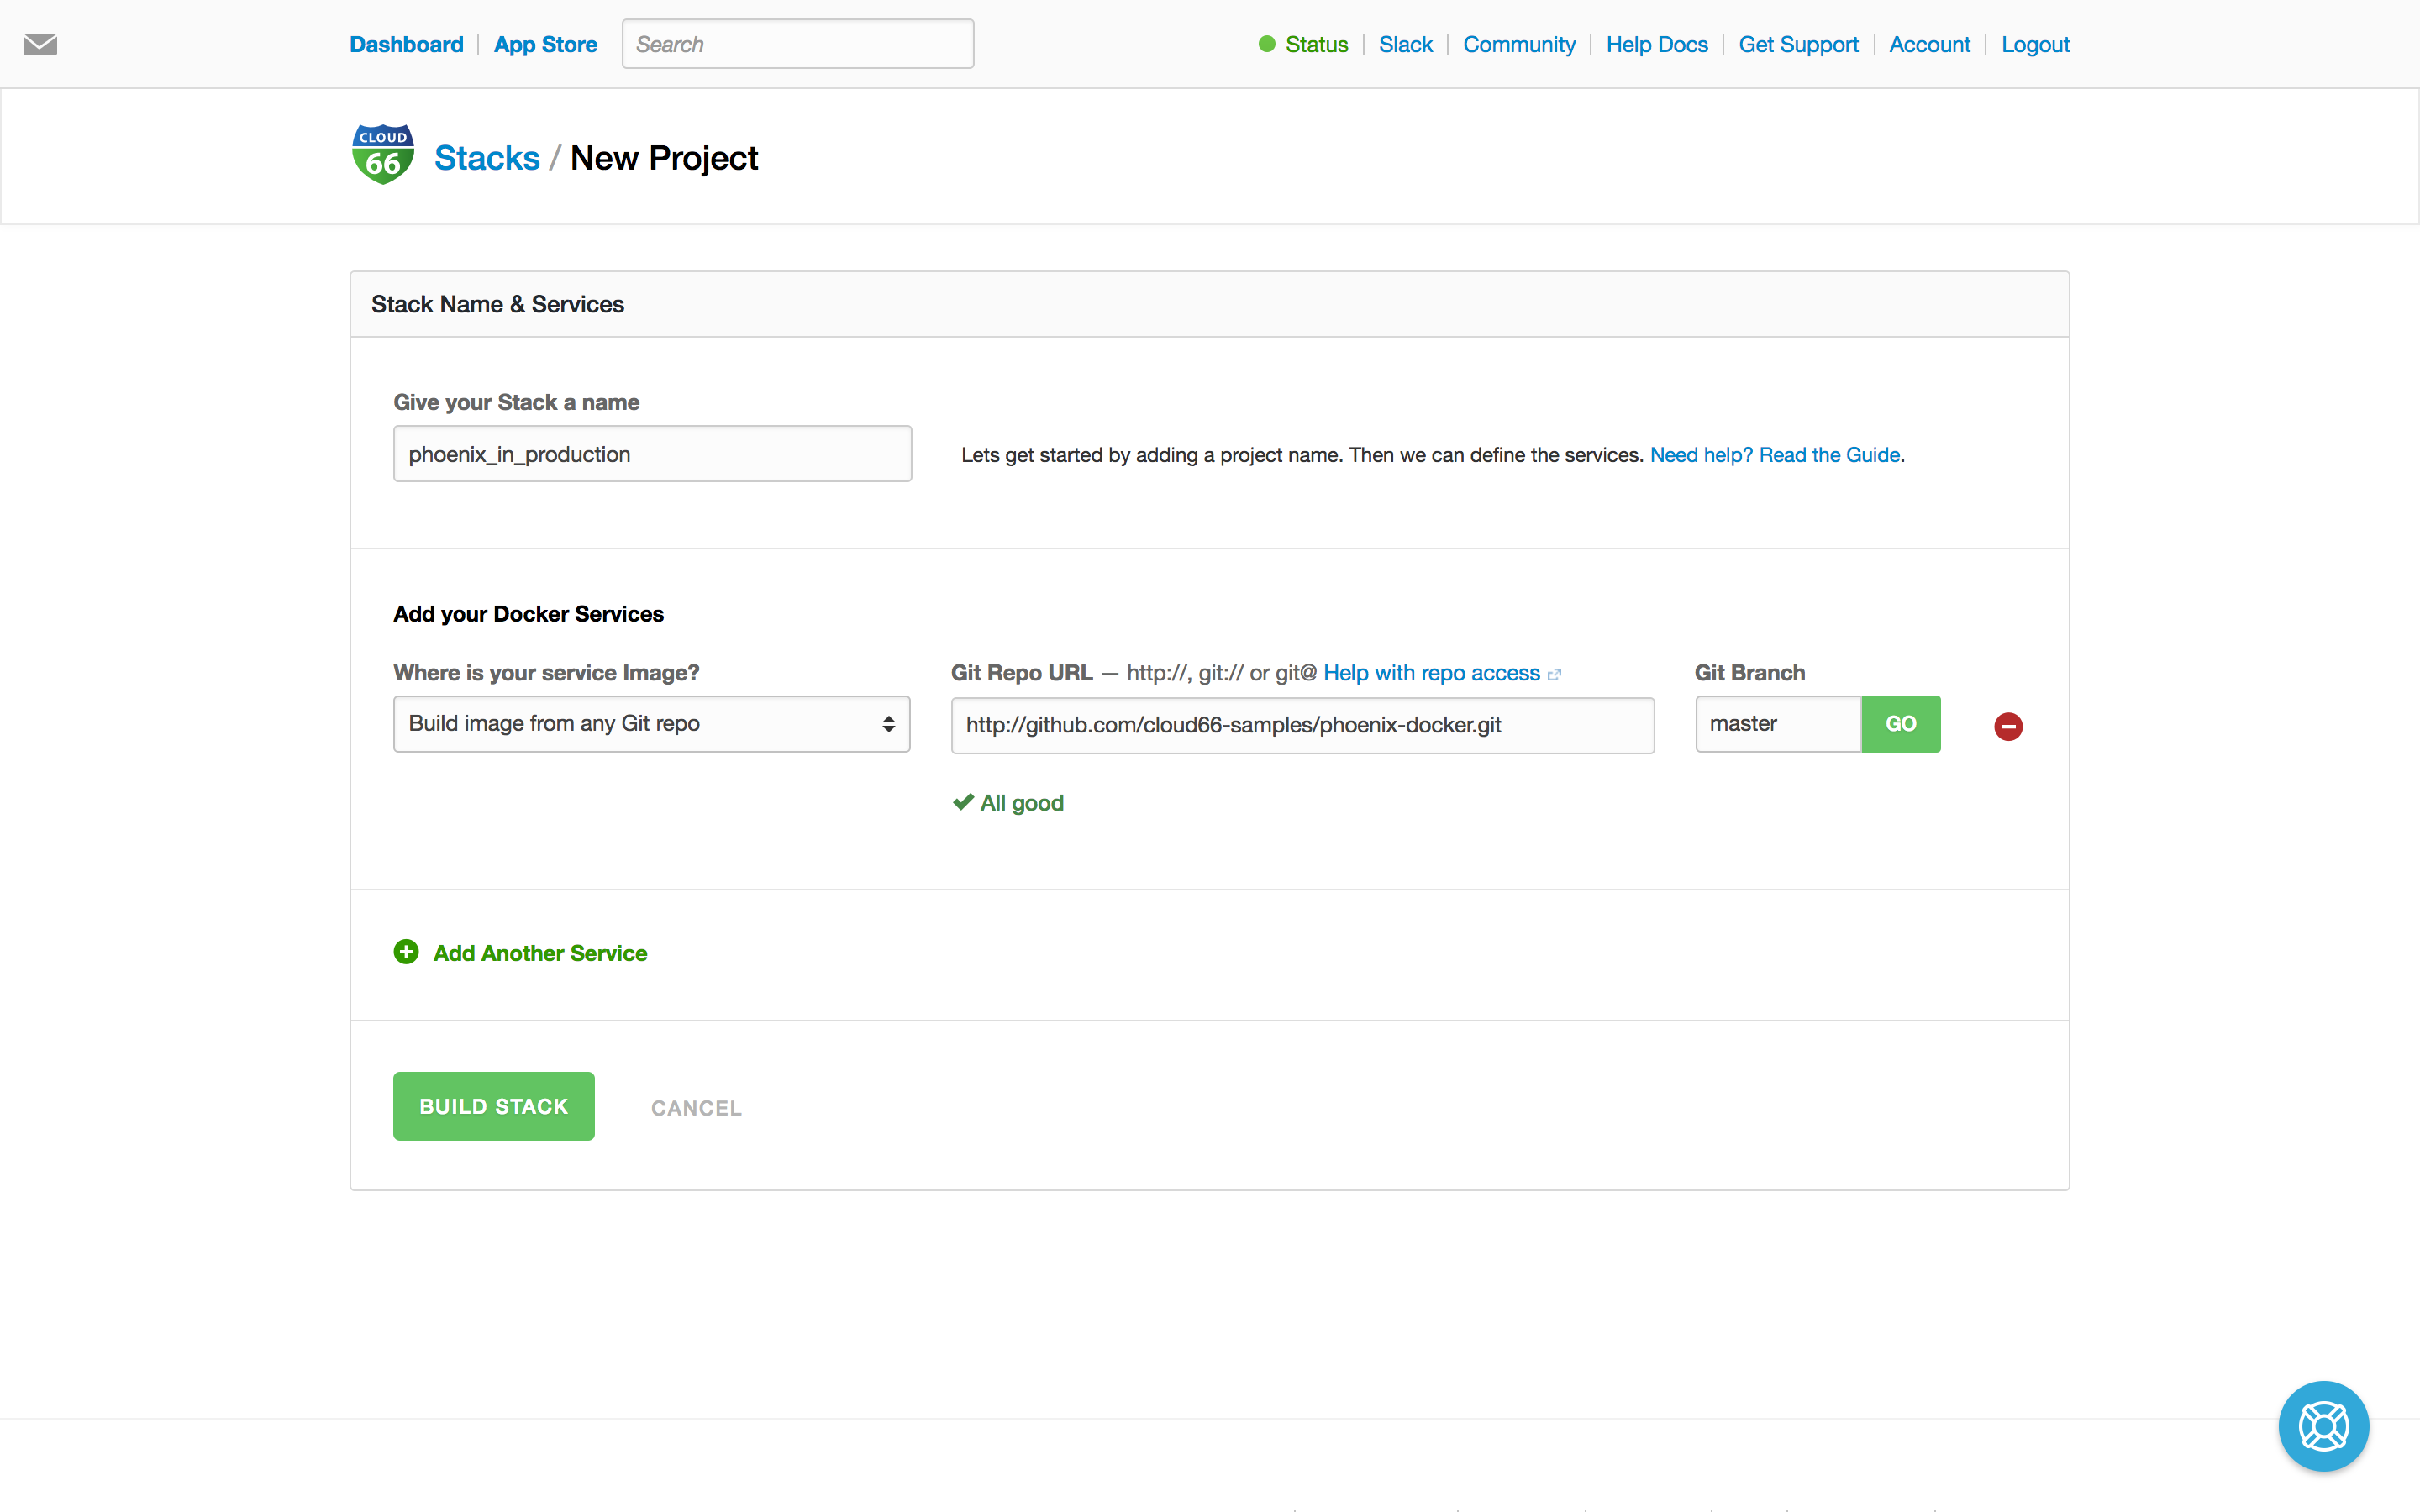
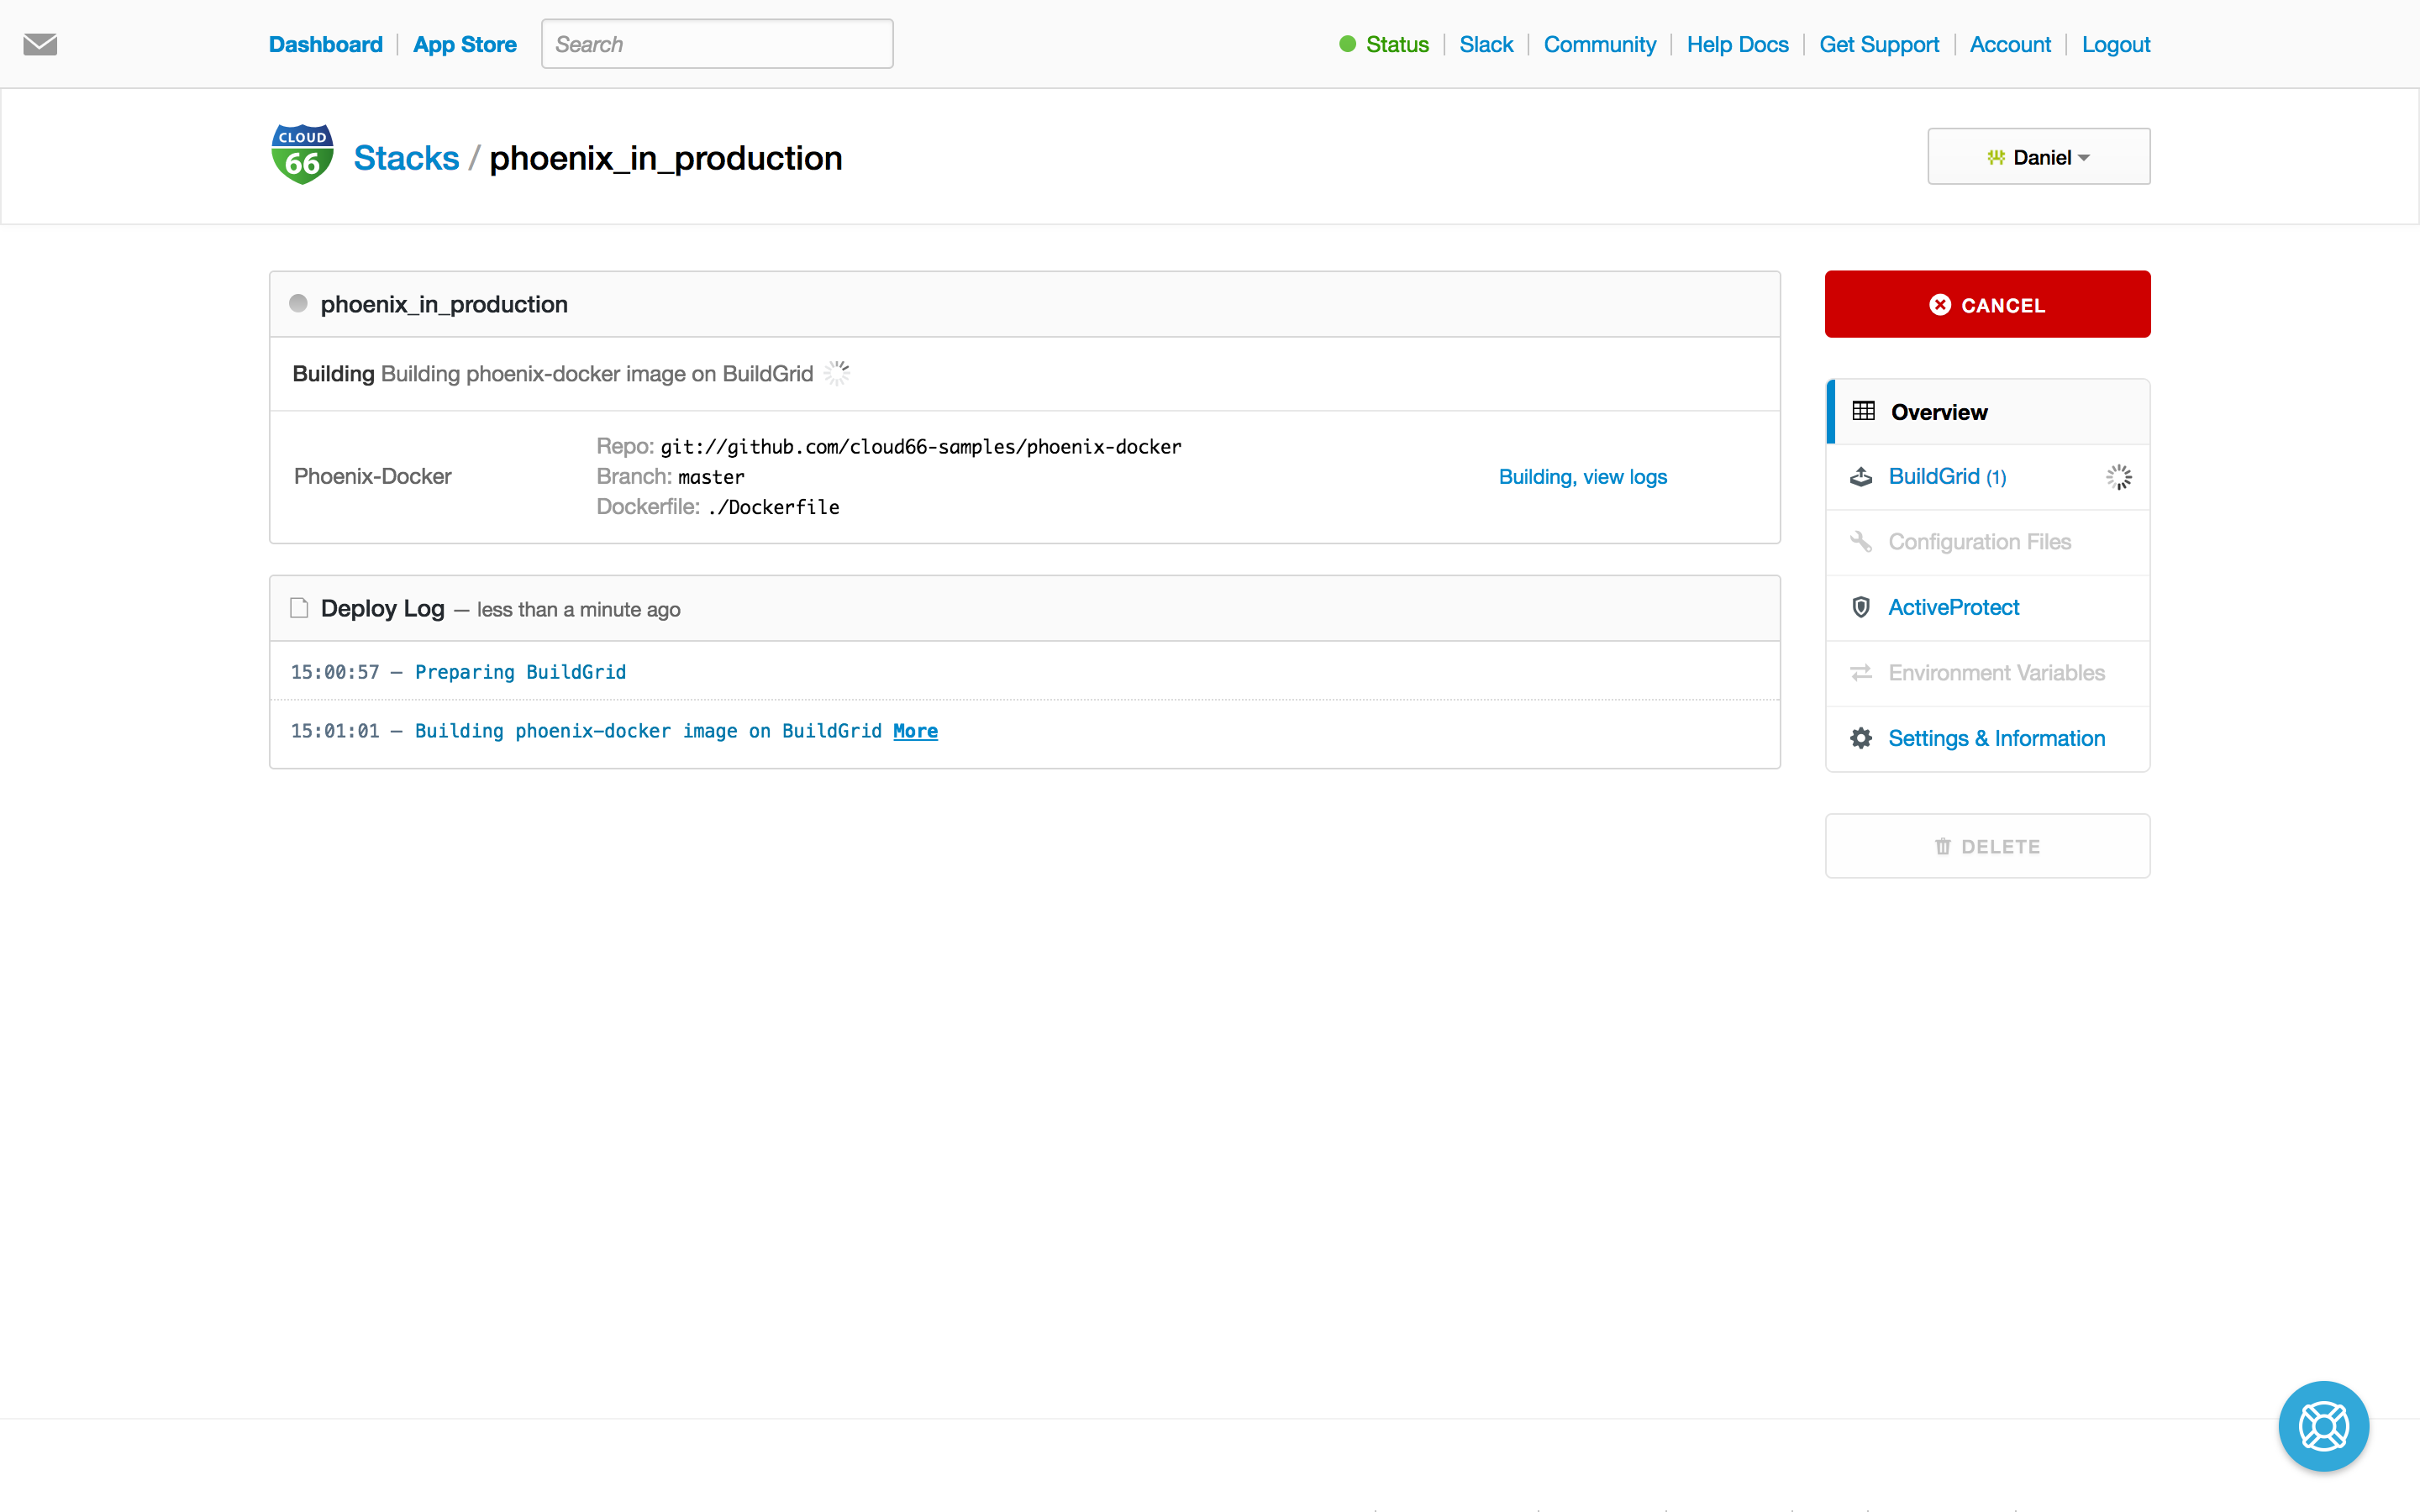
The Dockerfile is picked-up by Cloud 66 and will build the production ready image for you using Build Grid. To get started with Cloud 66 we create a new Container stack. Just give your stack a name, enter your Git repository and Cloud 66 will analyse your Git repository and will start building your image.
Building in progress...
Building done.
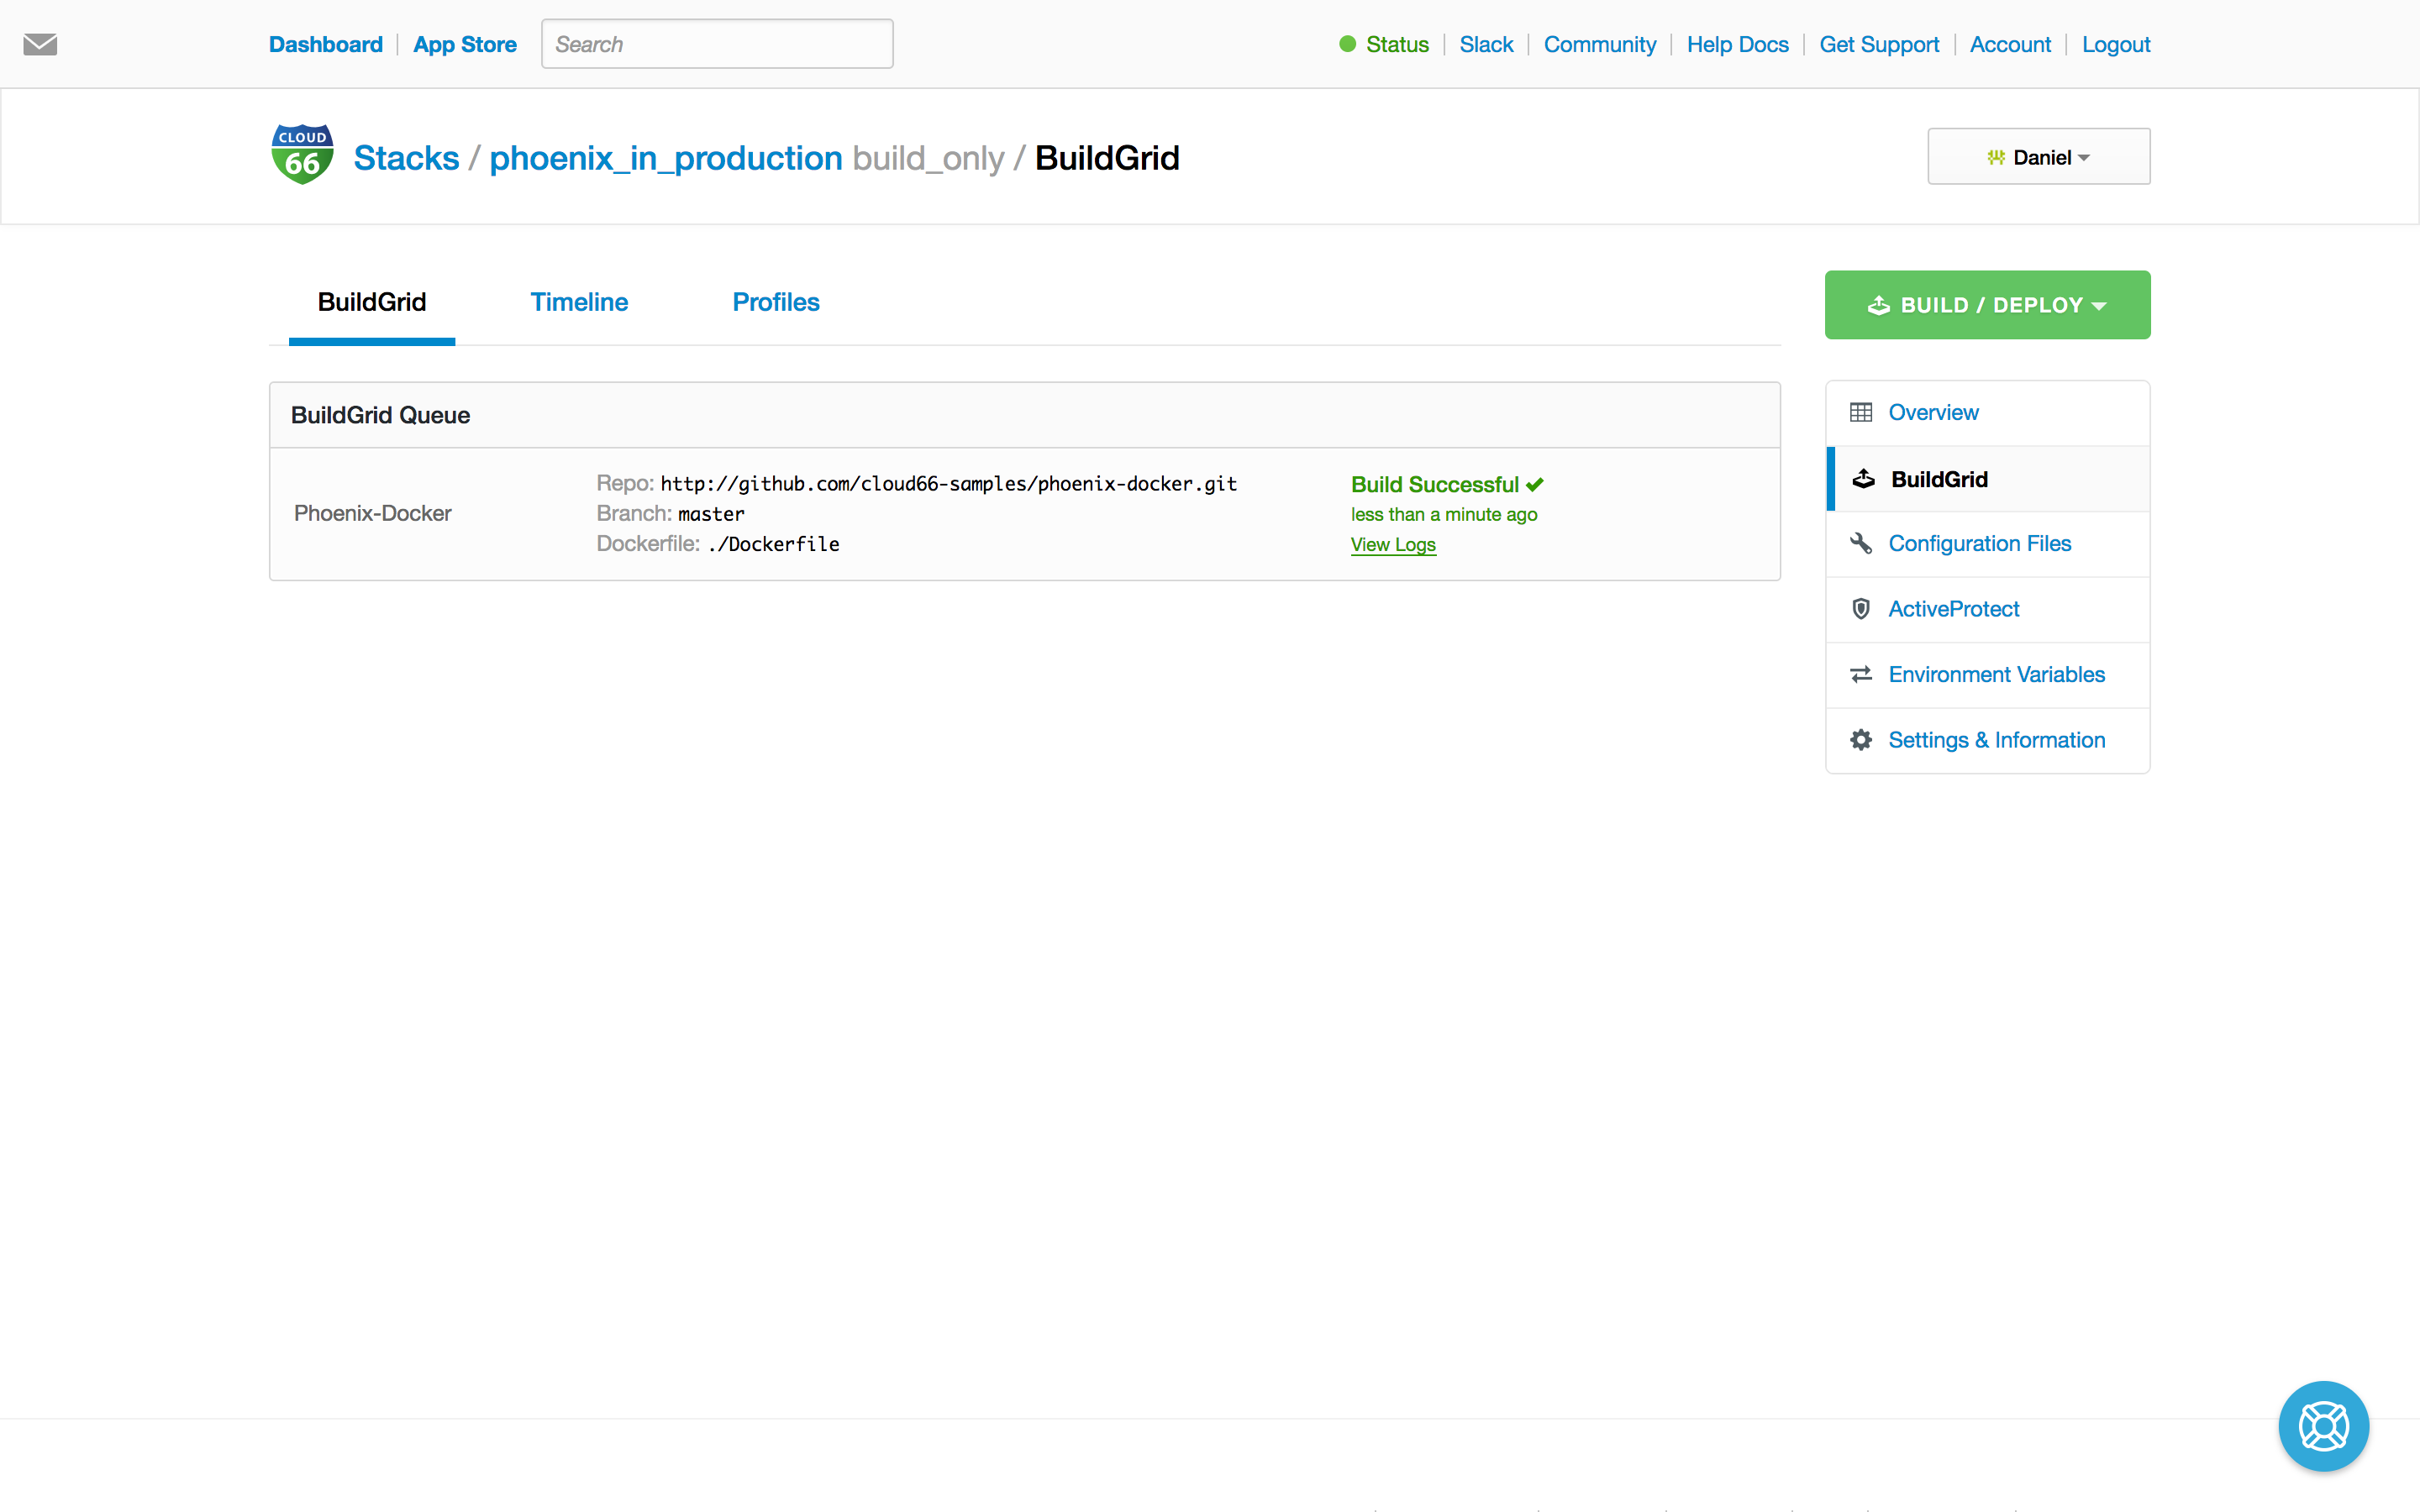
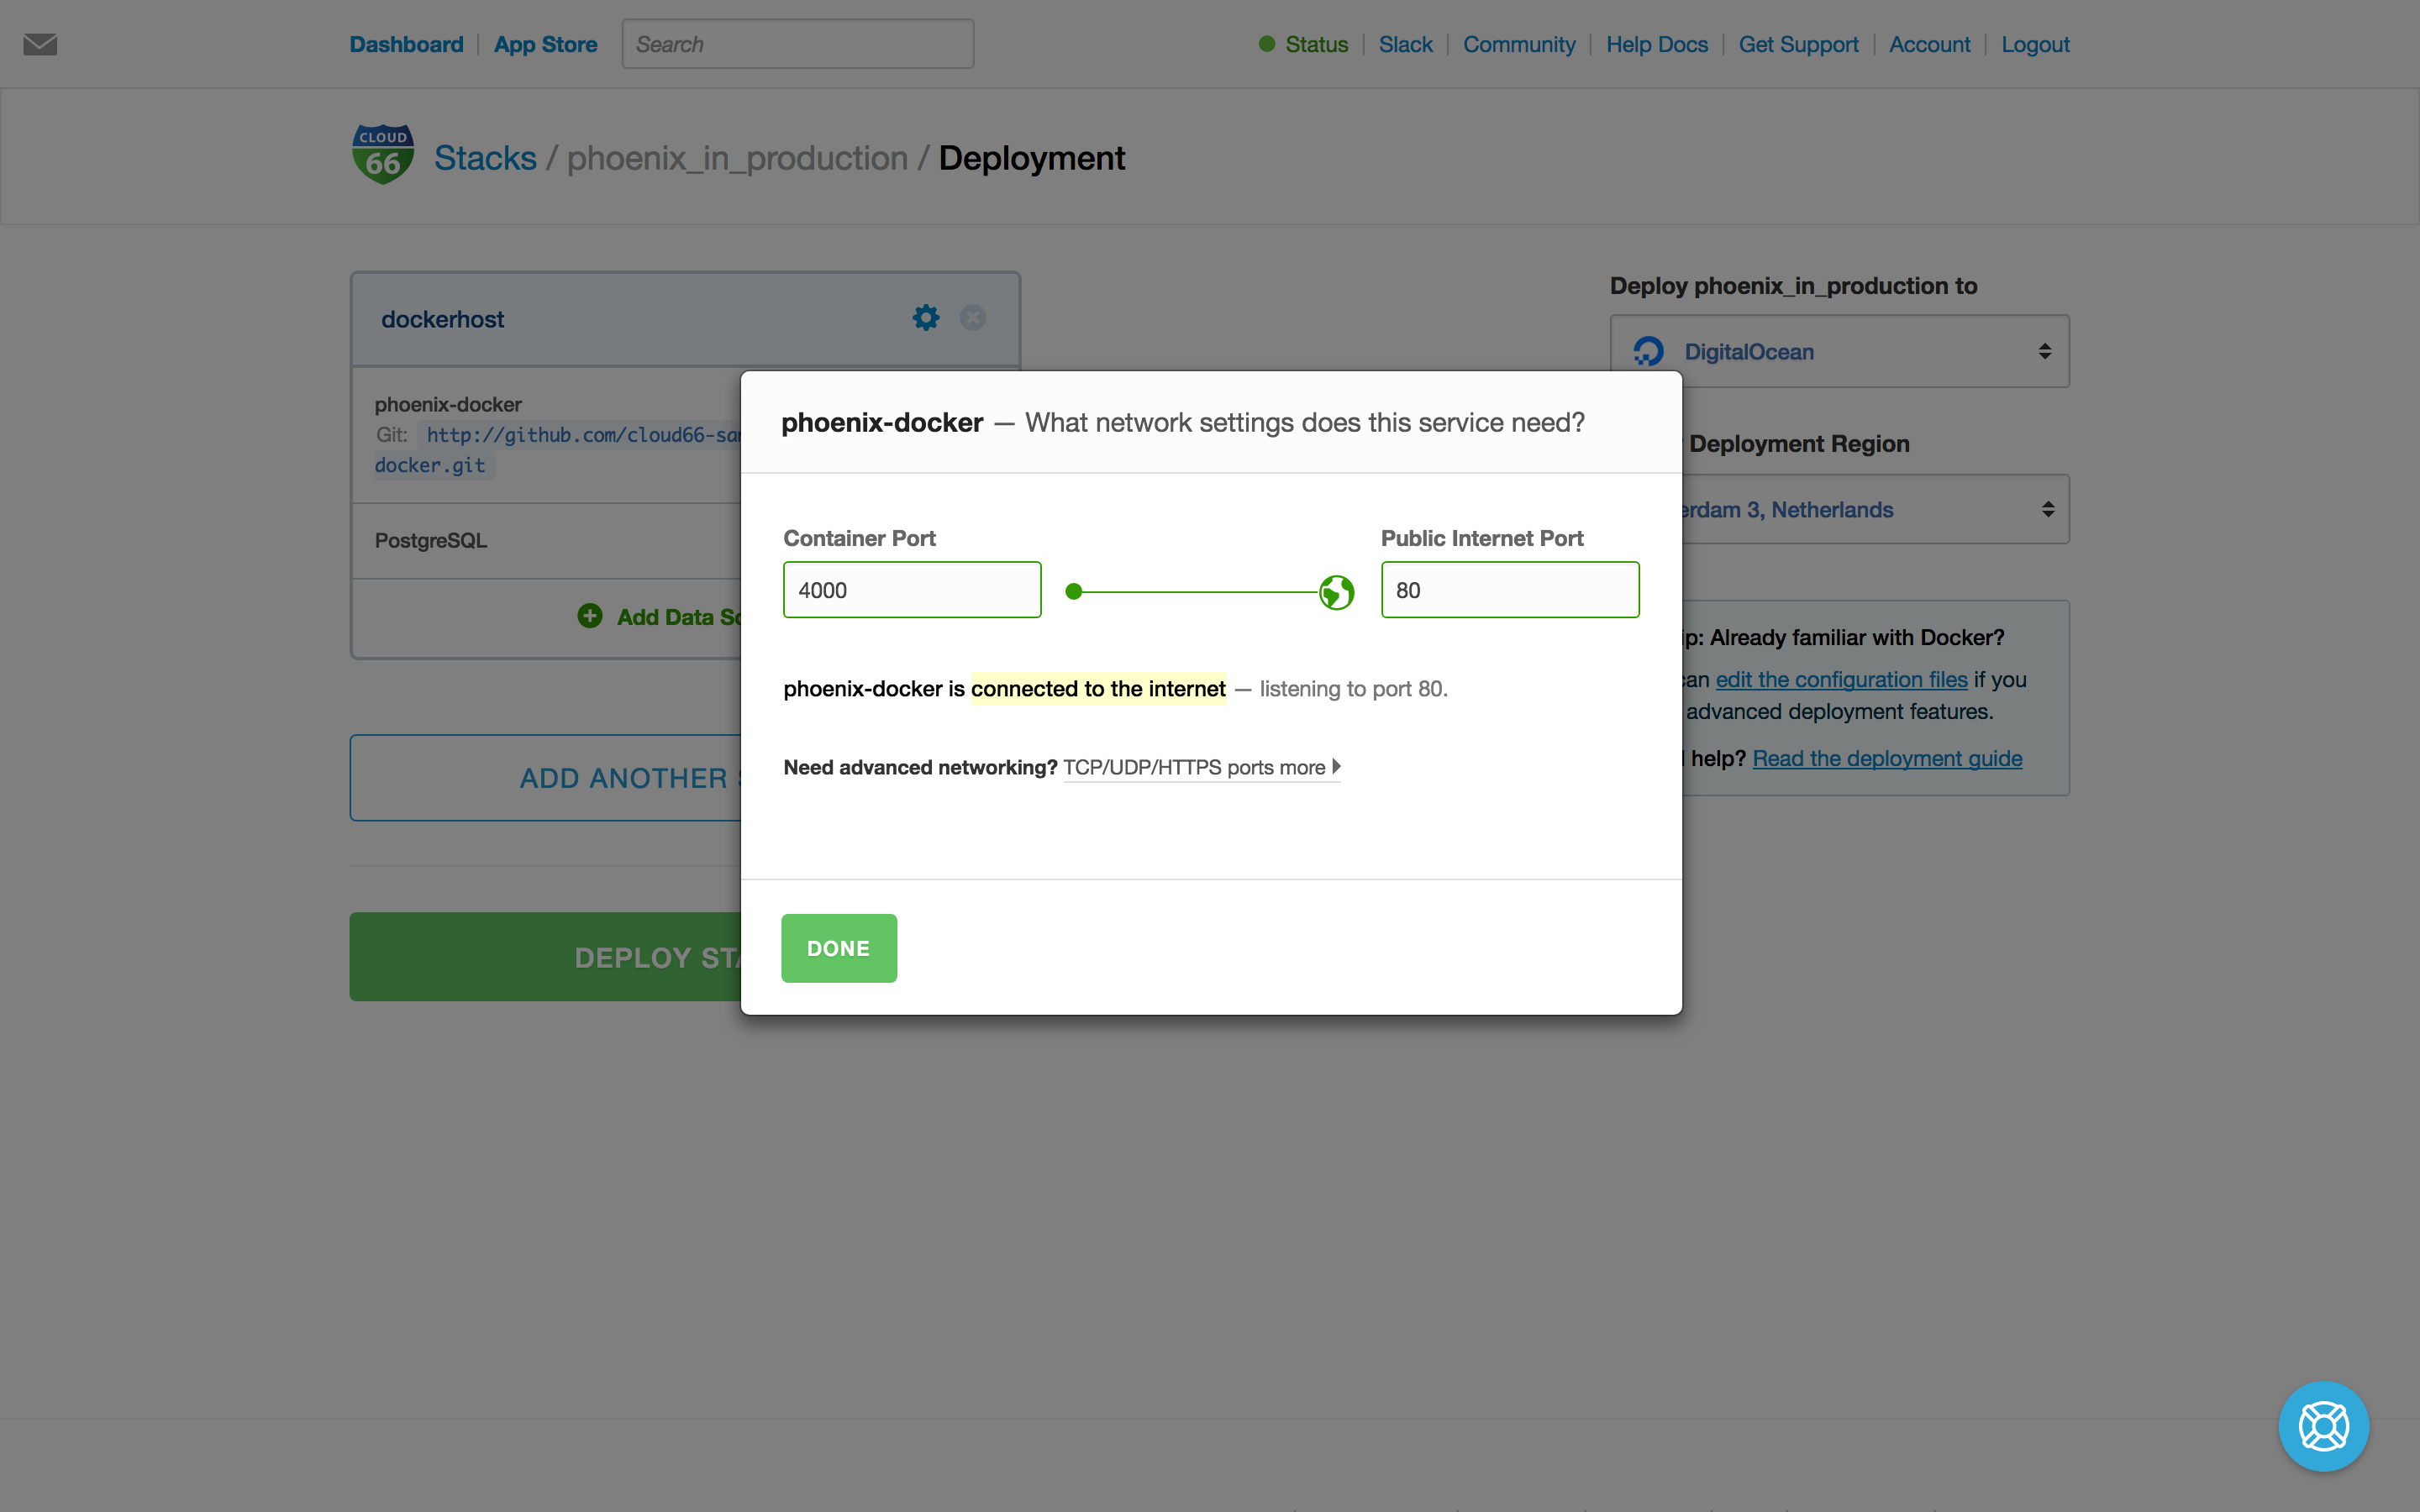
After building, we set up the services (port settings) and select the cloud provider of choice.
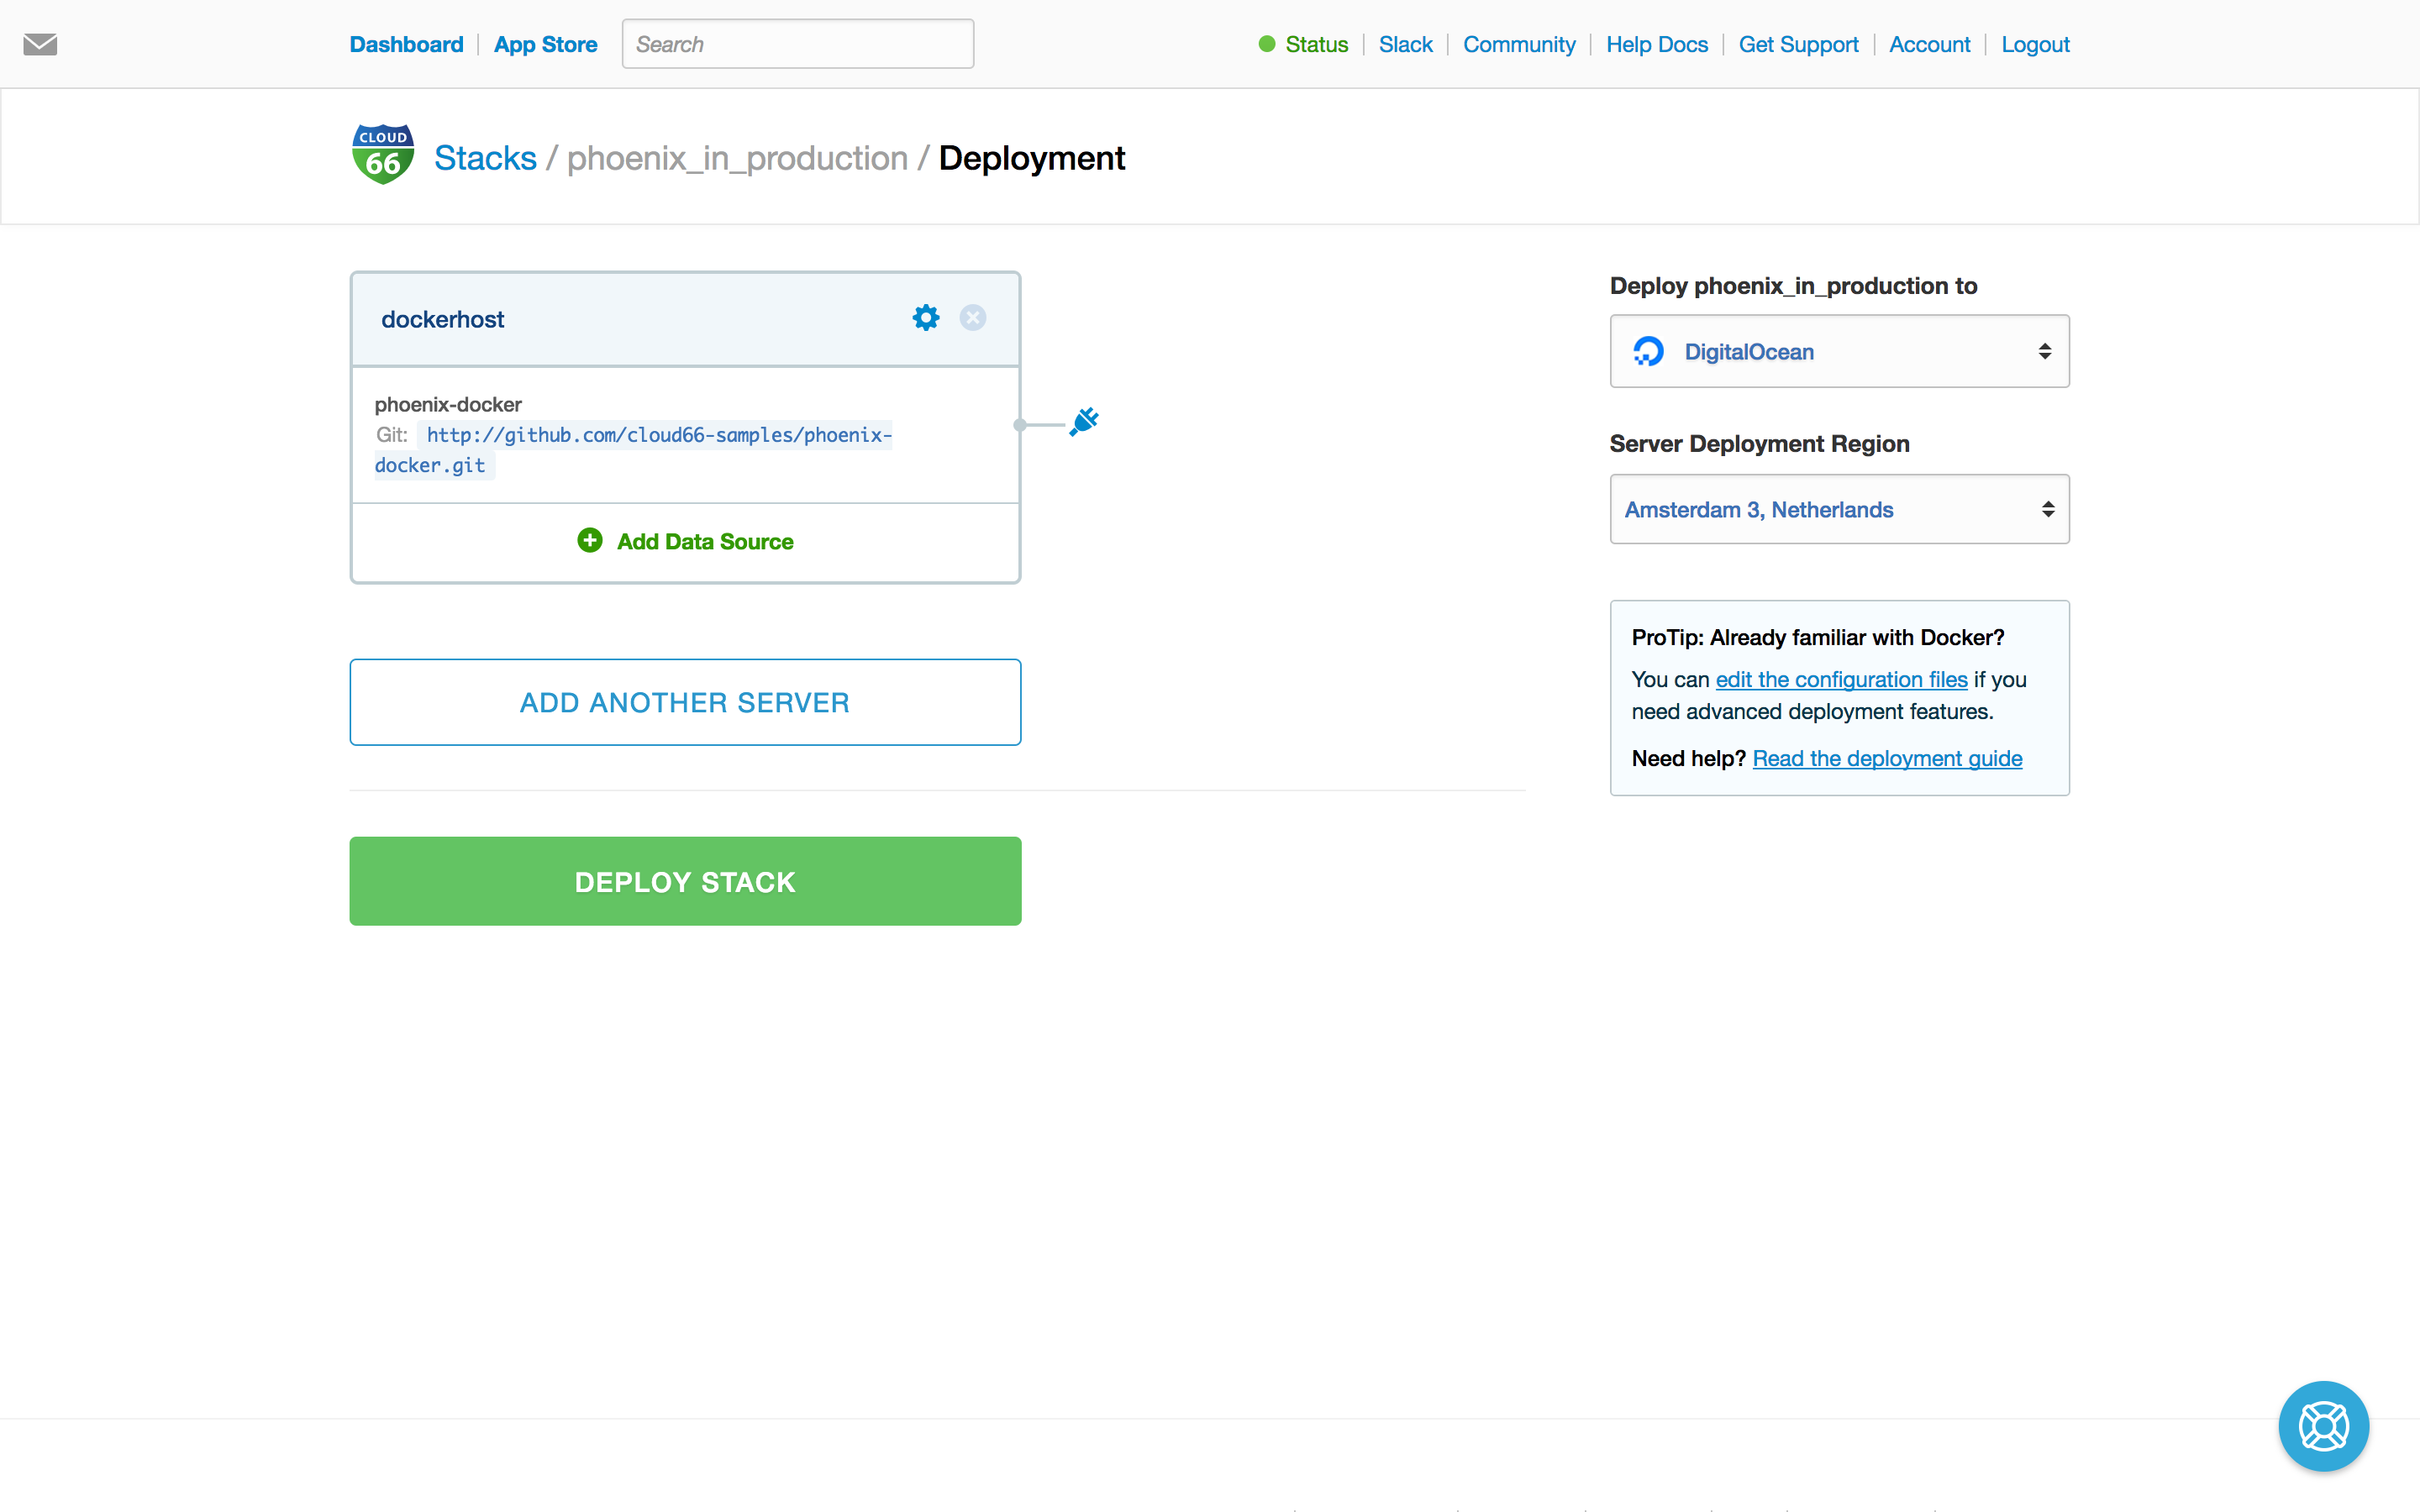
And select PostgreSQL for our backend, it's good to know we deploy databases nativaly and not in containers, giving you all the nice features of our platform like database replication, backup and restore.

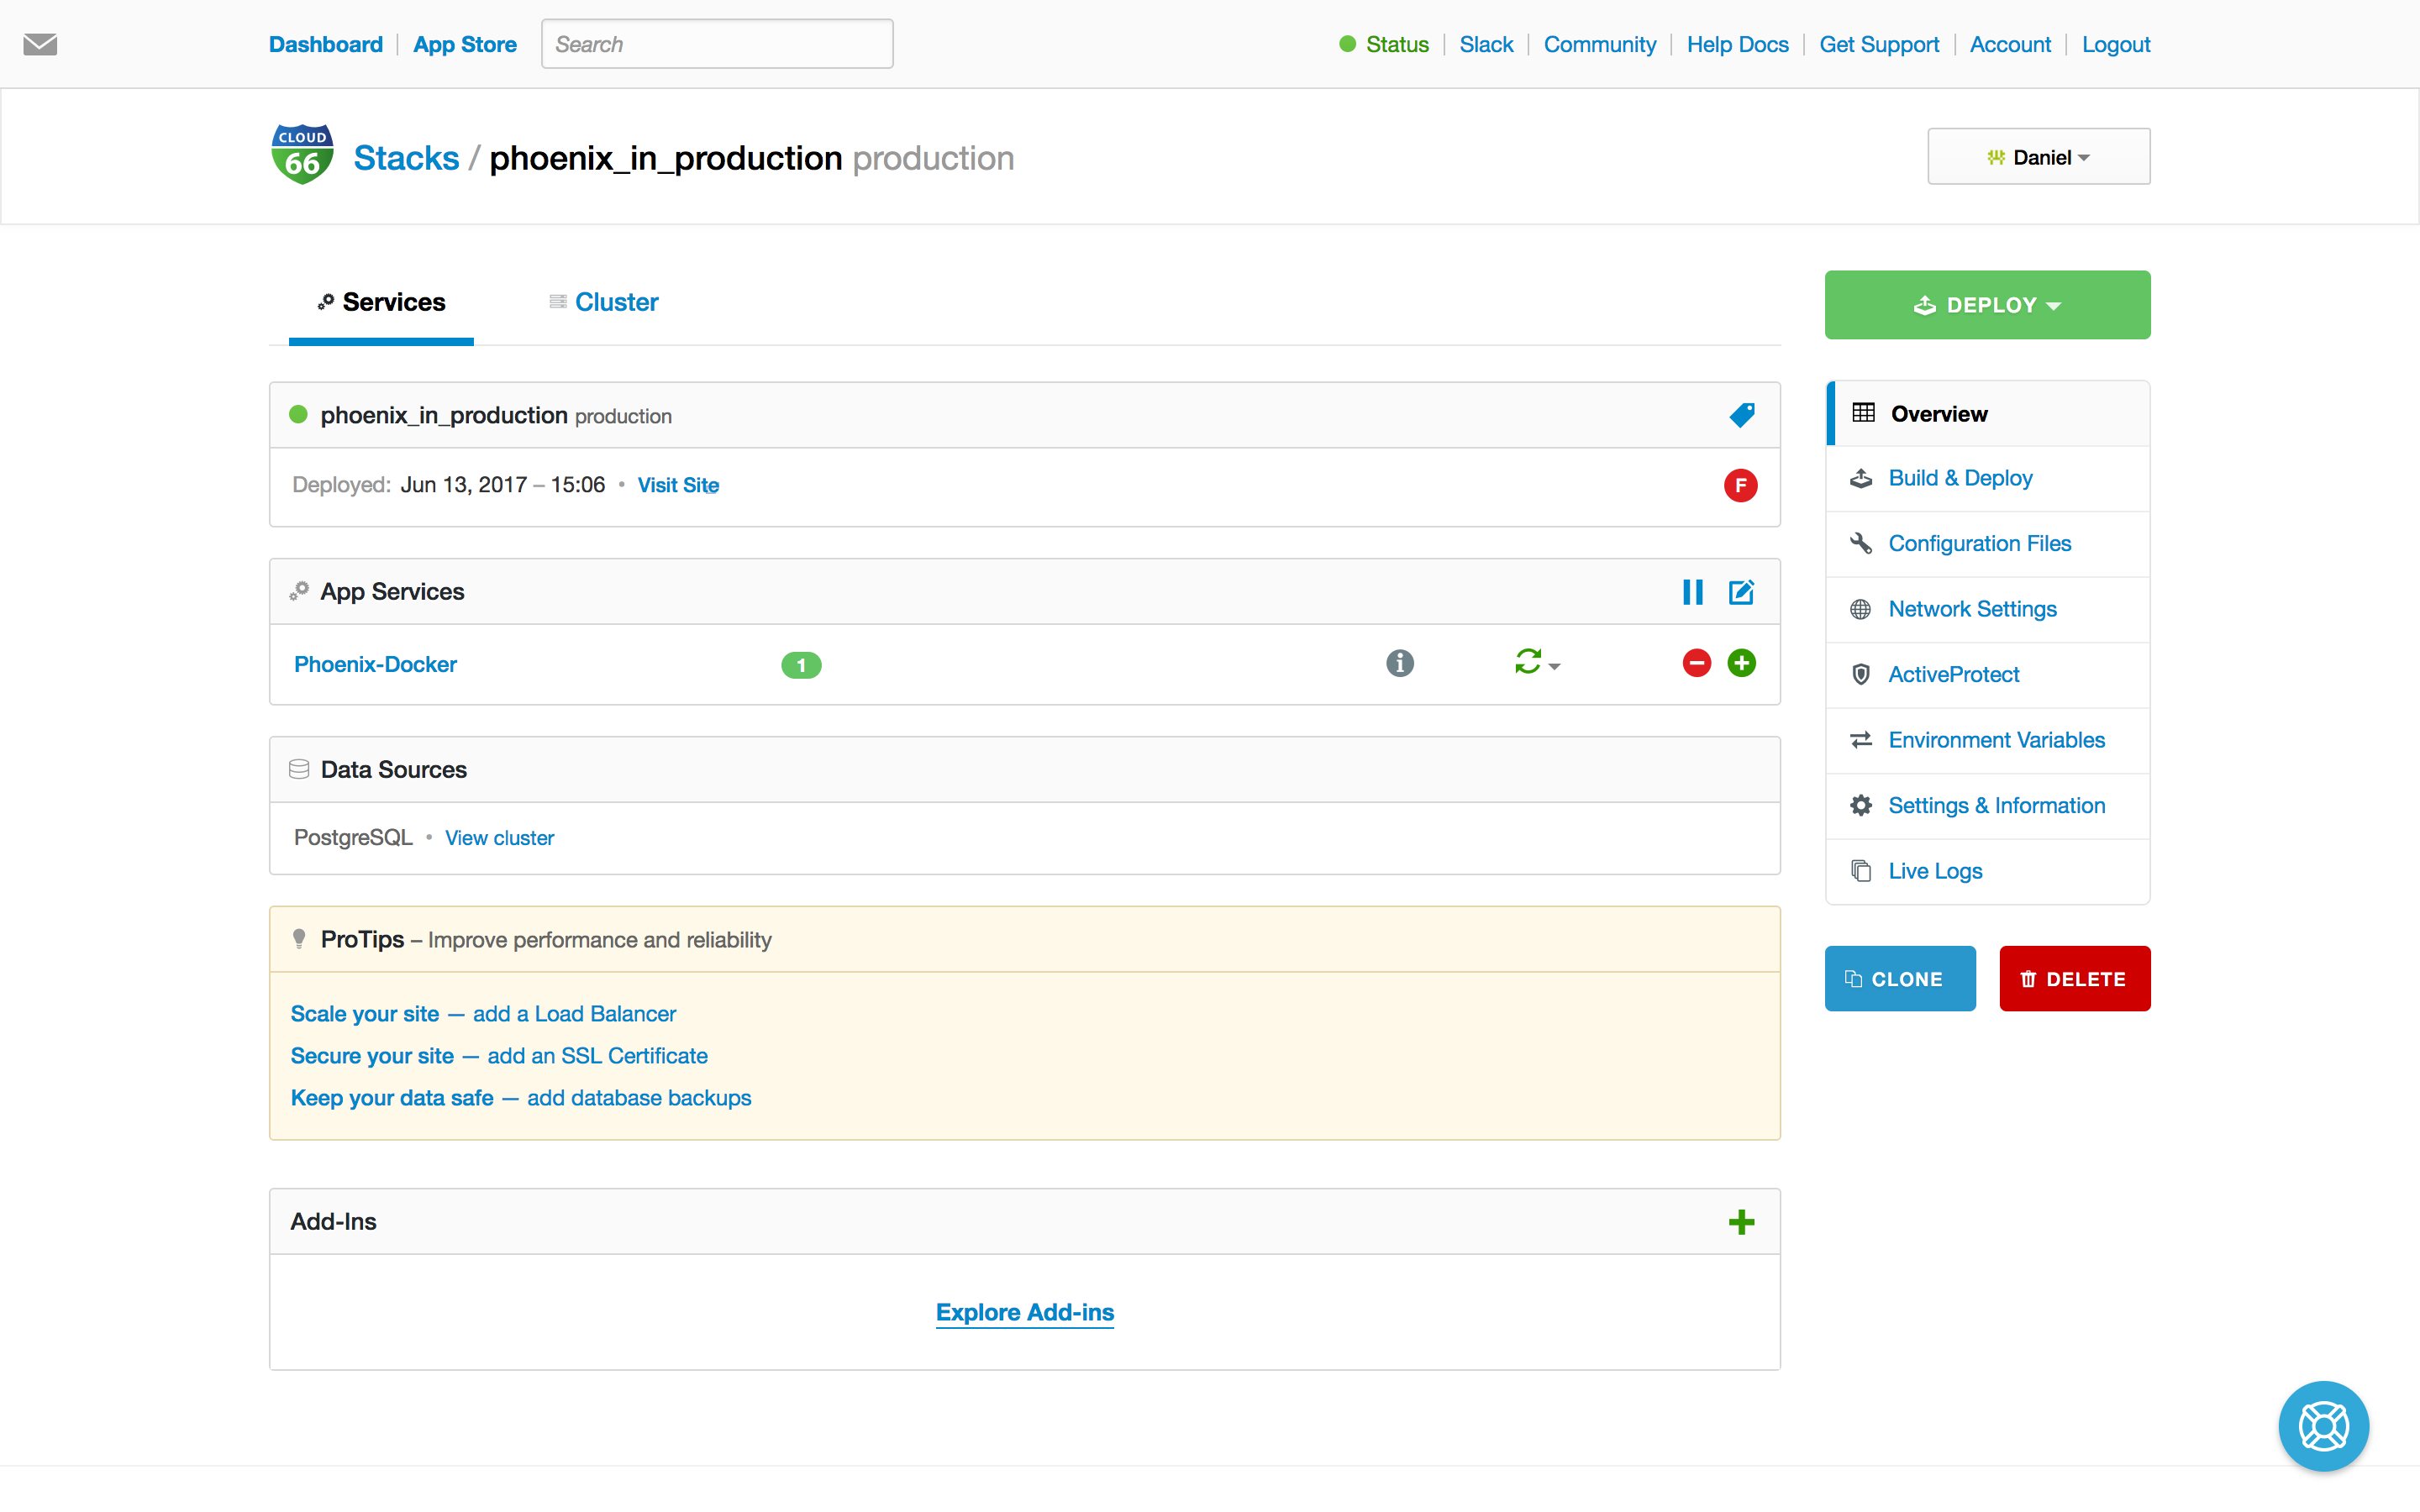
We hit Deploy Stack and let Cloud 66 do all the heavy lifting provisioning all the servers and components. After a couple of minutes, your stack is ready!
Don't forget to inject the environment variablesCloud 66 expose with all the DB credentials into your prod.secret.exs.
- POSTGRESQL_ADDRESS
- POSTGRESQL_DATABASE
- POSTGRESQL_PASSWORD
- POSTGRESQL_USERNAME
For example:hostname: System.get_env("POSTGRESQL_ADDRESS")
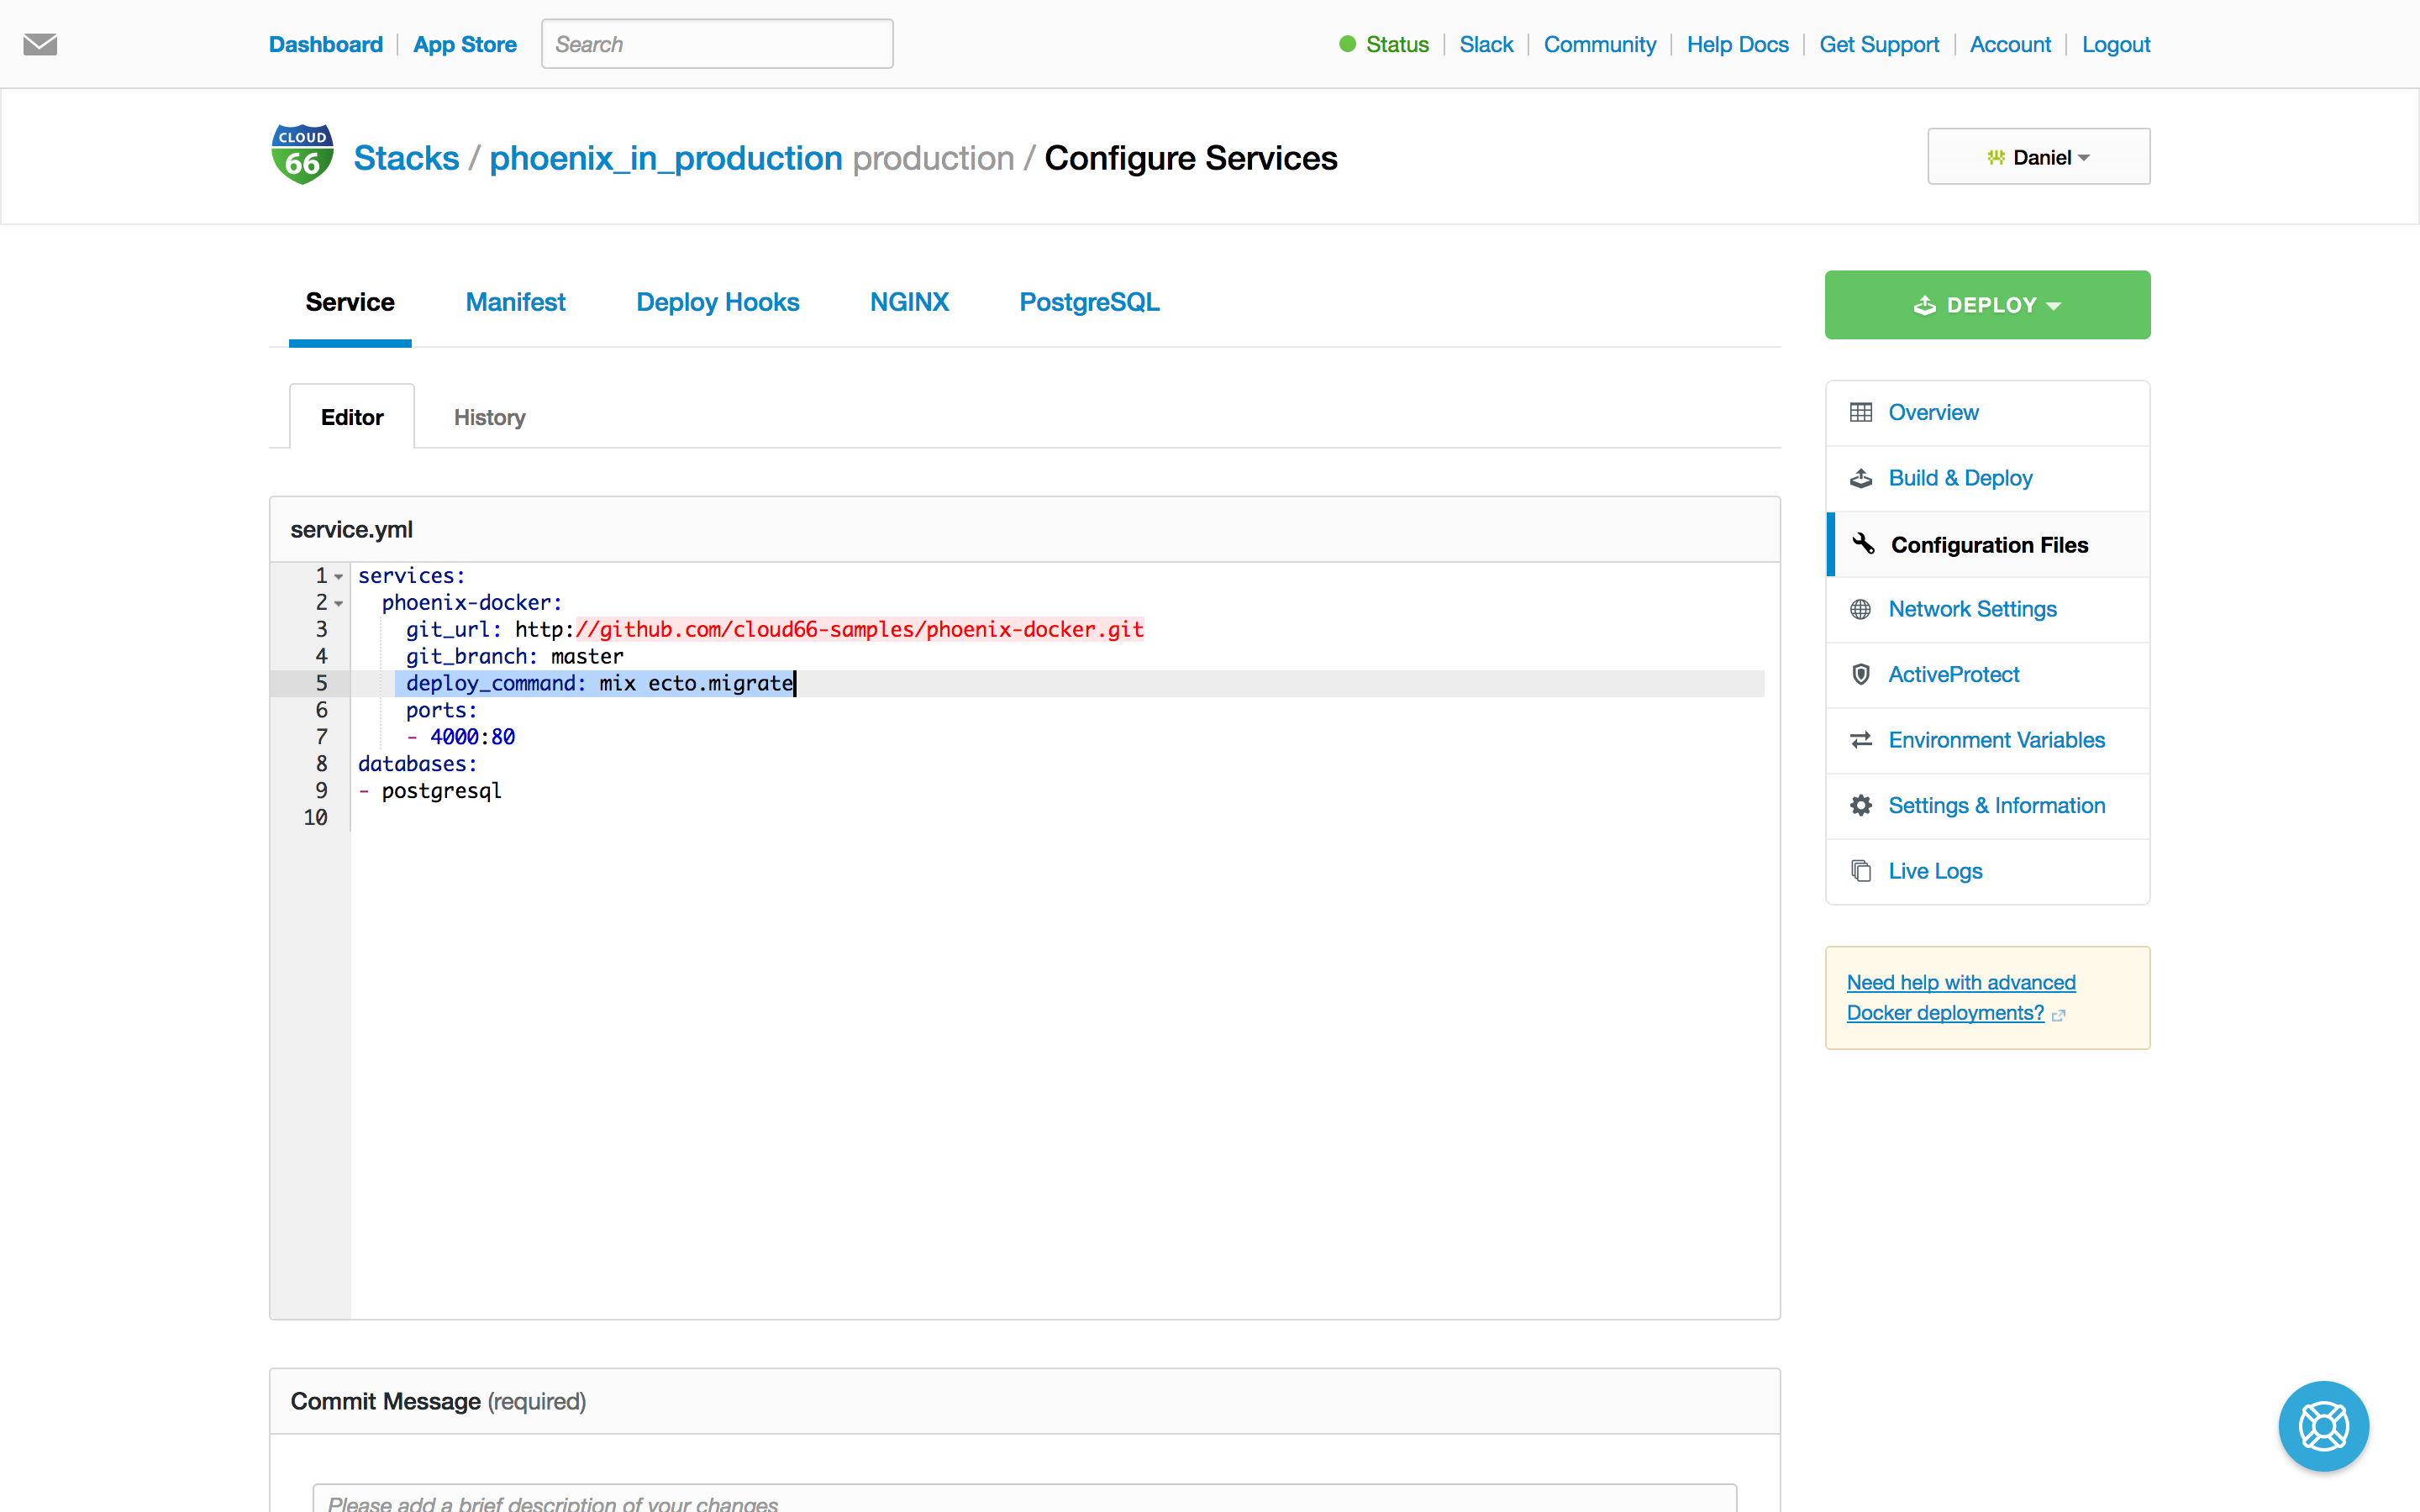
Hold on. Do we need to run the migrations? Yes. We can edit the service definition called service.yml to run the migration before each deployment.
Great we have Phoenix running in production, now it's time to scale your application depending on your workload and install SSL, backups and other add-ons. All just a click away.
What else can Cloud 66 do to manage my production containers?
This workflow has provided a concise introduction to deploying an Elixir/Phoenix App to Cloud 66 using their managed container services. Here are some other key features which are important for managing Phoenix in production with Docker on Cloud 66:
- Continuous deployment support - Cloud 66 provides a build grid for creating new images, it can automate the full deployment process from the time you push new code on the git branch for your environment using redeployment hooks. No more scripting efforts.
- Selective container deployment - You can choose to redeploy specific services within your stack, allowing your to manually or automatically deploy new versions of your services without requiring all services to be deployed at once (and without the heavy scripting required to make this happen easily)
- Parallel deployment - Cloud 66 manages the internal network infrastructure, You can push new deployments in parallel to an existing stack, without worrying about dropping requests. Incoming requests already in progress are completed while new traffic is directed to the updated stack
- Multi-cloud failover - While many cloud providers can provide high availability within a region, Cloud 66 supports app failover to new regions or even completely different cloud vendors!
- Internal DNS - The elastic DNS service automatically assigns internal DNS names for databases and container services and is deployment-aware. This makes it easy to integrate services without worrying about referencing the wrong version of a service during or after a new service deployment